Clutch tools for 120 engines

  • Thread starter Thread starter Smiddy
  • Start date Start date
S

Smiddy

Guest
Good evening

Can anyone here supply me with some good pictures of the special tools needed to build a 120 clutch.
I'm thinking of modifying a spare clutch drum for one of them. Anyone else done this?

Thanks
Graham
 
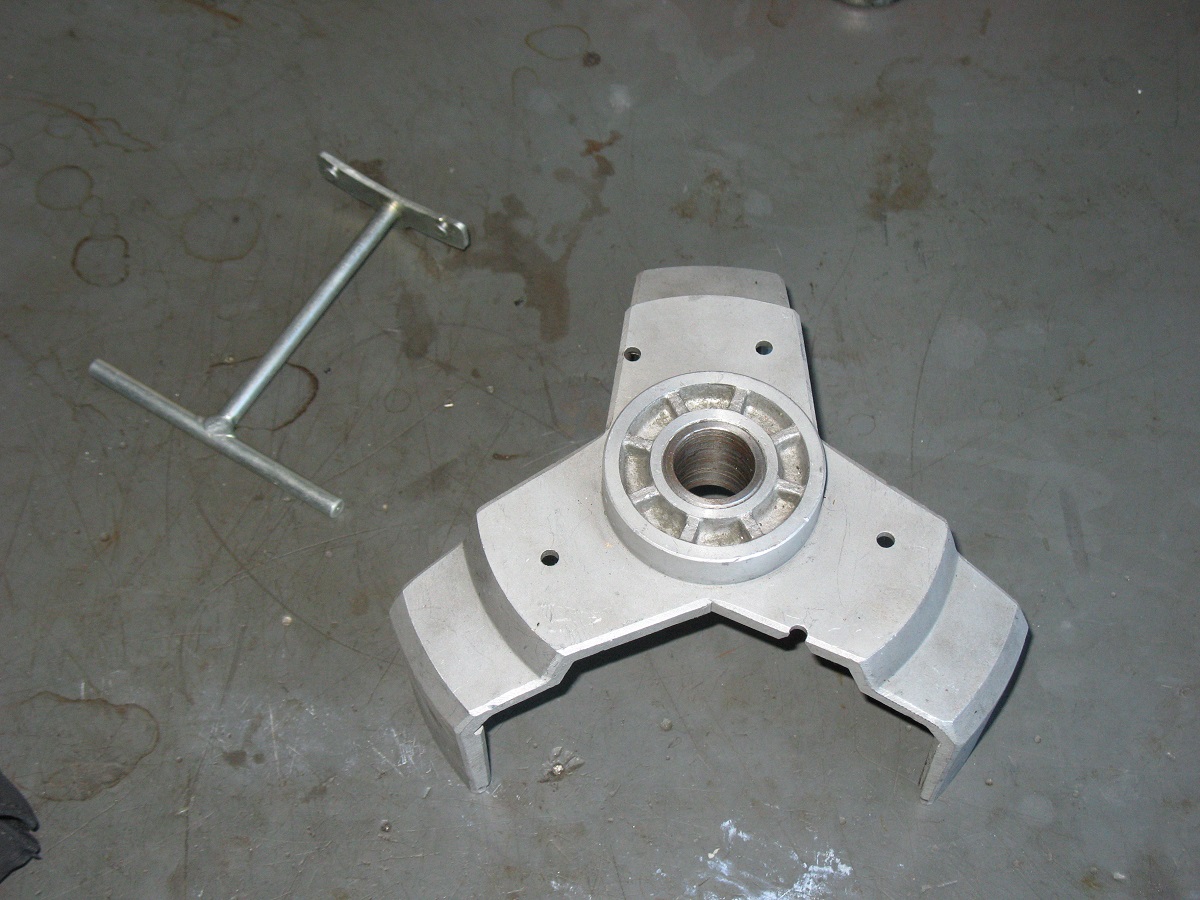
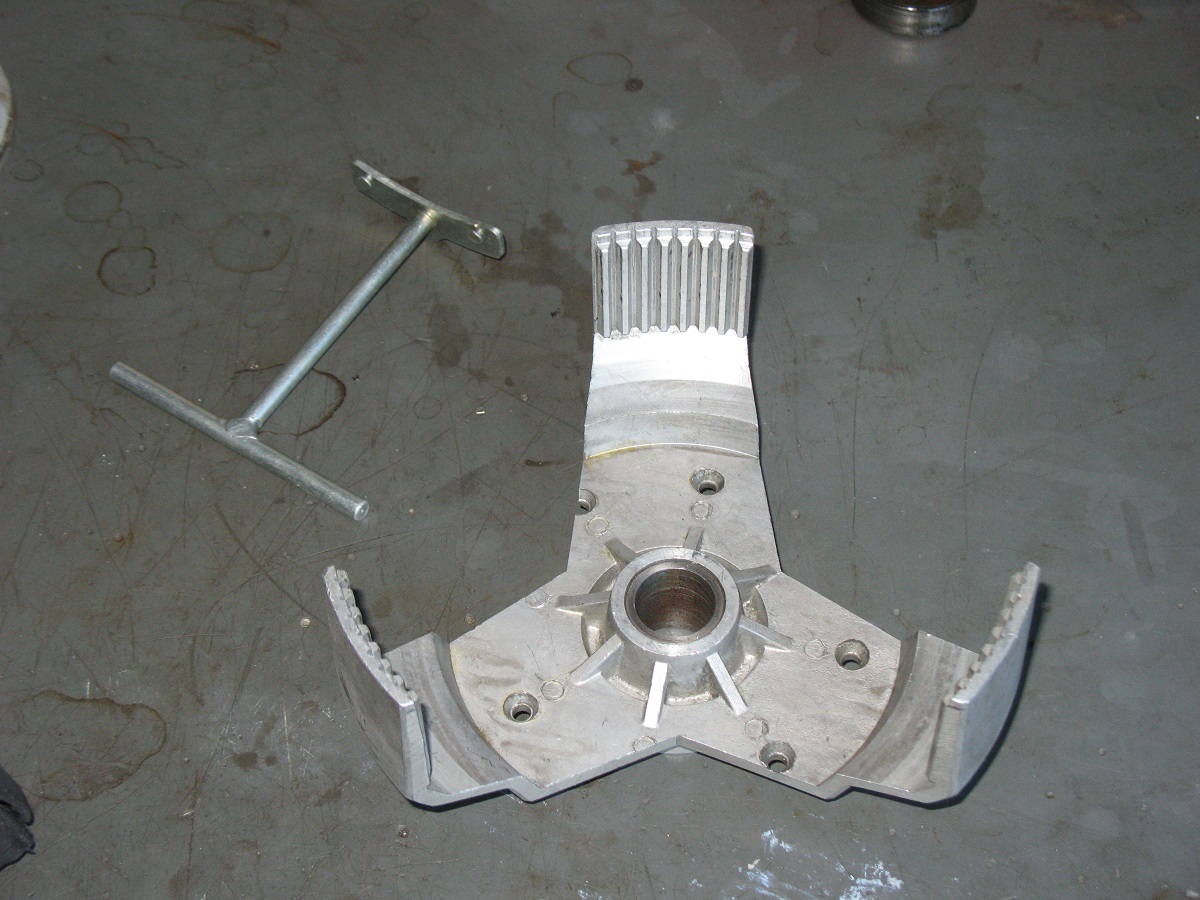
You don't really need a plate aligning tool, with a little practice it's fairly easy to just line them up and jiggle the drum on by hand.  The tool just makes it quicker if you're doing lots of them I guess.  I do have an alignment tool for triples and it is literally just a cut down clutch drum, it came with a bike I bought and I assume it is a factory one.
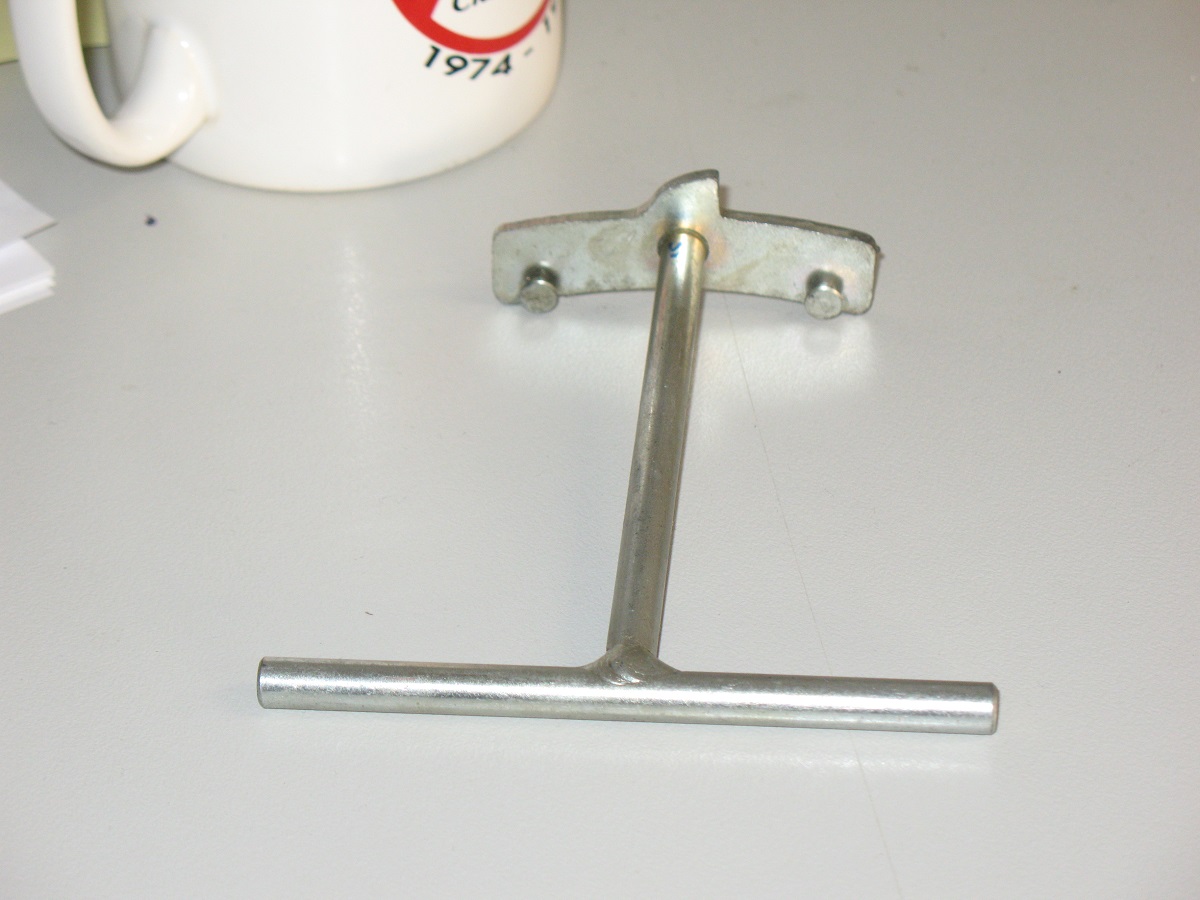
The anti-rattle spring preload tool is a different kettle of fish and is definitely necessary if you want to fit those springs properly.  I guess if you're preloading the anti-rattle springs then the alignment tool is a must.
I'll photograph both for you tonight if nobody else chimes in.
Cheers
SteveB
 
G'day Graham,
As Steve says, getting the plates aligned is a piece of piss, as long as you've ditched the two anti-rattle springs.
I think the common practice is to remove the springs and fit a metal clutch plate between the two friction plates, no specialist tools needed.
I did this mod to my RGS without any discernable increase in clutch noise or change in clutch 'feel'.
If there is any increase in cluth noise, you could always pretend you're on a Duke ;)

Terry
 
Morning  >:(

Thought of just junking the springs & living with a rattley clutch. Love the noise my Ducati makes!
I have a spare drum & thought, do it right.

If, & it's a big IF I decide to junk the springs, would it be wise to swop the two friction plates & steel plate between, so they are the same as the rest as I have spare plates.

Thanks for replies and look forward to seeing pics of tools

Coffee is taking effect, definately feeling more awake. Not such a bad morning after all!!  :)

Graham
 
Don't think there is a steel plate between the two friction plates that have the springs attached, as standard. The idea of fitting the extra steel plate is to reduce the chance of clutch slip. Don't think it makes much of a difference if you leave the two original friction plates in but if you have spares, why not.
HTH

Terry
 
A stock Laverda clutch in GOOD condition will NOT slip, no need for triple-strength springs or any other fancy gizmos.  Get just a little bit wrong, and problems can arise.  Slipping clutches are mostly caused by worn basket or hub splines, causing the plates to over-heat and buckle and make matters worse. 

By inserting an extra steel plate, the engaging surfaces of the clutch hub and pressure plate are reduced by the thickness of the extra plate.  May not be an issue with worn plates, but might be a bit edgy with new ones that have just a little extra thickness compared to standard.  Properly fitted, the anti-rattle springs do their jobs well.  It pays checking the clutch hub for both wear on the engaging splines to the mainshaft and for a loose steel insert in that place.  To cure a loose hub, I machine a groove on the rear where it mates to the gearbox bearing and fit an o-ring, just as in the 750 twins.  This measure jams it up against the bearing and it stops rattling for quite some time.

For the life of me, I cannot understand why anybody would want a rattly clutch! ::)  The junk Ducrappi calls a clutch and sells to the pulic, would be turned down in any 2nd year engineering class, let alone make it into production anywhere else.  Bad engineering through and through, unnecessarily loud and extremely wear-prone, about on par with bevel cranks.  They're already admitting to lousy engineering imho, the newest Bolognese products run a wet clutch...

piet
 
Here ya go. Interestingly, the plate alignment tool seems like a different casting to the actual clutch drum, since it doesn't have the posts for the cush rubbers (they do not appear to have been cut off).  But then the bits that are cut away seem to have been cut and chamfered by hand.  Weird.  Anyhow, would be a shame to cut down a decent clutch drum for this, try to find a wrecked one rather than ruining a hard to find part.
Cheers
SteveB
tools1.JPG


tools2.JPG


tools3.JPG
 
I bow to Piet superior knowledge. In the meantime, I'll do what it takes to keep the the yellow peril on the road.
 
Thanks very much for the pics Steve.
Looks like the posts have been machined off & the needle bearing replaced with a bush. Needs must, & I want to put this back together properly. Next thing to check will be the clutch hub & pressure plate as I may have some wear issues there. Reason being previous owner or before that even, had put an extra plain plate between the friction plates with the springs. No time at the moment so it'll have to wait till the weekend.

Terry
I think we've been rumbled by the Headmaster!!!!

Piet
Many thanks for keeping me on the right track & I promise to build the clutch as it should be. My old Ducati 900 supersport's 50,000 mile clutch is a tad noisey but I have to say it has been 100% reliable.  

All the best & thanks for the advice & info
Graham
 
Smiddy said:
Thanks very much for the pics Steve.
Looks like the posts have been machined off

As I said earlier, the posts do not appear to have been cut off (or machined, or otherwise removed).  Does not affect the operation of the unit, I just thought it was odd they'd make a different casting but then have to turn around and cut the 3 big chunks out by hand.  then...

1000/3C_Stefan said:
Steve, from your picture it seems the Laverda folks just replaced the ejector pins acting on the rods in the clutch basket die by longer/different shaped ones for casting this alignment tool. Not a big job...

Thanks Stefan, so it becomes clear that deleting the posts could be done with the same casting dies, but making the tool directly with the big cutouts in as-cast form would have required new tooling.  Removing the cush rubber posts from the casting made it easier to do te cutouts, and also the resultant tool looks less dodgy than if a couple of the posts had been partially cut through.  Another mystery solved...  :D

cheers
SteveB
 
Can someone give me the theory of operation for the spring tool?

I also understand that they are not available so I will copy one that I am borrowing if anyone is interested let me know and I will figure if its worth making the parts...would probably need to make 10-20 for the laser cutting to be cost effective.

Any damaged clutch hubs out there to bet cut up??? I was able to align the plates using the outer clutch hub so the tool doesn't seem to be required
 
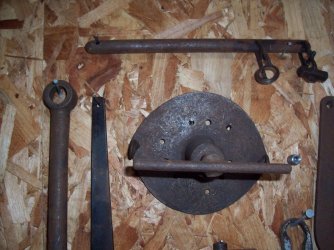
Whilst we're on the subject of special clutch tools - here's a shot of a not very often seen works tool - used to extract clutch hub from shaft - we (Motodd) were given this (and others) by the factory mechanics  (Andrighetto & Cavazzin) when the ball bearing crank debacle was being (sort of) sorted in the UK. - Regards - Phil
 

Attachments

  • Clutch puller.jpg
    Clutch puller.jpg
    170.2 KB · Views: 52
I found a rather easy way of aligning the clutch on my RGS.
I used a couple of lengths of TIG wire, 1.5 mm or so, a nice slide fit in the clutch palte holes..
Bent it through 180 degrees, tensioned the two plates with the springs and slipped the wire in.
Once the the clutch outer drum into position, with a bit of wiggling, I just pulled the wire out and "bobs your uncle".
worked a treat, the wire is now in the "special tools" section of the tool chest.
 
looks like left over from Rom's invasion into GB and found in your garden to be honest

You're nearly right Lothar - it' a survivor of the "great fire of Motodd" - I like the "patina" on it - yes - that's a valve spring compressor for the triples - Regards - Phil
 
Back
Top