bclark
Senior member
I temporarily wired up my DMC2 today to just check everything out before cutting wires etc. It has really made a striking difference, especially at lower revs. Haven't taken it out yet but in the workshop it is clearly running better (using setting 7 - max 32 degree advance - as mentioned by Piet a while back).
For anyone interested mine is a BZT triple. I followed the notes here. but made a slight mod with the DMC loom. There are 2 branches one to the main terminal block rear of tank and one to the coils - I pulled out the red wire from the sleeviing of the coil branch and fed it into the sleeving of main terminal block branch. It now connects to the orange and white wire at the block (which connects to the coils).
It's no big deal but as the DMC loom replaces the amplifier loom to main connector block/coils (which is very neat), it seemed a shame to run the DMC red cable to the coils and leave the orange and white wire on the original loom sitting there redundant..
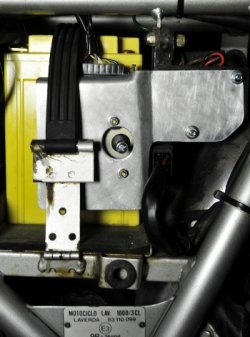
Mounting wise I modified an alloy cover from an old USB hard drive caddy and mounted it using the LH amplifier mounting. There is a small adhesive foam square between the battery and DMC - battery strap pulls it tight and stops any movement.
For anyone interested mine is a BZT triple. I followed the notes here. but made a slight mod with the DMC loom. There are 2 branches one to the main terminal block rear of tank and one to the coils - I pulled out the red wire from the sleeviing of the coil branch and fed it into the sleeving of main terminal block branch. It now connects to the orange and white wire at the block (which connects to the coils).
It's no big deal but as the DMC loom replaces the amplifier loom to main connector block/coils (which is very neat), it seemed a shame to run the DMC red cable to the coils and leave the orange and white wire on the original loom sitting there redundant..
Mounting wise I modified an alloy cover from an old USB hard drive caddy and mounted it using the LH amplifier mounting. There is a small adhesive foam square between the battery and DMC - battery strap pulls it tight and stops any movement.