Dependant on cable free length and angle of the actuation lever. Grimecas are easier to work with than the Laverda brakes.
Remove any edge from the drum that may have appeared through wear to make installation easier. Turn all cable adjusters to yield maximum free length of the inner cable. Measure this free length with the cable installed at the handlebar lever.
Assemble the brake plate. You'd need to work out approximately where the lever needs to be to be able to hook up the cable. You want to aim at a lever position yielding around 80° between lever and cable when the shoes contact the drum. Install the lever on the splines so that an approx 70-75° angle between lever and cable results. Check if the cable can connect without further actuating the brake (this will only be possible to a small degree once the wheel is installed). If the cable is too short to achieve this you'll need to alter it or make a new one. Check the clearance between the shoe and the brake cam with the lever at approx. 80-85°. Usually around 1-1.5mm. Cut a shim to size that fits between cam and shoe (2 off, for both shoes).
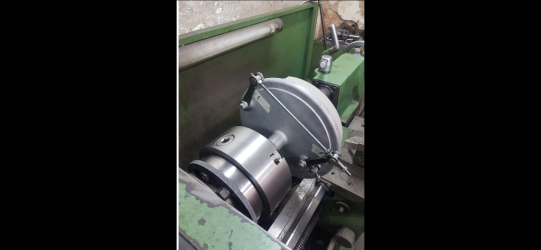
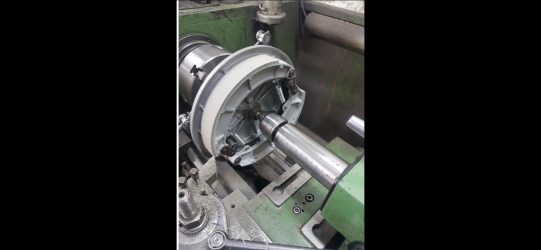
Place your shims between brake shoes and brake cams. Be sure the springs are tight so the tool can't pull at the lining and "dig" into it. If in doubt, wire the shoes together after shimming. Set the brake plate up in the lathe, preferably on the actual axle. You will need to devise some form of drive for the plate, I use the stepped part the front axle to push the plate against the 3-jaw chuck via the tailstock and rotating centre. The plate is held entirely by friction in this case, so the cuts cannot be very deep, I use around 0.2-0.3mm cut depth per pass. Use a tool with a lot of cutting angle. You can now dial in the shoes, they need to be quite equal. You will find they're anything but round! Adjust at the connecting rod between the levers to get an average over both shoes. After a couple of passes, compare the cuts on both shoes. If very different, the shoe actuated by the rod may require a little adjustment to get it closer to the other. Proceed with small cuts until the cuts on both shoes are close to identical. Machine exactly to drum ID. File the leading edges of the linings to a 2x2mm chamfer. With the shims removed, the brake plate assembly should slide into the drum easily and the shoes will contact the drum with exactly the same diametre when actuated, giving a (hopefully) complete contact patch over the entire linings. If your cables proved too short to fit, now's the time to make new ones.
If the brake proves to be too fierce, file the leading edge of the linings to a 15-20mm long chamfer.
This is far more difficult to explain in writing than simply showing how it's done...
Good luck,
piet