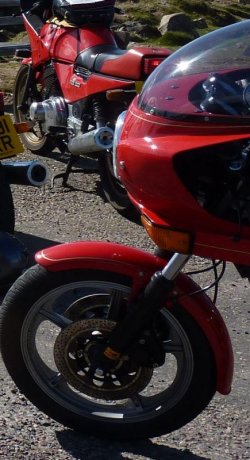
Installing the Furura fairing - 1982 Jota

MotoV

Hero member
Any advice would be welcomed.

My initial install was done with the bolts on the dash , then the ones on the "tail" and left a side to side mis-alingment at the front bolts on either side of the headlight.
My question - Is there a preferred order for installing the screws, is there any pre-fitting prep that needs to happen? The bolt on the stem only seems to control some rotation and possibly some  front-rear adjustment but part of the problem may be the ears on either side of the headlight need some "adjustment.

Maybe the thing is just a pain to install and I haven't had enough beer...
 
I have one to fit on my series 2.
Not at the stage to finally mount it but did a few test fittings.
I started at the back with the 2 spars that bolt to the ballast resistor mounting points.
There seems to be little adjustment opportunity on these mounts whereas the front mounts are slotted thereby offering some degree of adjustability.
The central mount via the rubber bush slides fore and aft, again giving some degree of adjustability.
In my various test fittings it never looked an easy fit and I am sure there will be a bit of heaving and pulling to get it all lined up.

Are you sure all your mounts are square and true? Past damage may be hard to spot and would also throw out any hope of everything being trued up.
 
It's a breeze once all the bracketry is lined up. :D

Installing Well-Nuts in the front bracket, top and bottom, makes fitting the fairing a lot easier, no more fiddling and fumbling with nuts and washers...

piet

 
Thanks
I had to do some repairs to the fairing when I got it -it had something fall on it and did bend the main bracket which I bent back into shape...maybe need to look closer and take a few measurements... The mounting holes align well except for the ones around the headlight which both seem offset in the same direction.
I have a friend who worked on these bikes and he did not like to install the fairings so I never got the idea it would be easy..
 
sfcpiet said:
It's a breeze once all the bracketry is lined up. :D

Installing Well Nuts in the front bracket, top and bottom, makes fitting the fairing a lot easier, no more fiddling and fumbling with nuts and washers...

piet

"well nuts" - Surely that is an oxymoron?

;)
 
sfcpiet said:
It's a breeze once all the bracketry is lined up. :D F***

Installing Well-Nuts in the front bracket, top and bottom, makes fitting the fairing a lot easier, no more fiddling and fumbling with nuts and washers...

piet
There is a 12mm-ish gap between the fairing and headlight mounts that was filled with a THICK rubber washer - do the wellnuts take up that gap? Define top and bottom are you using them in the four positions on the dash?
 
Well-Nuts won't take up a 12mm gap.

Fairing should snuggle up to the bracket without thick rubber washers between them.  Start off with the front ones next to the headlight(bottom) and nudge the bracket till these holes line up.  Headlight should be nicely centred in the cut-out.  The ones (2 or 4, depending on production date) above the headlight/dash(top) should then also be quite close, may need to lengthen the slots a bit.  The later fairings had an extra supporting plate between fairing and bracket that reached backwards, doing away with the necessity of supporting the ends of the "ears".

piet
 
If I took out the thick washers - which were original - the headlight would protrude beyond the front of the fairing. Should it be flush or protrude?
 
I had my 81 triple from new. It was delivered with thick rubber washers on all the screws holding that horrible fairing.
Ciao
Paul
 
Back
Top