Making a new seat!

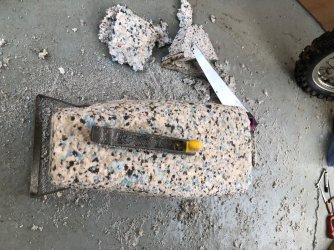
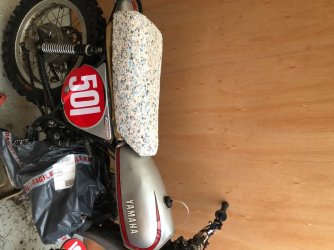
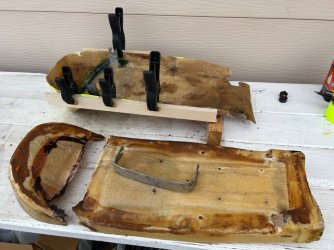
Not a Laverda but principle is the same, 50 year old seat foam is knackered. Buy a block of 6lb extra firm chip foam, mark it out with a marker pen, cut it with a fine tooth hand saw ( I used a kitchen laminate saw) which is easy and surprisingly accurate and neat- don’t use a bread knife. Once you’ve got the basic shape I used a Surform to remove the rest and get soft curves . I hand picked out the under tray detail then used the Surform to finish. Makes loads of dust but is very controllable- unlike an angle grinder which people have used. I took it to the upholsterer yesterday and he’s more than happy- asked me to do some others for him. It’s really not that difficult and it feels so much more comfy. I also used the Surform backwards, dragging it seems to work well..
When I get it back I’ll post finished pics.
 

Attachments

  • IMG_3963.jpeg
    IMG_3963.jpeg
    138.2 KB · Views: 55
  • IMG_3964.jpeg
    IMG_3964.jpeg
    172.3 KB · Views: 54
  • IMG_3965.jpeg
    IMG_3965.jpeg
    175.3 KB · Views: 55
  • IMG_3966.jpeg
    IMG_3966.jpeg
    251.9 KB · Views: 54
  • IMG_3967.jpeg
    IMG_3967.jpeg
    172 KB · Views: 55
  • IMG_3969.jpeg
    IMG_3969.jpeg
    152.8 KB · Views: 55
  • IMG_3970.jpeg
    IMG_3970.jpeg
    138.5 KB · Views: 57
Neat job and timely for me. I have an SF seat base to carve foam to fit as the original is getting quite powdery. I got similar foam to yours from the only foam specialist in the land, and some slightly softer for a thin layer.
 
Great job that.
That type of foam looks harder to work with than the closed cell foam I've used. Mine being a more simple project.

I bought a block of 50mm but have now got used to 38mm? It sands with p80 grit and I used a sharp carving knife 🔪.

I can see why they asked you to make more.
 

Attachments

  • 20250331_185031.jpg
    20250331_185031.jpg
    103.4 KB · Views: 17
Last edited:
Neat job and timely for me. I have an SF seat base to carve foam to fit as the original is getting quite powdery. I got similar foam to yours from the only foam specialist in the land, and some slightly softer for a thin layer.
Upholsterer guy said he’s going to wrap mine in 1/4” foam before covering - more for smoothing than comfort. Apparently you can get 8lb foam but 6lb is spot on for our use.
 
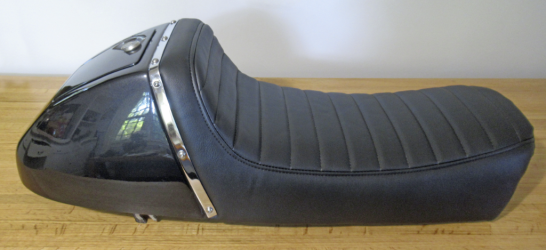
I was able to re-use the existing foam and the upholsterer did a nice job. He built up the front so that it rests against the tank to fill the gap that caused the tank to slide backwards. I also like the solid side sections that give it a cleaner look. The marine grade vinyl is soft and leather-like.
 

Attachments

  • seat.png
    seat.png
    1.2 MB · Views: 23
What's a Surform? Must be a UK thing. I'm looking into a pure latex for my seat. I used a closed cell foam for it but it's too soft and my arse sinks into it too easily. Tippie and I rode two-up from Byron Bay to Perth on his SF2 in about '77. We picked up a chunk of Dunlopillo (latex blend) from Clark Rubber in Melbourne and chucked it over the std seat - made a huge diff. I've wanted to try it as seat material ever since. Clark Rubber still exist but they don't do Dunlopillo and more.
 
Not a Laverda but principle is the same, 50 year old seat foam is knackered. Buy a block of 6lb extra firm chip foam, mark it out with a marker pen, cut it with a fine tooth hand saw ( I used a kitchen laminate saw) which is easy and surprisingly accurate and neat- don’t use a bread knife. Once you’ve got the basic shape I used a Surform to remove the rest and get soft curves . I hand picked out the under tray detail then used the Surform to finish. Makes loads of dust but is very controllable- unlike an angle grinder which people have used. I took it to the upholsterer yesterday and he’s more than happy- asked me to do some others for him. It’s really not that difficult and it feels so much more comfy. I also used the Surform backwards, dragging it seems to work well..
When I get it back I’ll post finished pics.
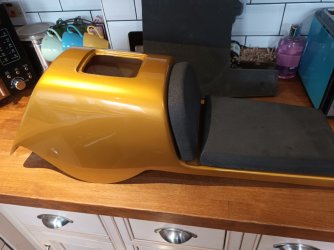
Very timely for me thank you, working on repair of two damaged fiberglass SF seat bases, each damaged in different areas so provides the pattern for the other.
Next step will be foam so your guidance is greatly appreciated.

fibreglass seat bases.jpg
 
Apparently the stuff to glue foam to base/ foam to foam is spray carpet adhesive that they use for carpet, underlay and Lino.
Obviously some glues will eat foam but this stuff is safe. I bought a 5 “ thick foam as my seat was basically 5” thick but you can stick chip foam together effectively, so I could have used 2”+3” to make 5” . You can also buy the metal spike strips that line the base of the seat that the vinyl seat cover attaches to. Years ago we used to lower seats on brand new bikes and the best way to do that is to remove foam from the base, not the top- which most of the YouTubers do. This keeps the original finish and contours for the seat cover to follow- my boss showed me that trick , not as obvious as you think.My upholsterer is about to retire, like most craftsmen he’s in this seventies and no one else is doing it!
 
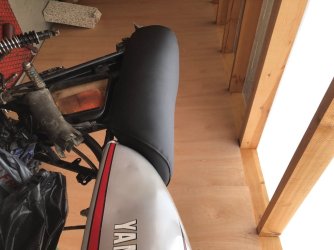
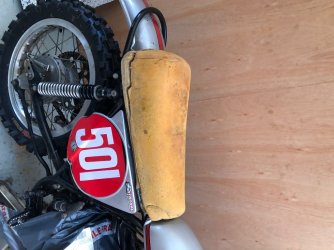
Just got the seat back from old George, fits a treat.Picture of bike in van has the original seat as was, the next two are the modified seat with the nose of the seat going up the tank, more like a later YZ. Hopefully this will put me in a more upright stance ( not slouching) and will prevent the frame rails making my arse look like a griddled steak.
 

Attachments

  • IMG_3699.jpeg
    IMG_3699.jpeg
    214.5 KB · Views: 38
  • IMG_3978.jpeg
    IMG_3978.jpeg
    110.3 KB · Views: 38
  • IMG_3977.jpeg
    IMG_3977.jpeg
    123.1 KB · Views: 38
Just got the seat back from old George, fits a treat.Picture of bike in van has the original seat as was, the next two are the modified seat with the nose of the seat going up the tank, more like a later YZ. Hopefully this will put me in a more upright stance ( not slouching) and will prevent the frame rails making my arse look like a griddled steak.
I had a helmet that was so tight, every time I pulled it off made my face look like a griddled arse on my head.
 
Back
Top