Newbie Learnings

andym

Junior member
Location
Auckland
Assembling engine on the Jota and all going well -- crankcase together, have the right washers, used the right sealant, new bearings all around -- feeling OK about it all..

Go to fit the clutch hub/center -- this went on well, followed by the circlip -- Oh shit, not quite enough clearance to fit the damm clip !!!

So split the cases again, out with the main gear shaft, drive the main bearing on just a tiny bit more (couple of taps), fit the clutch center and circlip !!

So tip for me (which no doubt is second nature to everyone else already) -- fit the clutch center on the main gear shaft BEFORE assembling crank case :)

Wonder if there are any other gems I should know about before I close up the crank case ?

Andy

 
Bugger!!
Good idea to go through all the gears before fitting top case. You can do this by hand with the selector gear in the lower triangular section.
 
that bearing is supposed to be located with a steel "C" ring laying in the bottom of the bearing housing, where there is a "track" cut for it, the ring then protrudes and locates in a groove in the bearing, there are others located very similarly, and one with a dirty great big fat cheehead screw.The clutch is alos fitted with verying thickness shims to ensure alignment with the crank sprocket.

you have installed the ring(s) havent you?
CLEM
 
Also make sure you fitted the pin that retains the selector fork shaft (drops into a hole in the LH layshaft bearing hole).  It's a favorite to lose/forget/ignore for those unfamiliar with the job.  It will all work fine for a while until the fork shaft starts to wander out.  In a 120 it will occasionally jam the selector mechanism, in the earlier bikes I guess it eventually grinds into the back of the clutch.

If you're split the cases using the 'upside down' method to just access the gearbox, put the selector shaft and forks in, drop the pin in, then put an M6 screw into the short bit of thread in the end of the selector shaft (provided mainly for extraction purposes) and clamp down on the pin lightly.  That way nothing falls out when you're dangling the case on trying to line up the cursed forks.

Cheers
SteveB
 
I always completely assemble the bottom end of the engine before slotting top case on
this way you can check everything lines up, is in place, etc

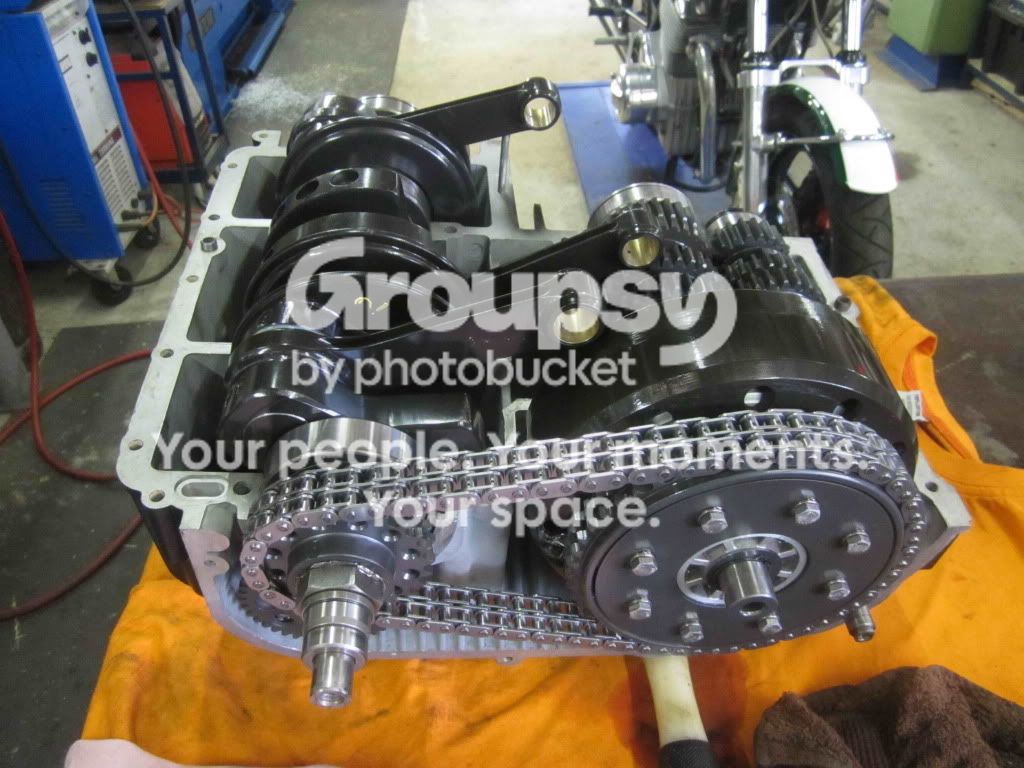
Engineshot1.jpg


breganzane said:
If you're split the cases using the 'upside down' method to just access the gearbox, put the selector shaft and forks in, drop the pin in, then put an M6 screw into the short bit of thread in the end of the selector shaft (provided mainly for extraction purposes) and clamp down on the pin lightly.  That way nothing falls out when you're dangling the case on trying to line up the cursed forks.

Lots easier...

Remove the neutral switch.  Fit the complete gearbox in the lower case half, as it is intended.  Loop a large cable tie around the gearbox shafts and poke both ends out of the switch hole.  Place a bar/screwdriver/allen key/rusty 4" nail across the hole and tighten the cable tie over it.  The entire gearbox can now be lowered onto the upper case without worrying that something might fall out or the selector forks won't match up.  Once the case is in position, cut the cable tie (once!) and pull it through the hole and out of the gearbox. :D

Time savings, at least 2 beers!

piet

 
Yeah, and don't forget the rusty nail.  Reckon you'll find one in a fence post somewhere on the island... :D

piet
 
Red,
Can you put little windows in the crankcase so we can see your pretty engine bits when the tops on please?  :D

We will need to call you "Black" soon  ;)

Julian
 
motoddrob said:
Red, I notoced you have the primary chain mounted on the outside rows, any particular reason??

if you look close the chain is mounted on the two inner rows of teeth
the 3rd outer row of teeth on both sprockets has been machined off in the search for weight saving

sorry Julian, no windows in this engine, yet
 
Back
Top