Oz Laverda engines

normally torque angle is used after some nominal torque value is applied not just firm contact.
for example; head studs might be torqued to 18 ft pounds then 90 degrees.

one would have to calculate, or measure, how much stretch is required for proper clamping.
length, diameter and material of the stud are all factors in determining the correct value.
more pertinent to in chassis work might be, i believe, the requirement of the angle rotation to be done without stopping.

i suppose one might start by torquing a new stud, in a fixture, to yield and measure the stretch
but you would need to increase sample size for any validity

i don't think there is a different value due to gasket type but perhaps a different retorque time period due to different gasket compression time

i have difficulty seeing how one form or another has more or less friction variables. one should always attempt to make the required torque value on the final step a smooth one time turn to specified value and always use oil on the thread and the washer.

a snapped stud could be from a previous torque to yield, a stress riser from a nick in the stud, a high frequency of retorques even a stud that falls on the wrong side of the std distribution from QA and that's for a stock engine  :o
 
Greg, those 9mm studs are rolled threads, or at least the ones I have seen are,(lost count how many) and yes Piet you are right about 30 odd year old studs,what is forgotten is that the studs work like a spring in tension, they get a bit stretched when they are doing their job corectly and at some point the "elasticity" of the stud has to give up, even if not fully give up, so replacement is a good thing, providing that the new ones are of good quality, I bought a new set of studs from Wolfgang a few years ago and they were not even the corect length,were plated (instant softener) and looked generally cheap and flimsy, so they went back, and I then got lucky and found some never used factory ones still in greasproof paper, so never stretched, but still maybe age hardend, I dont know, but they are the one currently in use.
Greg you are right, an internal stud girdle (like the term) will be very hard to do, if it was easy, David would have done it already, now that Red is starting on that one, there seems little point in the two not working together, but UK/Aus distance wont make that any simpler
CLEM
 
Greg,

Stock Lav studs are all rolled thread....

Never seen one pulled entirely from the castings, seen a few that had started, though!  Always snapped, so probably caused by surface damage, ie, from using vice-grips to remove/replace, etc.

As soon as a head stud lets go, the nut is no longer tensioned and it is only a matter of time when it fully unscrews itself from the stud remainder, free to fly around with the cams, followers and chain!

Reckon if you stick to factory torquing specs, not much will go wrong, not taking into account such factors as aging, work cycles and ham-fisted wrenchers!!

piet
 
brief update on our recent track day
mixed results, we tried the EI carbs on the first attempt but realized we have a lot of work to do on them so they only did a lap of the pits
removed them and installed the original set of 32mm Dellorto's.  :'(
most people know what I think of Dell's but purpose of the day was to try the new engine so they did okay.

First session, we set rev limiter at 6,500 rpm, bike ran well but started to puff smoke on a trailing throttle and on the downshifts
Second session, raised the rev limiter to 7,500 rpm, smoke started to increase
Third and last session, same as above with an increasing amount of smoke.
end of the day

at home, leak down test revealed we had blow by past the rings
engine out and stripped, found bores had been effected by foreign matter
Looks like my engine hygiene was not up to scratch when I assembled the engine, failed to remove all the grit left over from the coaters when the cases were prepared for their thermal coatings
I always fully seal the cases when I beadblast cases but these cases were left open at the coaters
So we had wear on the piston skirts and on the liners, thankfully liners cleaned up with a 0.0005" hone so engine is now going back together
took the opportunity to modify the output shaft on the Black engine to bronze bushes after seeing damage done to the Silver Bullet
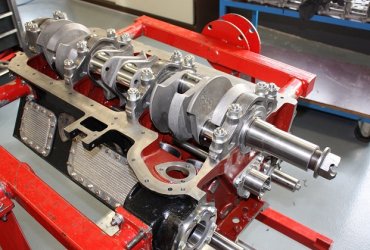
also checked the crank, still running true, no issues there at all

riders impressions
Blair was very impressed with the power increase even though we are only running a temporay head at the moment
he was also very impressed with the gearbox, was raving about how easy it was to shift gears so the anti friction coatings are doing their job
vibration level is similar or a bit less then the Silver Bullet so crankshaft mods have worked out well

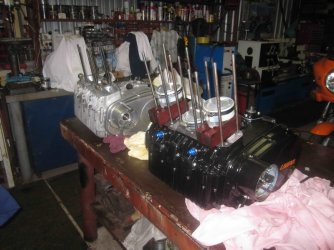
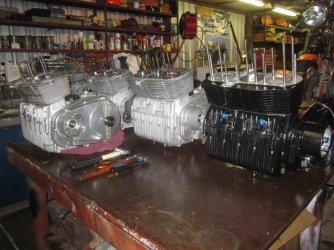
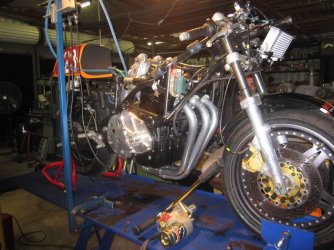
attached shot taken last night, have the Black Mamba and the Silver Bullet at the same level of build
plan is to have both engines buttoned up this week and the Black Mamba back into the frame by Wednesday

overall, apart from the smoking issue with the engine, we are very encouraged by the upgrades
now for the Barry Sheen meeting in a few weeks time
will have both engines there in case the Black Mamba fails

Red
 

Attachments

  • Morgan Park 1.jpg
    Morgan Park 1.jpg
    174.3 KB · Views: 87
  • Sat night.jpg
    Sat night.jpg
    184.6 KB · Views: 99
Live and learn,I have seen ,been down to me on the power washer and the solvent tank on my motor up at Reds how clean he has them,this stuff must have been microscopic.Sounds like all the work is hearding in the right dirrection.I had a mate who had an EI carb on a 250 2 stroke KTM years ago,it was very very smooth but didnt have much in the way of topend power
 
if you have your engine blasted no matter how hard you clean some stays,one answer is to use an old dish washer run the outlet hose in to a large bucket let it settle after the wash you wont believe the stuff thats in the bottom of the bucket i do it twice,maybe its the hot water that does it,no joke it works and don't forget to use conton buds on the drilled oilways on the top of the crankcases,then fulsh out with WD
 
I search fleabay for brushes every now and then so have a neat selection of circular brushes to fit pretty well all the holes on a Laverda engine
Agree on the parts washer though, a hot tub with agitation action is on the list of items to purchase, soon as I extend the workshop.

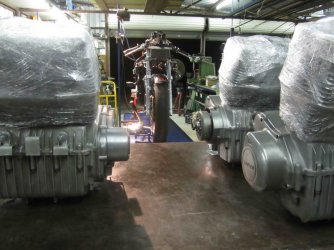
attached shot taken yesterday afternoon
2 x Oz Laverda race engines and a pair of 120 customer engines
spent all day cleaning, measuring and fitting pistons and barrels
will do all the heads today
after I machine another set of engine cases from a 75 engine that also needs to be finished within 7 days


Attachments

  • Workload.jpg
    Workload.jpg
    191.6 KB · Views: 87
Hi Red,

Sorry to hear about that  :(

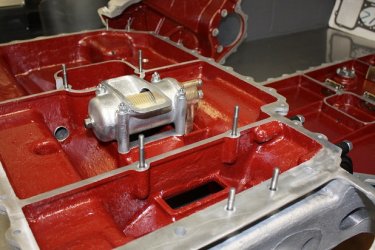
One of the reasons we paint the inside of every engine we build is for that very reason (amongst others)
We use a specially developed epoxy paint that is everything proof!  stays on for ever!
Will mail you the details if you are interested!  Will contrast with the black nicely too  ;)

Julian
 

Attachments

  • IMG_3391s.jpg
    IMG_3391s.jpg
    141.1 KB · Views: 72
  • IMG_3405s.jpg
    IMG_3405s.jpg
    122 KB · Views: 54
jotacorsa said:
julian, i think that trick is as old as that engine  :D
glyptal.  racers have been using it in cast iron blocks before i ever saw the light of day
first time i've seen it used on alloi
cheers,
scott

Oh probably even older Scot  :D :D that engine was only built in 1938 so it's "almost new"  :D :D :D

Julian
 
been a bit busy last few weeks so not much time to sit on the computor and post replies or updates

good idea the internal coating Julian, will do that on the next one

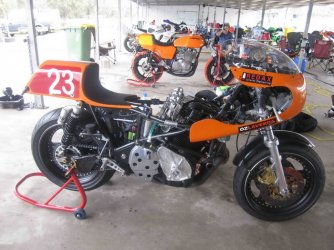
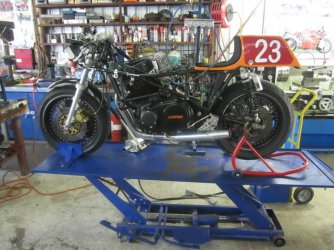
bike is leaving Redax workshop today, heading down to Sydney to get ready for the Barry Sheen Festival of Speed meeting.
both engines finished, ready to go


Attachments

  • finished.jpg
    finished.jpg
    178 KB · Views: 69
  • Sat night.jpg
    Sat night.jpg
    185.7 KB · Views: 45
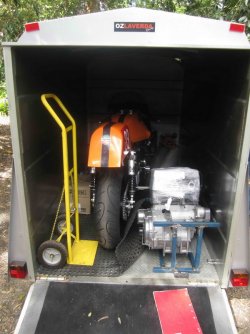
Sunday morning, loaded and gone to Sydney

we made a video of the bike running that I'll load onto u-tube when I figure out how


Attachments

  • Sunday.jpg
    Sunday.jpg
    182.3 KB · Views: 61
  • Loaded.jpg
    Loaded.jpg
    175.9 KB · Views: 38
They're the 17 inch astralites off my Mkl Saxon/Motodd - Crispin also has the 18" ones - not sure if he still needs them - Regards - Phil
 
He'll need 'em if he wants to bring it over to Europe next year... :D :D :D We don't go in for those new fangled wheel sizes in this neck of the woods, no siree. Rim brakes and plunger suspension is what we likes...along with acetylene lamps for night racing.
 
Back
Top