rocketonarail
Hero member
- Location
- Gloucestershire,England
Not really Laverda specific ....... although it could be if you`re into updating 50 year old Italian electrics ........
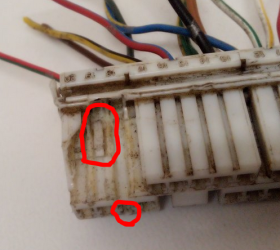
Dis - lodging wires from multi - connectors .......... Does any one have a sure fire method of releasing the buggers ? ....... I`ve spent many an evening trying to do this on this connector ( condition unimportant , this is just for practice before I attempt to try it on the real thing ) ) , without success .
The latch on this particular connector has to be flattened from the directions the wires enter it , by the look of things , which in this case seems practically impossible to do ........... other connectors may be easier , but not this one ........ and this one is the same type as on the bike ........ I opened this one up to get a better idea of how the latches engaged ......
Looks like I will have to replace the one on the bike with a couple of nines , plus a two ........
Extra connectors to replace the one large one is no great problem , apart from extending the wires to accommodate the new ones which is a bit of a faff , but can be done ......... but I just wondered if anyone on here has any ideas regarding this ? ........ Probably not , but you never know .......... ...........
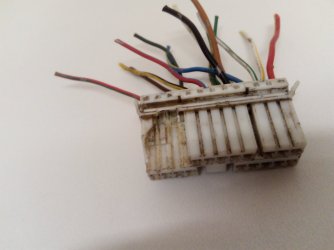

Dis - lodging wires from multi - connectors .......... Does any one have a sure fire method of releasing the buggers ? ....... I`ve spent many an evening trying to do this on this connector ( condition unimportant , this is just for practice before I attempt to try it on the real thing ) ) , without success .
The latch on this particular connector has to be flattened from the directions the wires enter it , by the look of things , which in this case seems practically impossible to do ........... other connectors may be easier , but not this one ........ and this one is the same type as on the bike ........ I opened this one up to get a better idea of how the latches engaged ......
Looks like I will have to replace the one on the bike with a couple of nines , plus a two ........
Extra connectors to replace the one large one is no great problem , apart from extending the wires to accommodate the new ones which is a bit of a faff , but can be done ......... but I just wondered if anyone on here has any ideas regarding this ? ........ Probably not , but you never know ..........
...........
Last edited: