Re: What did you do to or for or with your Laverda today?

Mic'd SF std. pistons today---perfect. Crank,rods,brgs,bushings,cams,guides great! Pulling apart wheel,brake assy's tomorrow to get the cast aluminum brake and eng. parts to the vapor blaster tomorrow. (Everything nastified with old shed roof timber sap). Getting nastified myself from buffing wheel------------------Cheers!
 
Davo said:
Red, you have just pointed out a classic example of where the poster's written word does not convey the true meaning of the post.

Davo, I fear you've just done the same.  :D
A poster is desingned to give across a message, as smartly as possible, the true meaning of the post is to hold up a light or wire and somewhere to glue or tape the said poster to.

Pertaining to a forum, wouldn't the 'Poster's' (those that post) have a capitol P?  :P
 
Rrosco said:
Mic'd SF std. pistons today---perfect. Crank,rods,brgs,bushings,cams,guides great! Pulling apart wheel,brake assy's tomorrow to get the cast aluminum brake and eng. parts to the vapor blaster tomorrow. (Everything nastified with old shed roof timber sap). Getting nastified myself from buffing wheel------------------Cheers!

I put sunsceen on my face and neck and the black shit just wipes off, rather that wipes in.
 
This weekend I actually did some work on the old heap, de-cacking it and removing various bits to clean up in anticipation of my new motor going in.  Tried to fit my brand new clocks too, but the bastard wouldn't play ball (and the rubber surround is wrong anyway) so brought them back home to fettle.  Bloody Bayflex.  Was allowed to briefly look at my refurbished head, new pistons and Carillo rods, the sight of which gave me a wee tingle down below, I can tell you.

Oh, and I met Grant, who arrived with a massive sausage in his hand.  Well, three actually....
 
Managed to get a bit of time on the RGS mongrel.

Carefully (and a little nervously) drilled the windscreen mounting holes in the acrylic bubble and the matching holes in the fairing, and bolted them together.
Made up all the fairing mounting hardware did final fit-up up of the fairing.
Made up coil mounting bracket and bolted coils in place with HT leads and NGK caps.
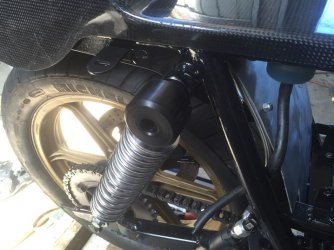
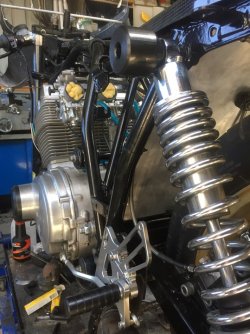
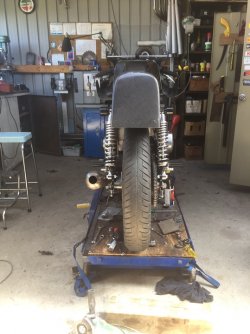
Made some HDPE crash knobs to fit onto upper shock mounts (gotta protect that expensive carbon fibre bodywork.
Started making a seat pad (my upholstery skills are as yet un-tested).
While I was having lunch, the postman rang the doorbell (he only rings twice) to deliver the carbon fibre front mudguard from Padlock. I reckon that'll be tomorrow's job.

The other day I fitted some nice 50mm long bellmouth inlet stacks to the Mikuni carbs, but it was a but of a stuff up. The tank wouldn't fit - it fouled on the right-hand stack. I checked for clearance under the tank before I ordered them, but I only checked the left carb, not realising the clearance is different on the right because the engine is offset in the frame. The right stack just fouls the bottom edge of Boba carbon fibre tank. Bugger and FFF!

I've just ordered some 30mm long stacks and will put the 50mm ones in the "for sale" section when I get around to it.

I'll post some photos of the bike when I get the seat pad made up.

Cam


Servo driven inlet bellows leave lots of room under the tank of the Monty, just the airbox cover left to fit. (scratch)

Got a call from the local ION Beam guy last week and he explained part of what they do, realised how much of a technical dinosaur I was.

P.S. The Monty bit may not be true.


Attachments

  • servo driven inlet bellows.jpg
    servo driven inlet bellows.jpg
    169.7 KB · Views: 43
What you grown men do in private is up to you I suppose

Nothing private about it- he jumped out of his van and whipped them out in broad daylight.  Glad the missus thought it was too cold to get out of the car parked on the other side of the yard. :o
 
:o Cam, with all that plastic, the bike might actually pick up speed rather than slow down when you lay it down on the tar!
Until it bogs into the grass and cartwheels, or, slams into the concrete wall, that is.

Vince said:
Priced some of these Ogre nobs a while back,crazy money for a lump of plastic
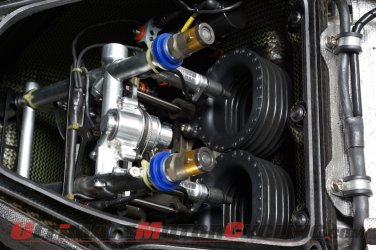
I saw a bloke that had used skateboard wheels, probably for the same reason.
 
Damn it Chris, you've let the cat out of the bag. That's my secret overtaking manoeuvre.

I paid something like $15 for a 500mm length of 50mm HDPE bar. Enough to make about 10 knobs. If you need a couple of knobs Vince, give me some dimensions (length, daimeter, bolt size) and I'll make them for you.

I'm trying to make the bike as crash-proof as I can without going too berserk. In the photo of the left side you can see the knob at the top of the shock, plastic footpeg and plastic ignition cover. Ideally, 4 points of contact with the ground on each side would be optimal, so I reckon I could still do with something high up towards the front. I've been thinking about attaching a knob to the lower fairing bracket. But I'd have to substantially beef-up the bracket to do that. Just wondering whether it's worth the added weight. Might be more sensible to make up some kind of crash bar arrangement, especially as I am obliged under race rules to protect the alternator cover on the right (because it contains oil on a 120 engine).

I haven't worked out what the alternator cover protection is going to look like yet. The most vulnerable bit is the bottom edge, but I don't want to do anything to further reduce the already limited cornering clearance.

 
No racing ambitions here Cam,thanks anyway.Take care with your placement,Bevelman was grounding his left side case protector.Must have taken a big lean angle but it was still touching down in corners.Crispins one was on the fairing mount and complicated and slowed pulling the fairing for between race pit work.
 
Back
Top