Rebuilding wheels.

gibbo-123

Full member
Location
Warwickshire,UK
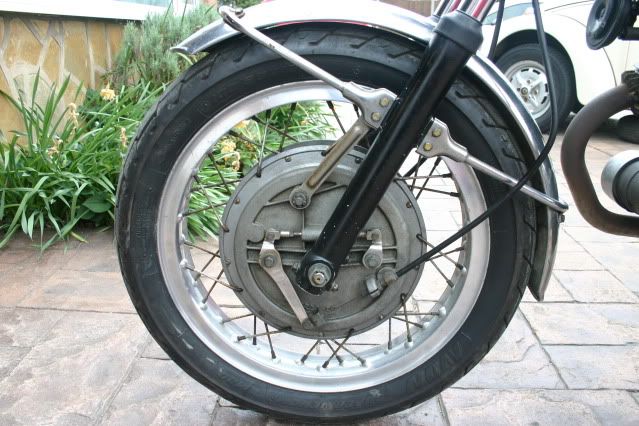
After a summer break I spent Saturday finally reducing my SF1 to a pile of parts. While the frame is away for powder coating I'm going to tackle the wheels. So, once stripped down what is the best way to get the hubs etc cleaned up to restore that factory fresh look? Mine are damage free but really dirty, rims are just in need of a polish.

When I get them re-spoked should I stick with standard spokes or go stainless (unpolished).

Your thoughts please. This will be the first 'proper' bike I've restored.

Stuart
 
I would think for cleaning the same methods used on the engine cases should work. Bead, shell, soda blasting, whichever you prefer. On the spokes I like stainless but if your looking for a truly original restoration then stainless wouldn't be "proper". It depends on your outlook and what "restoration" means to you. Its been claimed that stainless spokes can be brittle and easier to break but I've never had a problem with them on street bikes. I also know of a few guys with them on dirt bikes with no problems. I'd just be sure to buy good quality spokes.
 
Thanks for that. When I say 'proper' I mean a bike that's worth doing rather than something that there are still thousands left on the road. Having used stainless spokes on trail bikes in the past I like the way they are easy to keep clean as I'm intending to use this bike rather than look at it  :D.

I shall get the spokes from Central Wheel Components, there local to me, www.central-wheel.co.uk . Going to have a go at lacing them up myself then just get them trued up correctly at Central.

Stuart
 
Stuart, if you are confident enough to dismantle them, you are clever enough to do the whole job and true them. There are some good sites on the net if you search. It is a simple step by step procedure and rewarding when you get it done. Before you loosen any spokes measure across the rim (or hub) and write down your sideways reference measurement for reassembly (even if you are sending it to get done); they usually pretty much sit there if you screw up the spokes evenly. I bolt the axle in the vice vertically with the wheel lying flat and have 2 pointers onto the bead section for up/down and sideways, as that is where the tyre sits. Get a good solid spoke spanner. Take good time and work on one direction at a time, up and down or sideways, loosening opposite where you have to tighten. Stop for a break if you get lost. The spokes when finished are firm, not tight. Generally you can get it to about half a mm, easily visible without a dial gauge, with the weld on the rim the offender. Check it before you dismantle for interests sake. I love wheel building.
Don?t blast your hubs as they are polished. Get a buffing wheel or pay to get it done. Good heavy gauge stainless spokes are fine.
 
Morning Stuart,

when I did the 750SF(0) restoration 4 years ago (man, time passes fast... :-[ ), I had the same issue. What I did was to polish the outside of the rims while they were still mounted with spokes. I mounted the full wheel into a balancer (here a pic of my latest work on a 1000SFC rim):

DSC_2922.JPG


Then I took a drill machine with according buff wheels in different density and different polishing wax and within 20 Minutes, the rim looked 90% perfect. For the finish you can either use belgom allu (http://www.dailymotion.com/video/xclljg_belgom-alu_auto) or the likes and use a very soft and clean buff wheel or you can use a certain polish clay.

For the hubs, I used the same method after removing the spokes. Worked a treat... :-)

for the drums, I slightly pearl-blasted them with just 4 bar or even less with some distance. Make sure if you do so to clean the afterwards several times to make sure you remove ANY dust left over. Also make sure you de-greased and cleaned them before blasting, as the sand will make a nice sanding paste with any grease left on. Not good.

here is how my drums and rims looked like before restoring them:

DSC01860.JPG

DSC01861.JPG


Here is the result after finishing (with stainless spokes; make sure you re-tighten them after 50 Km of riding or so!!)

https://lh6.googleusercontent.com/-guZDWQJsjHY/SqactWaGD8I/AAAAAAAABJw/cjQ44g78Yo8/s912/0002750SF.JPG

Here is a friends drum-plate we did from an SF1:

DSC01884.JPG


HTH
 
If you decide to have a go at it yourself Stuart be sure to measure the offset as Tippie has mentioned; a few photos would help on reassembly also. There is an excellent chapter on wheel building in "The Vintage Motorcyclist's Workshop" by Radco. Sadly this is now out of print and prices for it are astronomical. But, fortunately someone in a VMCC in Wales has scanned a copy which you  can download as a PDF at:

http://www.southwalessectionvmcc.co.uk/Library/Tech%20files/The-Vintage-Motorcyclists-Workshop.pdf

Bless their souls! Dennis
 
Tippie, Dennis, Lothar: thanks for the tips, just the advise I was looking for. My rims are good and only need mild work and the hubs aren't that bad either compared to Lothar's photo's.

Dennis, I shall print off the wheel building chapter of the book tomorrow at work, cheers for the link.

IMG_6625.jpg


I'll get the tyres taken off tomorrow, measure up the offset and make a start at stripping down taking plenty of reference photo's in the process.

I think I'll make up a stand and a dummy axle and see how I get on. Photo's in due coarse  :D.

Cheers, Stuart
 
Stuart

If you're going to replace the spokes anyway, a pair of bolt cutters or an angle grinder with a cutting wheel will make short work of separating the hub from the spokes.
There are some misconceptions around wheel building. Many people think it's a mysterious art shat should only be attempted by highly skilled wizards. The reality is that it's not difficult and anyone with more than a few functioning brain cells should be able to do it, and you don't need any special tools. It's a little bit fiddly fine-tuning the radial and axial run-out, but quite satisfying when you produce a wire wheel that you've assembled yourself.

Cheers,
Cam
 
I would second what Cam said.  If the hub and rim are correctly matched (ie rim drilled at the correct angle) then it really is quite simple. I have only done one wheel, but had no particular difficulty getting it as right as the shoddily welded Borrani rim would allow.  I did it in the swingarm of the bike with a pointer g-clamped to the swingarm to indicate runout. Not rocket surgery.
I do have a machining background, so a bit of experience clocking up 4-jaw chucks helped, but really it is just a matter of a bit of empathy on the tension of the spokes and a methodical approach to chasing the runout.

On the other hand, a friend just got Lightfoot Engineering in Melbourne to change the rim on the front wheel of his SF2. Cost about $500 all up, but most of it was the new spokes and nipples.  Labour charges for refinishing the rim and hub, and for lacing the whole thing up were pretty minor.  So it may well not be worth your while to do it yourself anyhow, assuming (and that's a big assumption) there is someone you know who will do the job to a high standard. My experience with Lightfoot is excellent, only problem being sometimes long turnaround times and you have to allow an hour if you call him (the two might be related).  Top bloke and top quality work in my experience.

If the rim is undrilled, or drilled at an angle not suited to the hub you're employing, or you have some weird offset to accomodate, then you might benefit from someone with a bit of experience to look at the wheel for you.

Cheers
Steve
 
When I was much younger and sharing a house with a bunch of other greasy motorcyclists, buckled rims were such a regular occurrence that one of my housemates built a jig for drilling spoke holes in new un-drilled rims. It was a real Heath Robinson contraption made from a solid wooden frame with rollers to hold the rim and allow it to be indexed around for each hole. An old electric drill was mounted on a track so it would slide in and out, and the drill track itself was bolted to the main wooden frame via various other bits of wood and steel that were slotted or pivoted for adjustment (to allow the drill angle to be set foreward-backward, left and right).
He called it the Guess-O-Matic. I wish I'd taken a photo of it. It looked hilarious but worked perfectly.

Cheers,
Cam
 
Doesn't time fly.... I started this last September.

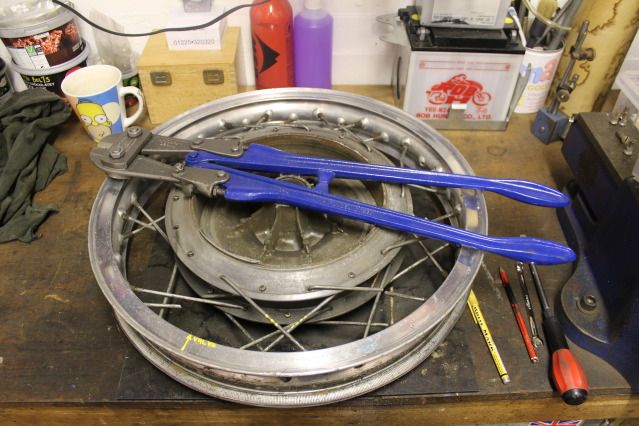
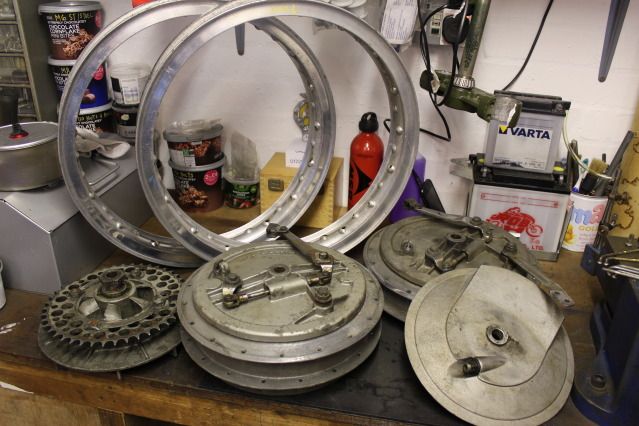
I've just got round to stripping the wheels apart and ordering the new spokes. Loosened the nipples off, took out my sample spokes (4 different sizes per wheel) then finished the rest of the spokes off with some bolt croppers from work. Like a knife through butter.

IMG_2188.jpg


IMG_2198.jpg


A couple of questions though:

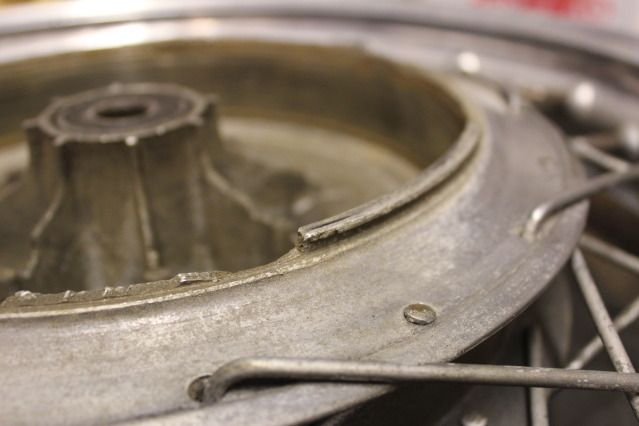
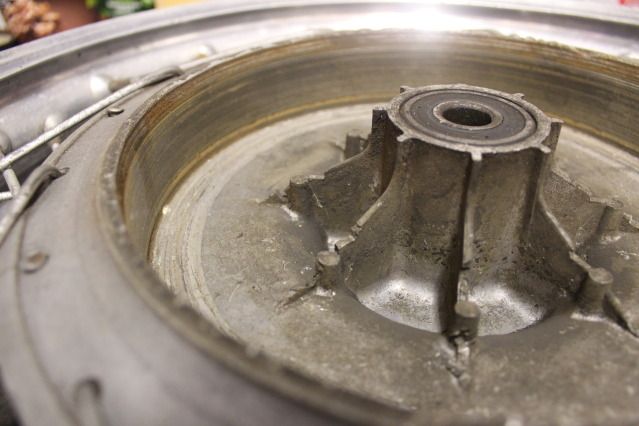
The rear hub has lost most of it's lip, I'm guessing a wheel bearing has let go at some point in the last 40 years and metal has met metal. It's also damaged the internal webbing to some extent. Am I ok to just machine the remaining lip off and do without. I presume this was to keep water out of the brake assembly?

IMG_2181.jpg


IMG_2182.jpg


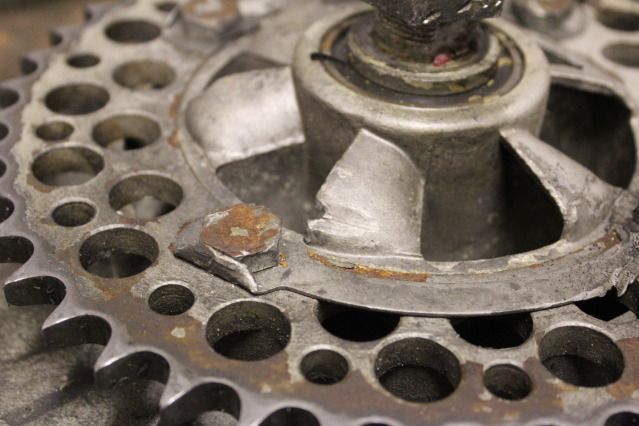
Also the sprocket carrier has sustained some damage to one of it's fins. Can I get this tig welded then fettle it back to the original shape?

IMG_2193.jpg


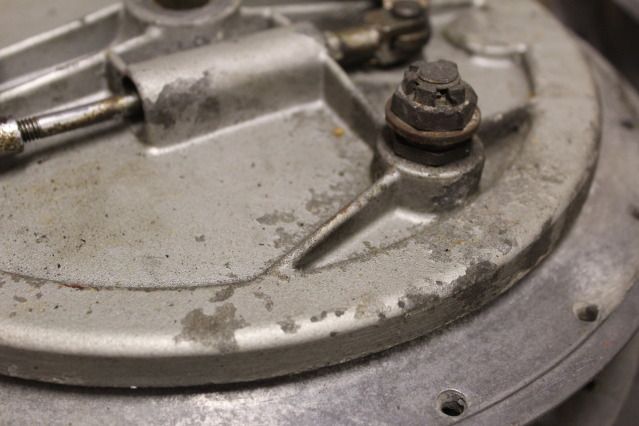
I'll get the hubs soda blasted and then polish them up but the brake plates seem to be painted. Is this right, or what kind of finish would they have had from new?

IMG_2197.jpg


As a footnote, I decided to order some Maxxis Hi-Max tyres for the rebuild as apposed to my preferred Avon's. They were less money and seemed to get decent reviews on the net. They arrived yesterday, I took one look, phoned the supplier and sent them back. Now badged as Cheng Shin  :o they looked bloody awful, I wouldn't want them on my push bike. Morel of the story? Don't be a tight arse and buy decent gear in the future.


Stuart
 
Gibbo, yeah that wheel has seen some exciting times. I'd just rock down to the local Laverda dealer and buy a new one myself  :( Failing that, though, I wouldn't even bother to skim off the last of the dust seal lip, you never know it might help to keep some brake dust in. Really up to you, if the busted bits offend you then clean it up, it isn't going to make any difference to the function. For that matter, I wouldn't worry about the spocket carrier fin, it's a crude air scoop with very little structural functionality. If you have a mate who's good at alloy welding give it a go, but it's probably never going to look like new. Patina :D
My early 3c drum brake backing plates was just sand cast, although thinking about it it may have been bead blasted too. Bare metal anyway, and it does corrode leaving an ugly white residue. Phosphoric acid aluminium cleaner, used judiciously, will get the corrosion off and have the dull aluminium finish back to ... well, dull aluminium. Looks functional and butch (maybe that's why they never put these on 120s :D :D).
You might want to think about replacing that castellated nut, too ;)

Ken
 
breganzane said:
I would second what Cam said.  If the hub and rim are correctly matched (ie rim drilled at the correct angle) then it really is quite simple. I have only done one wheel, but had no particular difficulty getting it as right as the shoddily welded Borrani rim would allow.  I did it in the swingarm of the bike with a pointer g-clamped to the swingarm to indicate runout. Not rocket surgery.
I do have a machining background, so a bit of experience clocking up 4-jaw chucks helped, but really it is just a matter of a bit of empathy on the tension of the spokes and a methodical approach to chasing the runout.

On the other hand, a friend just got Lightfoot Engineering in Melbourne to change the rim on the front wheel of his SF2. Cost about $500 all up, but most of it was the new spokes and nipples.  Labour charges for refinishing the rim and hub, and for lacing the whole thing up were pretty minor.  So it may well not be worth your while to do it yourself anyhow, assuming (and that's a big assumption) there is someone you know who will do the job to a high standard. My experience with Lightfoot is excellent, only problem being sometimes long turnaround times and you have to allow an hour if you call him (the two might be related).  Top bloke and top quality work in my experience.

If the rim is undrilled, or drilled at an angle not suited to the hub you're employing, or you have some weird offset to accomodate, then you might benefit from someone with a bit of experience to look at the wheel for you.

Cheers
Steve

Words of wisdom.

OK, being the first time for me dealing with refurbing wire wheels. I started from a worse place than Lothar! Next time I won't painstakingly undo each spoke with a spanner...

However I am very glad that I entrusted the rest of the job to a nearby semi-retired old wheel building chap. The new Borrani rims (complete with the crappy weld...) were drilled for a different lacing pattern.

My bill was about ?180 for the rims and ?230 for the spokes (stainless, rolled thread), nipples (all 72 ooh err!), rim tape etc. and lacing/trueing BOTH front and back.

J
 
I used the Radco book that Dennis mentioned to lace my first set of wheels from a 3C.The next restoration project will be a 750SFC and this time I will clean and repaint the original spokes to see how that turns out.
Ian
 
took out my sample spokes (4 different sizes per wheel)

Hi, Gibbo.
Where did you find 4 sizes per wheel? There are only 2 sizes per wheel,
inner and outer spokes
(but 4 per bike, as front and back spokes aren't he same, back spokes
are double crossed).
See parts catalogues for that.

hth
Ernesto
 
Ernesto, my mistake. When I stripped the wheels I marked up the two spokes from each side (inner & outer) so ended up with 4 sample spokes from each wheel.

Spokes & nipples for both wheels are ?120. I'll lace them myself and get a friend to do the final check for me. Bargain  :D.

Stu
 
Back
Top