Renovating tiddler rockers

chris78jota

Senior member
Location
England
I have a few sets of rockers for my tiddler engines, and all show signs of wear to the pad that acts on the end of the valve stem. I've been looking for a firm who will overhaul them, but haven't really been convinced by any of the services I've found in the UK.
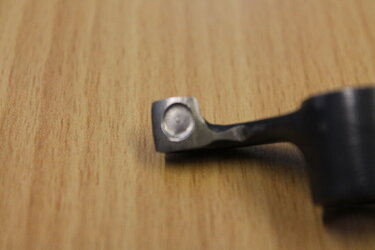
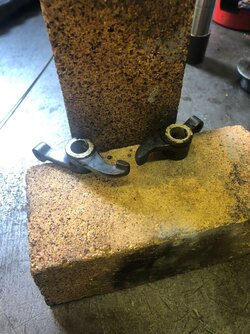
So, my willing engineer and I set out to have a go on a couple of sets as an experiment. After buying some Stellite welding rods, the pads were built up with weld, then ground to convex on a custom shaped wheel. Very happy with the results.
The "before" photo is typical of them all. The two finished sets are in the third pic.
 

Attachments

  • IMG_0246.JPG
    IMG_0246.JPG
    76.9 KB · Views: 26
  • IMG_0247.JPG
    IMG_0247.JPG
    67.1 KB · Views: 26
  • IMG_1439.JPG
    IMG_1439.JPG
    251.4 KB · Views: 26
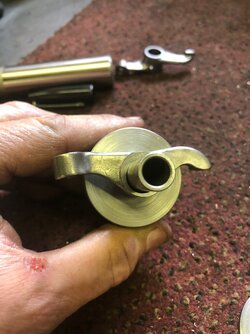
The shiny set of rockers are the first pair I had, and came with my 1954 75cc engine. I polished them up (I must have read somewhere that it alleviates stress cracks) without realising just how worn they were. Hours with a bloody dremel :rolleyes:.
The rockers and valve gear on normal tiddlers isn't positively lubricated - it relies on oil mist collecting in the rocker cover (a la 350 Morini). That's great in theory and a certain amount of practice, but my '54 engine had quite high mileage so the shaft thatthe rockers pivot on was worn, and indeed the tunnels in the rockers themselves were worn.
The first pic shows how worn!
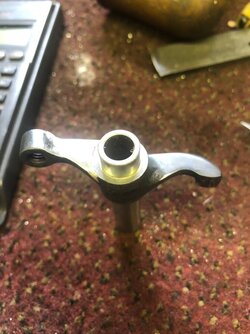
After making a rigid mount for the rockers, the engineer ground out the centres accurately, then silver-soldered bronze bushes inside them. Another half hour of dremel work and they look good as well as fit perfectly.
 

Attachments

  • NPZU2194.JPG
    NPZU2194.JPG
    118.3 KB · Views: 19
  • KCAZ9873.JPG
    KCAZ9873.JPG
    119.8 KB · Views: 19
  • VXUQ2984.JPG
    VXUQ2984.JPG
    198.2 KB · Views: 19
  • XWOJ7118.JPG
    XWOJ7118.JPG
    111.2 KB · Views: 19
Back
Top