Steering Head Assembly Advice

Rockitdoc

Hero member
Assembling top and bottom yokes of my RGS1000SFC and ran into a question that the cartoons in the Green Book and the factory manual do not answer that I understand, anyway.

Here is a picture of the stack as I took it apart:
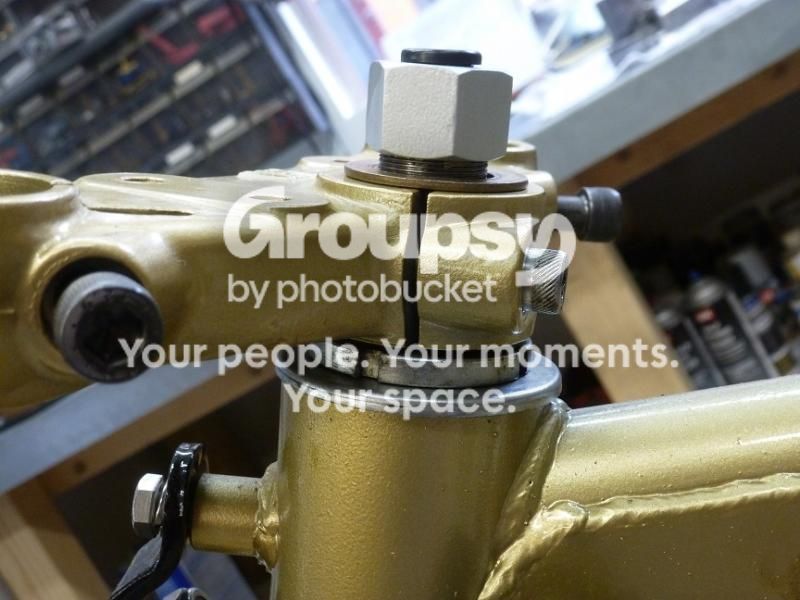
TopYokeReassembly_zpsf1206b4b.jpg


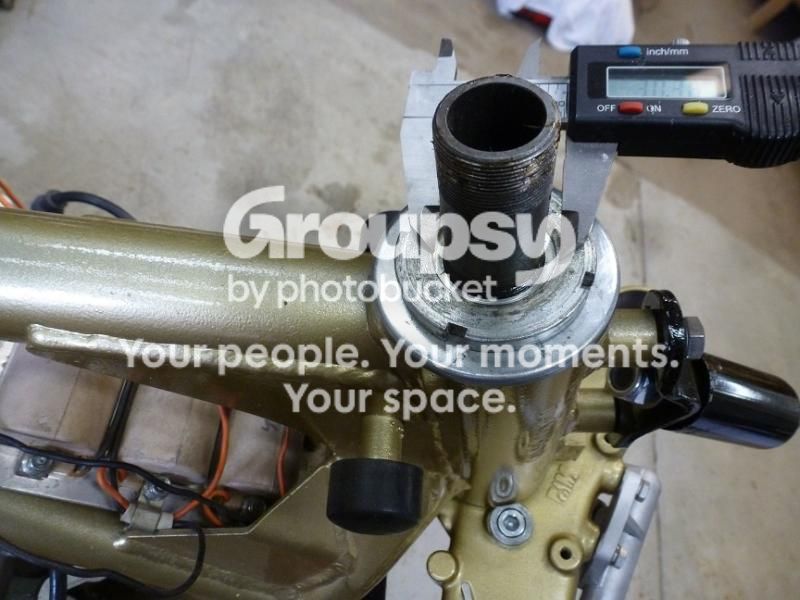
But, there is a recess about 28mm in diameter cut into the bottom of the top yoke and a recess of about 30 mm cut into the nut that holds the whole stack in the steering tube:
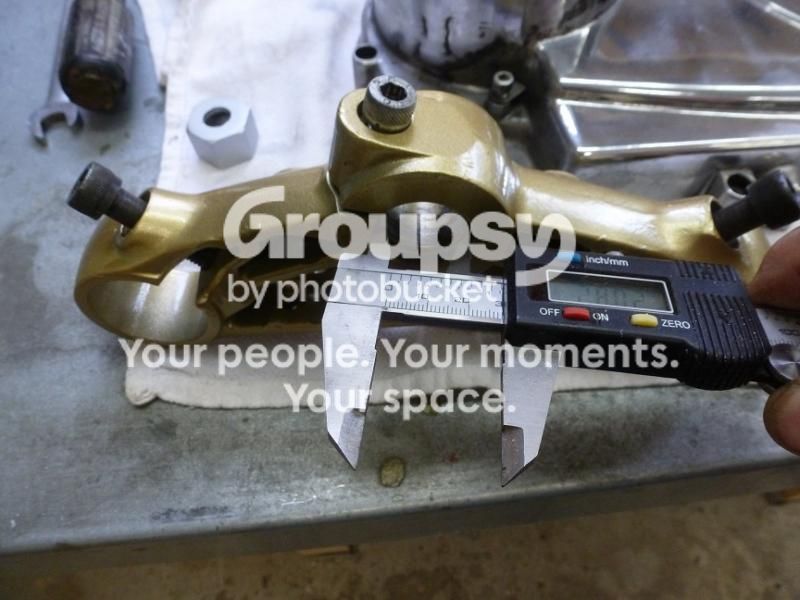
TopYokeRecess_zps6c001a1d.jpg


SteeringTubeNutRecess_zpscce0bef6.jpg


These look suspiciously like something goes in there, between the top yoke and the big retainer nut, like a bushing or something.

Also, what goes under the chrome nut at the top.  My bike had a big brass washer.  Is that correct? 


Nothing needs to go between the top clamp and the steering stem ring nut. The relief on the inside diameter on the underside of the top clamp is only there to prevent it clamping against any exposed thread on the steering stem. I dunno why the ring nut has a small relief in it though (I don't remember noticing that last time I had one of these apart). My only guess is that the nut should go the other way up and the relief is to prevent possible damage to the edge of the fine thread where it bears against the bearing cap. Seems a bit unlikely though.

There should be a washer under the top nut. I'm not sure whether brass is original on SFCs. If not, it'll still work OK but will upset the rivet counters.

Cam
 
The relief on the nut is for clearance in the event it runs down to the bottom of the thread.  Don't forget these parts were fitted to a multitude of makes and models, so are somewhat universal.  As Cam pointed out the nut is upside down, otherwise all good.
 
the washer under the top nut is normally zinc plated as shown on mine:

SFC10006.jpg


As this is however a hand-assembled 1st production bike, everything is possible from "original with intention to match frame color" to "replaced with a wrong item" to "lost it's zinc plating"...  ::)

Leave it there if you like it and feel good as it is a special (as many parts on this bike, like the yokes, the passenger seat cover rubber and some others) and don't think to much about it...

;)

Originally btw., the tank breather hose was put through the rubber in the top steering head nut and the hose was black. If you do that, make sure it reaches even further down through the tube and ends below the lower bearing, else there is a good chance that fuel washes away the grease from the lower bearing...

Later ones hat a different routing, which is better but less invisible (see the pic above). You could even put a valve in the end of the hose so that air can go in but no fuel comes out.

BTW: originally I think the brake manifold/distributor unit was black - at least on the later ones. if this one was silver though when you got the bike (not sure, never looked at it), leave it as is - another special then...  ;)
 
Thanks for all the good info guys.  Onward, through the fog...  Bike is coming together nicely, and with more rapidity with your help.

Today, the front suspension/wheel and rear suspension/wheel.
 
Make sure to "relax" the front assembly during installation... I do it always this way:

-make sure you do not overtighten the stearing head nut! The thing needs to move as freely as possible without "clatter"
-mount the fork legs so that they protrude roughly 40mm above the top triple clamp and fasten the bolts of the top yoke only, but these shall be tight
-mount everything else loosely, including the axle with the wheel, the mudquard etc.
-make sure the front brake is mounted correctly and calipers are bleeded.
-now pull the brake and push the bike down on the front suspension several times
-let someone fasten the lower yoke bolts
-push the front down several times
-let someone fasten the mudguard bolts (4)
-push down the front again several times
-fasten the front wheel nut
-check if the front moves still easily
-fasten the counter bolts at the lower leg (right side I think?)

HTH
 
Back
Top