swingarms and frame bracing?

I'm a big fan of the snail cam type of adjuster, weld a dowel in, either side of the swing-arm, and bingo. Have them on my DT400, and are a piece o piss to adjust.

Similar to this:
http://www.ebay.com/itm/17mm-STAINLESS-CHAIN-ADJUSTERS-SNAIL-CAM-Pre-65-TRIALS-for-17mm-spindle-size-/263157646745?hash=item3d456b0599:g:m8AAAOSwvgdW3sy6&vxp=mtr
 
sfcpiet said:
Same here, eccentrics at the rear axle are a solution in search of a problem, unnecessary and often fiddly.  Not even good for race bikes, tyre/wheel changes can take ages.  The Ducati/Rickman method of moving the swingarm spindle at least keeps hassles of installing the rear wheel to a minimum.
piet

While I agree it's a crap system in general, if done properly wheel changes are a breeze.  Changing the rear wheel on my Bimota is the ONLY easy job on the whole bike.  Just remove the axle, that's it, no other tools required, and all spacers are captive (as they should be).  The eccentrics stay clamped up.  They are also quite easy to adjust chain tension, as the whole assembly is keyed together, although you do need the special tool to insert into the various holes in order to adjust it.

But yeah, the only explanation is that people in the 80's thought they looked good.  In all other ways they suck badly, definitely avoid.

In terms of swingarm I made my own, wider, stiffer and lighter than original... with straight pull adjusters! :)

Also, definitely avoid the Moto Officina one too, a friend bought one and it is the worst aftermarket part I have ever seen by a long stretch.  Immensely heavy, ugly, poorly made, horrible MIG welding, nonsensical bearing arrangement that does not even work.  Do not touch with a barge pole.
 
breganzane said:
Also, definitely avoid the Moto Officina one too, a friend bought one and it is the worst aftermarket part I have ever seen by a long stretch.  Immensely heavy, ugly, poorly made, horrible MIG welding, nonsensical bearing arrangement that does not even work.  Do not touch with a barge pole.

Come on Steve, open up, tell us what you really think!  ;)
 
Now Steve since you mentioned Bimota and easy to work on in the same sentence I am still reeling in shock.
Now go and check those valve clearances ;)

I must admit eccentric rear wheel adjusters no way!
 
I like eccentric rear wheel adjusters, I made my own swing arm when I did the Egli type thingy in 1970 something, and I incorpaorated that feature, it is made from two very large blocks of turned alloy, in circular "eyes" at the end of the swinger, and pinched by two 10mm bolts for each eccentric, the chain alignment is a sinch, since the eccentric's are about 60mm wide and don't "want" to go out of alignment without a bit of torture, I have location holes drilled in them so as to be able to slot in a two piece tool, of an "L" shaped nature, one for outside left and one for outside right, they have extensions that slot together with a tight sliding fit and when on the adjusters looks  like the old type of wheel stand arrangement that you see on 30's bikes, in fact the idea came from looking at my 1935 Sunbeam Lion, to adjust, I loosen the four pinch clamp bolts, the wheel spindle nuts just a tad, and then lift or lower the "wheel stand", if the bike is on a level surface, and is itself level (with a spirit level on say a disc) then the "wheel stand" has only to be level itself and Roberts your fathers brother.
CLEM
 
interesting comments re the eccentric axle adjuster arrangement. The only experience I have with one is on the Metmachex swing arm I am using on the 1979 turbo CBX. I installed it, put the wheel in turned the keyed together eccentrics until the chain tension was what I wanted, then checked to be sure the wheel was straight with the frame pivot, and done. I do not recall the process being any more onerous than the stock Laverda arrangement, with the added benefit of the eccentrics that I raised the back end of the bike a bit. Also, the big beefy swing arm suits the CBX turbo build better than the skimpy stock piece, and the aluminum braced swing arm is shiny......... ;) :D

Paul LeClair
 
Trust the Italians to get it right, to change the wheel on the pommy jmc you have to disconnect the torque arm remove the caliper then drrop the wheel out with the axle and exenctrics then dismantle the the whole axle from the wheel, no quick changes here, right pita, but it does look cool
 
Cosi said:
Trust the Italians to get it right, to change the wheel on the pommy jmc you have to disconnect the torque arm remove the caliper then drrop the wheel out with the axle and exenctrics then dismantle the the whole axle from the wheel, no quick changes here, right pita, but it does look cool

Sounds exactly like the procedure required when removing the rear wheel from my SFC Special... not all Italians got it right!  Reassembly is like sorting a puzzle.  At least it is nicely made and very lightweight.

piet
 
The Bim even threads the axle into the RH eccentric, so there is not even a nut.  It is just the axle that comes out, one 24mm is all you require, the axle is removed and the wheel comes out - beautiful.
Fortunately they identified that this might actually be convenient, so they flush mounted the axle hex within a counterbore in the LH eccentric such that you require a 24mm socket and 1/2" socket wrench, which is physically impossible to carry on the bike without swallowing it.  Thereby, sanity prevails and I still can't remove my rear wheel if out for a ride.  :D

Back to Laverda swingarms, I tend to agree they make little difference on their own, other bits are revealing their shortcomings well before the swingarm itself.  But viewed in the context of an overall upgrade, with improved suspension, braced frame etc, then the end result is a sum of the parts and if done just right even more than that.
 
Has anyone looked at making a single sided swingarm for the triple? Just wondering. Makes life a breeze adjusting chain or taking the wheel off on the Triumph.
 
Scorch made one for his fancy framed RGS, suppose that doesn't count.
Would be hard to adapt one from an existing bike as they mainly seem to have left side chain drive.
Scorch got round it by having a transfer shaft.
 
Paul. I reinforced my RGS steering head a few months ago. Got good advice on different methods on this forum. From what I gathered most owners choose to gusset only (different ways to do this) and a few including Grant actually extend the steering head. Since I did not have any cracks, run stock wheels, brakes etc, and don't drive it that hard, I did not go the more complex route of extending the steering head. I have some pics and diagrams as well.  Regardless of the different designs you need to consider two common factors. Leave enough room for your coils...they are already a tight fit, and have an experienced welder do it so the frame does not get warped. I made the gussets up myself, extending the current factory gussets down to the top loop frame members (probably would have been just as easy to remove the small factory ones and replace with larger ones), and putting in new small gussets between the bottom of the top loop and the back of the down tubes. I did not put a brace above the oil cooler between the downtubes.
 
Grant said:
Scorch made one for his fancy framed RGS, suppose that doesn't count.
Would be hard to adapt one from an existing bike as they mainly seem to have left side chain drive.
Scorch got round it by having a transfer shaft.

Kind of odd, I wonder why he did that? On my Spondon with it's RC30 rear hub assembly its on the right, but just flipped over. The hub doesn't know the difference, and as long as your building a custom arm why not?
 
Spondonrider said:
Kind of odd, I wonder why he did that? On my Spondon with it's RC30 rear hub assembly its on the right, but just flipped over. The hub doesn't know the difference, and as long as your building a custom arm why not?

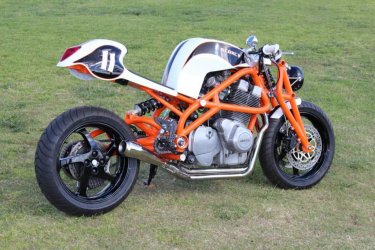
Herman told us that he had a single sided swingarm laying in the workshop when he decided to build his Street Fighter based on a Laverda triple so just used that.
Then he had to work out how to fit it and thus the cross over was made.
From concept to finished bike took 8 weeks  :o

http://www.scorchcycles.com/

 
redax5 said:
Herman told us that he had a single sided swingarm laying in the workshop when he decided to build his Street Fighter based on a Laverda triple so just used that.
Then he had to work out how to fit it and thus the cross over was made.
From concept to finished bike took 8 weeks  :o

http://www.scorchcycles.com/

Makes sense. Quite a job for 8 weeks!! He seems a talented sort.
 
And on the subject of swingarms...

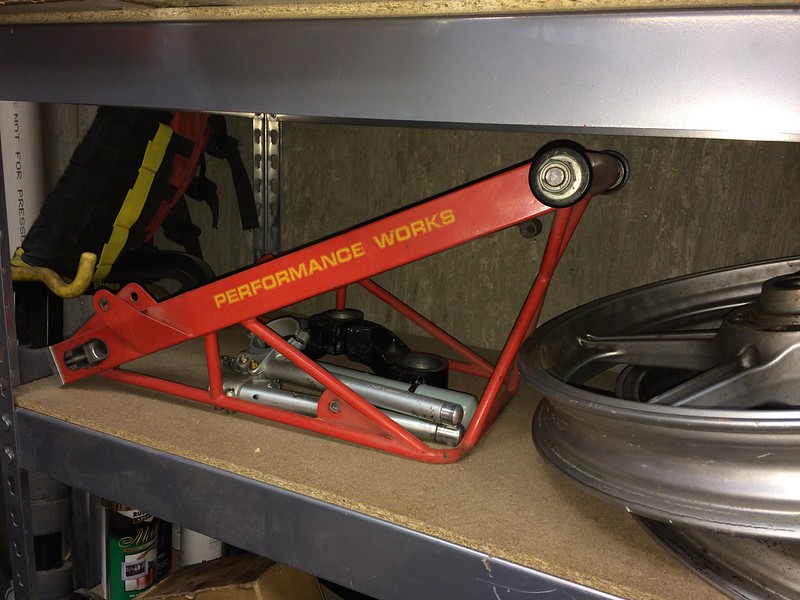
I have this sitting on a shelf here.

Performance Works Arm by Ed Lutz, on Flickr

It looks like it will fit up to a triple without too much effort. The length is almost perfect, close enough to leave alone, and the pivot is just a little too wide which would be an easy fix. A new spindle will be required but again not a big deal. It will need details like brake stay arm bracket, and a chain guard fitting but that's about it.

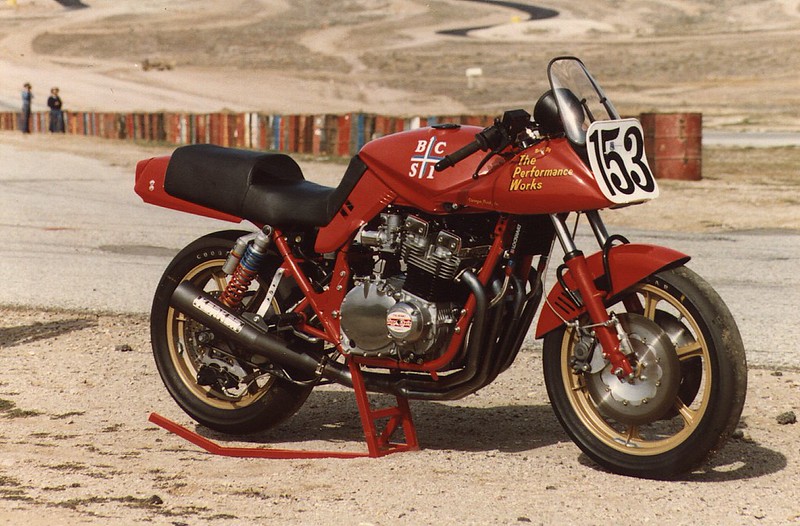
It came off this, that we built back in 1981, so should be plenty strong enough for a Laverda's power output.

Katana Right Side by Ed Lutz, on Flickr

The arm is waiting for me to have a project to use it on. If I ever get around to doing a set of Suzuki wheels for my Jota, then I'll do the arm at the same time.  Someday...


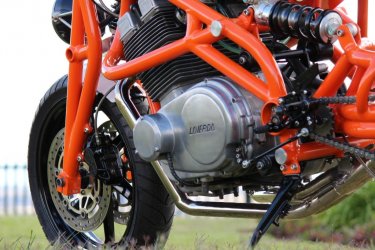
Scorch fitted the swingarm with left side chain run so that the spoke psttern on the rear alloy wheel ran in the original position,  otherwise it looked wrong.
As a fellow OCD sufferer I like his thought process.
I suppose it slso solved spacing the chain to the required offset too. Plus constant chain tension throughout suspension travel as I recall the transfer sprocket was concentric with the swingarm pivot.
 
Would love to see the transfer sprocket workings - that would be a tricky job, combining the spinning of a transfer shaft with a swingarm if it were to rotate around the pivoting section.
 
Found some pics, actually not concentric.


Attachments

  • Custom%20Scorch%20Laverda%201000%20%201.jpg
    Custom%20Scorch%20Laverda%201000%20%201.jpg
    110.1 KB · Views: 53
  • Scorch Laverda 1000  03.jpg
    Scorch Laverda 1000 03.jpg
    147.9 KB · Views: 53
Back
Top