Atlas Questions

Have to chip in here. The family Skoda Scout 4WD has a heavy metal bash plate under the motor/sump. It's big and it's very heavy and I hate removing it - necessitates removal for every friggin oil change. I made a cardboard template of where i can grind a V into it so I can simply remove the drain plug, but never got around to doing the mod - i simply left the thing off and it's been off for the last 5 years. If I head bush and I'm gonna be scraping the Skoda's knackers on the deck, I'll put it back on - but not before I grind that V into it!

I've got the Redax drain plate and mag bolt on the SFQ - the bolt head is JUST a tiny bit too deep to allow the bolt to clear the X pipe under the motor. While I had the bolt out i ground a few mm off the head and hopefully I'll be able to remove it completely next oil change. Alternative is it sits in place and allows oil to drain past but it takes about an hour and a half!

I'd go for it Vince and bore the hole and add the tidy tube. Piss easy job and once done, done forever. And FWIW, no way I'd be changing oil unless it was 4000km of heavy stop start summer city traffic.
 
I can think of no good reason why I wouldn't do exactly that, I am a big fan of making my life as easy as possible. But the first job tomorrow is dropping my Andy Strap 50mm elastic strap off at the local Bootmaker to add 500mm to it. I use it around the new Panniers and over the seat to stop them bouncing on bumps. Keen to do that 150k test ride next week. My first go on a bit of dirt on the Atlas.
 
Last edited:
I changed the oil on my X-max at 1500 miles on the trip to Breganze in 2014. Oil went everywhere….
however, I felt happier for doing the change, so do what’s right for you Vince.
 
There isn't a huge amount of ground clearance typified by the inability to get that jackable Dirtbike stand under it. Typical modern Dirtbikes have 300mm of ground clearance, my Atlas has maybe 250mm and with that a surprisingly high seat height. Add in that okish plastic bash plate and I probably won't be doing my favourite party trick jumping big logs across a track. You wheely the front wheel over and see-saw the rest over using the bash plate as a pivot, really good fun to do.
 
I don’t think the standard Atlas bash plate will stand more than a pebble hitting it. Doesn‘t seem that robust to me, especially one that is probably over 35 years old.
 
It's reasonably well supported by the lower frame rails but busting cases wouldn't be a good thing. I am really tempted to drop the bash plate off at one of the local alloy bash plate makers but there mostly in Victoria, plus it's not exactly a critical gadget for my needs. I have made a few over the years but they tend to be a flat sheet with a simple angled bow-like bend at the front. This plastic standard one is a dish-like compound curve, way more complicated requiring a sandbag and wooden mallet and HOURS of careful pounding, or a buck and a 50-ton press.
 
Last edited:
I had a visit from my Cousin on the weekend and he had had a tug on the clutch and said how heavy it is. It's not horrible but its defiantly not a 2 finger jobby so it's time for another mod. I am going to fit this. Suppose to reduce pull by 40%, and hopefully still allow an easy neutral selection. Fingers crossed the clutch nipple fits. added complications are the std clutch purch has the mirror mount included so I will need a stand-alone mirror mount, either 8mm or 10mm. I cannot tell till it comes off and I cannot do that as the mirror won't rotate past the Navigation tower, hope there is enough room on the bar for a mirror mount and the stand clutch also holds the choke lever mount, that I hope will bolt on via the pivot bolt on the new gadget. And the heated grips controller is also mounted on the original clutch purch. It's getting complicated fast. Should be fun modding all this. So much off-road riding needs easy 2 fingered clutch action.
 
Remember that it's a trade-off Vince. Any device that makes the clutch lever easier to pull (other than simple maintenance like cable lubrication) will also reduce the distance that the clutch pressure plate moves. I hope you can still get full clutch disengagement.
 
Me too, no free lunch. For some odd reason, the bike needs really close to zero freeplay to easily get neutral with the std setup. Has me a bit concerned this won't happen with this changed geometry with the new purch and lever fitted.
 
Me too, no free lunch. For some odd reason, the bike needs really close to zero freeplay to easily get neutral with the std setup. Has me a bit concerned this won't happen with this changed geometry with the new purch and lever fitted.
Not a good omen for that new lever Vince!
 
The new clutch perch and lever turned up today and yes one major issue has occurred and it's something I have seen before. The clutch nipple is slightly bigger than the recess in the new lever. I tried drilling these in the past and it won't work as the drill bit catches where the cable enters and snaps it out. I think some light Drameling would fix that. Issue 2 is the choke cable stop is cast into the clutch perch, that's going to be really tricky. As it starts with a couple of Throttle pumps and no choke I might just remove it. I think just getting the new bits fitted and seeing if it's worth mucking with for a lighter clutch pull would be smart before going fully at the rest of this stuff. 30 minutes with the Dremel should sort that.
 
If you mount the clutch lever solidly in a drill vice you should be able to drill it out. I've done it without problem. Even better, get an (8mm?) end mill and use that. If you don't have the gear, it's a 5 minute job for a machine shop.
 
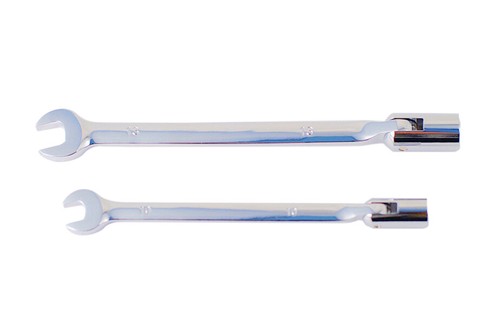
I just bought a grinding tip to go into my Deamel designed to sharpen Chain Saws. The cable hole in the clutch lever only needs to be approx 1 mm bigger so it won't take much work. I had a look for some electrical conduit to make the bit that I hope will stop any leakage of oil onto the baseplate, I was hoping a small joiner would do it as it probably only needs to be 20mm long but for now, to get a piece with the thick and thin bit I need it will have to come off a 3m length. I am waiting on a special order spanner I want to carry to do on-the-fly oil changes, 16mm isn't a very common size.
 
The new clutch perch and lever turned up today and yes one major issue has occurred and it's something I have seen before. The clutch nipple is slightly bigger than the recess in the new lever. I tried drilling these in the past and it won't work as the drill bit catches where the cable enters and snaps it out. I think some light Drameling would fix that. Issue 2 is the choke cable stop is cast into the clutch perch, that's going to be really tricky. As it starts with a couple of Throttle pumps and no choke I might just remove it. I think just getting the new bits fitted and seeing if it's worth mucking with for a lighter clutch pull would be smart before going fully at the rest of this stuff. 30 minutes with the Dremel should sort that.

L/H drill bit required.
 
It goes around anti clockwise 🤣

Oh, I thought the issue drilling it out was that it jagged the tab off
That makes sense too Chris - the small section around the hole probably is prone to breaking if it really jags up - more likely the drill bit will just make an ugly chewed up mess of the hole!
 
Back
Top