- Location
- Calgary, Alberta, Canada
Bigdaddy said:Paul,
Could you explain more about "popping" the dents out with a torch. I've got several steel & aluminum tanks that I'd like to save, most dents aren't creased. But I've seen how pressurizing to get the dents out can ruin a tank.
Thanks,
Wayne
Hi Wayne
I have never tried "popping" the dents with a torch on an aluminum tank, my personal practical experience is with steel car bodywork and steel motorcycle tanks, the thicker the steel panel, the better. I kind of doubt it work on aluminum, but don't really know.
not all dents can be popped, but many can. Google is your friend, do a search and all sorts of youtube video links will come up.
some years ago I did a complete bare shell restoration of a rusty and dented Jaguar. The required bodywork was well beyond my skills at the time, and I cut a deal with a 25 year experienced bodyman to trade legal services for his help in the heavy bodywork on the Jag. Working with him in my home garage, I was astonished at what can be done with metal by someone with the training, experience, and skills. He showed me the techniques I have been using.
the bottom line appears to be that when you heat metal, it expands, when you cool metal, it shrinks, when you heat then rapidly cool you can make all sorts of magic happen if you know what you are doing. I am still very much a novice.
you will likely find in your Google search folks using hair dryers, heat guns, propane torches, etc, to attempt to remove dents. My preference is an oxy/acetylene torch, lots of controllable heat, but obviously it is going to wreck any paint in the area. Entire books and courses are out there on how to expand and shrink metal in bodywork, and I am far from an expert, but I'll try and give a summary of the very basics as I applied them to this Laverda tank.
The bike had been crashed in 1999 and parked, never repaired. Among the damage was a big shallow dent in one side of the tank, a dent in the top of the tank, and several smaller dents, including a couple right on edges. I couldn't do anything with a couple of the ones on an edge.
The basic concept is to heat around the outside of the dent, working inwards. I typically go in a circular pattern starting from a fair bit outside the edge of the dent. The amount of heat is unfortunately a judgement call. Heat expands the metal, simple as that. As the heat expands the metal, the center of the dent will start to rise. Even better if you can push on it from behind with a dolley or something, but on the tank you usually can't. Anyway, heat the area in an inwards pattern, watch the dent rise, step away and let it cool naturally. Hit the area with a body file to get a sense of where you are, if the dent needs to raise some more, do it again, and again, until it as good as you can get it. Sometimes you wind up raising the dent above the level you actually want it, but that is easy to deal with a body file, sander, etc. I got the big shallow dent in the side of this 1200 tank as close to perfect as factory, without any bodyfiller. I spent hours futzing around, but with an excellent result.
to actually shrink stretched metal, a similar process is used, heat (seems counter intuitive), but then rapidly cool, something as simple as a sopping wet rag applied to the hot area. Entire other area of expertise.
anyway, that is the very very basics, enough to get you started on a Google search. It doesn't always work, it often does not work at all on the very thin metal of very modern cars, which is likely what is behind the rise of paintless dent removal technology, because previously things like hail damage on an old car would much more likely been dealt with by heating and expanding them.
another alternative would be to find an old time body shop guy, and get him to show you how, it is very much a trial and error, learn by experience sort of thing, at least for me. Start on the tank you are least attached to.........
 and keep in mind that modern body fillers can be your friend if absolutely necessary.
for really stubborn dents, you can "pull" them rather than pop them, there are all sorts of cool tools available, spot welders to attach things you can pull on, etc., etc.
Paul LeClair
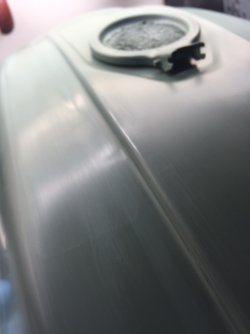
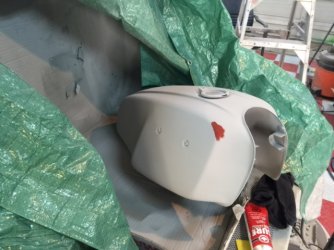
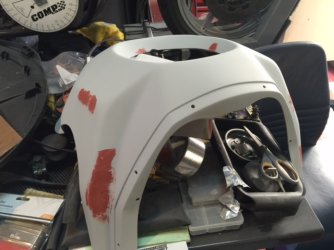
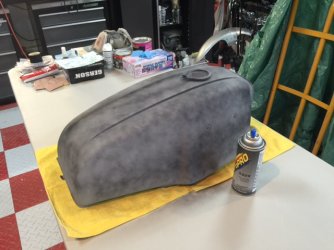
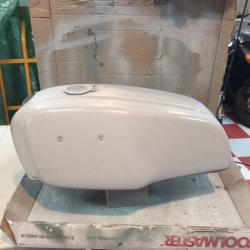
ps once I finish high build priming the 1200 tank, and before I apply any filler, I'll shoot some detailed photos and post them so you can see what I did get out by way of dents, and what I was unable to get out. I do have one detailed photo of the fairly large dent in the top of the tank that I heated out, taken after the initial coat of acid etch primer, you can just see the remnants of the dent in the two bands of light shining on the tank as two small high spots, along the edge of the tank top fold just to the left. I will wind up using a skim of body filler to do final finish, but that was a bloody big dent when I started, now it has almost disappeared. To be honest, that one dent took me hours of fiddling about, most folks I am sure would have just filled it with body filler and moved on, and it would probably make more sense from a time perspective to do so........
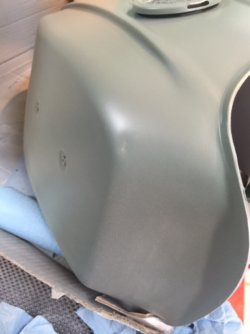
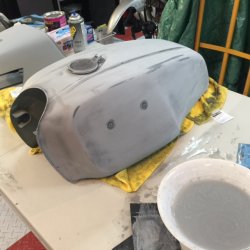
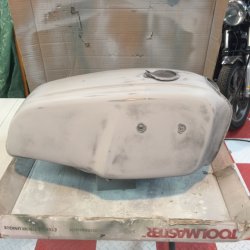
pps I also attach a better shot down the right side of the tank after etch priming. The right side had a big shallow dent in it, maybe from the riders knee (?) when the bike crashed and you can see I got the entire side of the tank pretty much back to where it should be, without any body filer. However, I couldn't do a thing with the small sharpish dent in the top front corner of the tank, that I am going to have to fix with a bit of body filler.