best and brightest SILVER colour available??

Bigdaddy said:
Paul,

Could you explain more about "popping" the dents out with a torch. I've got several steel & aluminum tanks that I'd like to save, most dents aren't creased. But I've seen how pressurizing to get the dents out can ruin a tank.

Thanks,
Wayne

Hi Wayne

I have never tried "popping" the dents with a torch on an aluminum tank, my personal practical experience is with steel car bodywork and steel motorcycle tanks, the thicker the steel panel, the better. I kind of doubt it work on aluminum, but don't really know.

not all dents can be popped, but many can. Google is your friend, do a search and all sorts of youtube video links will come up.

some years ago I did a complete bare shell restoration of a rusty and dented Jaguar. The required bodywork was well beyond my skills at the time, and I cut a deal with a 25 year experienced bodyman to trade legal services for his help in the heavy bodywork on the Jag. Working with him in my home garage, I was astonished at what can be done with metal by someone with the training, experience, and skills. He showed me the techniques I have been using.

the bottom line appears to be that when you heat metal, it expands, when you cool metal, it shrinks, when you heat then rapidly cool you can make all sorts of magic happen if you know what you are doing. I am still very much a novice.

you will likely find in your Google search folks using hair dryers, heat guns, propane torches, etc, to attempt to remove dents. My preference is an oxy/acetylene torch, lots of controllable heat, but obviously it is going to wreck any paint in the area. Entire books and courses are out there on how to expand and shrink metal in bodywork, and I am far from an expert, but I'll try and give a summary of the very basics as I applied them to this Laverda tank.

The bike had been crashed in 1999 and parked, never repaired. Among the damage was a big shallow dent in one side of the tank, a dent in the top of the tank, and several smaller dents, including a couple right on edges. I couldn't do anything with a couple of the ones on an edge.

The basic concept is to heat around the outside of the dent, working inwards. I typically go in a circular pattern starting from a fair bit outside the edge of the dent. The amount of heat is unfortunately a judgement call. Heat expands the metal, simple as that. As the heat expands the metal, the center of the dent will start to rise. Even better if you can push on it from behind with a dolley or something, but on the tank you usually can't. Anyway, heat the area in an inwards pattern, watch the dent rise, step away and let it cool naturally. Hit the area with a body file to get a sense of where you are, if the dent needs to raise some more, do it again, and again, until it as good as you can get it. Sometimes  you wind up raising the dent above the level you actually want it, but that is easy to deal with a body file, sander, etc. I got the big shallow dent in the side of this 1200 tank as close to perfect as factory, without any bodyfiller. I spent hours futzing around, but with an excellent result.

to actually shrink stretched metal, a similar process is used, heat (seems counter intuitive), but then rapidly cool, something as simple as a sopping wet rag applied to the hot area. Entire other area of expertise.

anyway, that is the very very basics, enough to get you started on a Google search. It doesn't always work, it often does not work at all on the very thin metal of very modern cars, which is likely what is behind the rise of paintless dent removal technology, because previously things like hail damage on an old car would much more likely been dealt with by heating and expanding them.

another alternative would be to find an old time body shop guy, and get him to show you how, it is very much a trial and error, learn by experience sort of thing, at least for me. Start on the tank you are least attached to......... ;) and keep in mind that modern body fillers can be your friend if absolutely necessary.

for really stubborn dents, you can "pull" them rather than pop them, there are all sorts of cool tools available, spot welders to attach things you can pull on, etc., etc.

Paul LeClair

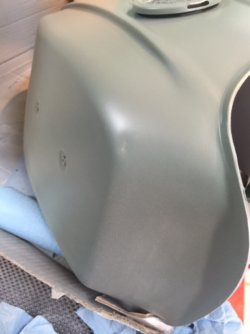
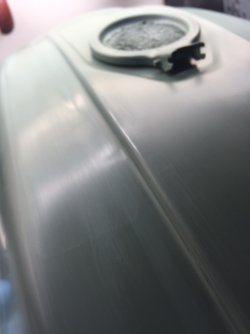
ps once I finish high build priming the 1200 tank, and before I apply any filler, I'll shoot some detailed photos and post them so you can see what I did get out by way of dents, and what I was unable to get out. I do have one detailed photo of the fairly large dent in the top of the tank that I heated out, taken after the initial coat of acid etch primer, you can just see the remnants of the dent in the two bands of light shining on the tank as two small high spots, along the edge of the tank top fold just to the left. I will wind up using a skim of body filler to do final finish, but that was a bloody big dent when I started, now it has almost disappeared. To be honest, that one dent took me hours of fiddling about, most folks I am sure would have just filled it with body filler and moved on, and it would probably make more sense from a time perspective to do so........

pps I also attach a better shot down the right side of the tank after etch priming. The right side had a big shallow dent in it, maybe from the riders knee (?) when the bike crashed and you can see I got the entire side of the tank pretty much back to where it should be, without any body filer. However, I couldn't do a thing with the small sharpish dent in the top front corner of the tank, that I am going to have to fix with a bit of body filler.
 

Attachments

  • popped dent.jpg
    popped dent.jpg
    174.5 KB · Views: 10
  • small dent.jpg
    small dent.jpg
    65.1 KB · Views: 8
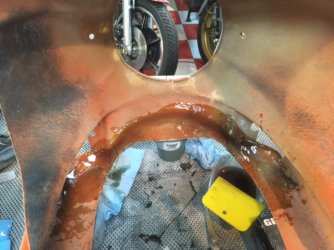
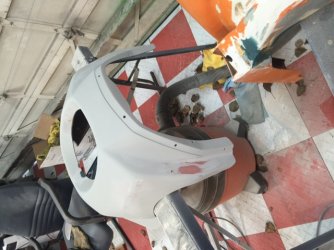
I have started the fiberglass repair of the 1982 JOTA series 2 fairing that I am also going to paint silver for an alternative fitment to the 82 1200 TS Mirage.

for those who know Andy Higgs, this fairing came off his bike from the second and final time he crashed it, then sold the bike without repairing the bike. I bought the broken fairing and the fairing mounts, and have had the broken fairing laying around gathering dust for a few years.

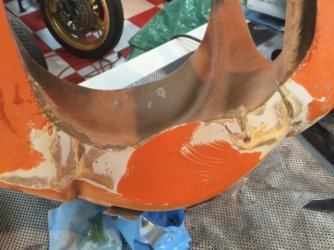
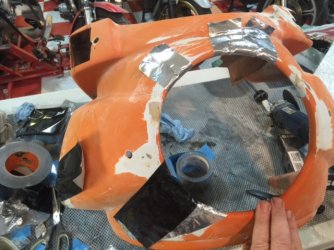
I took the broken fairing to Consolidated Compressor and I rented time in the garnet blaster. Coarser and sharper than glass bead, and blasted all the broken bits, then brought it home, took a metal grinder to the cracks to open them up so I could bring the fairing back into shape. I applied the first layer of fiberglass mat and resin to the bottom front of the fairing to stiffen the broken shell, let it set, then started on the front of the fairing from the inside. Using lots of resin and lots of cloth, should be stronger than when it was originally made once all the repairs are finished and fully set.

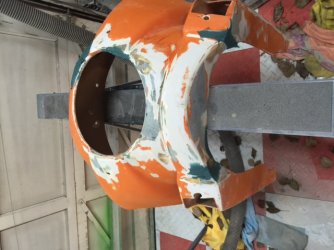
the last photo attached, titled Jota fairing repair 2, shows from the outside how well the metallic tape works to contain the cloth/resin applied from the inside, in this shot the resin has hardened and the tape has been peeled away, saves an absolute ton of sanding. The photo before it, titled Jota fairing repair 1 shows part of the method I have been using to force the fairing back into shape, there I am using heavy black duct tape leveraged through and around the other side of the fairing to force the broken headlight rim back into alignment.

Paul LeClair


Attachments

  • Jota fairing repair 2.jpg
    Jota fairing repair 2.jpg
    116 KB · Views: 25
  • Jota fairing repair 1.jpg
    Jota fairing repair 1.jpg
    131.1 KB · Views: 32
  • fairing repair 2.jpg
    fairing repair 2.jpg
    123.9 KB · Views: 21
  • fairing repair 1.jpg
    fairing repair 1.jpg
    122.6 KB · Views: 27
Paul, if those wavey marks on the outside, (bottom of the fairing between the indicator holes) are stress cracks, you'll need to gelcoat over them,. If you don't and just sand them back smooth, they'll do a Lazerous  (oops ... no religous taint intended) :-X  and come back under and through the paint.
 
Hi Chris

yes, they are stress cracks, and there are a bunch of other stress cracks not shown in those few photos.

what I was planning to do was grind them back, then apply some fiberglass cloth, then resin, then grind that back and use a skim of fiberglass body filler. Thinking about your suggestion, maybe gel coat would be easier, I'll check and see what gel coat costs.

I finished applying all the rest of the fiberglass mesh and resin repairs on the inside of the fairing this evening, will let everything set overnight, then turn my attention to the exterior, which will unfortunately need a fair bit of attention. From a time perspective it probably would have been easier to just buy a replica fiberglass Jota fairing shell from Wolfgang.......

I have also finished all the required repairs to the original 1200 TS Mirage fairing (as ugly as it is...) using plastic weld to deal with all the hairline cracks, and using a two part urethane for the structural repairs required, now I need to turn my attention to final finishing of the exterior of the shell, will need another coat of high build primer at a minimum and likely some filler.

I am making a hell of a mess in my garage, but still having fun.

Paul LeClair
 
I went by Industrial Coatings today to enquire about gel coat. The recommendation I received was to grind back the stress cracks, use mesh and resin, skin coat with the correct type of bondo for fiberglass, sand back, prime, and paint. I took them the fairing under repair and had them take a look, they seemed to think I am on track with the repairs, although I still have more fiberglassing to do. For my particular repairs and where I am going to be painting everything, they recommended against using gel coat over the repairs.

I also had to strip the 1200 tank back to bare metal today. Nearly broke my heart, but the original etch primer and the high build primer were clearly reacting with each other. I have now obtained a different etch primer supposedly guaranteed to be compatible with my high build primer as it is from the same company and same family of products, so I will re prime the freshly bare metal tank with the different etch primer and the same high build primer over the weekend. Sucks to have to do the extra work, but would suck more if I had finish all the painting and then had the primer bubbling up under the colour/clear. In my own defense, I did question the body supply place when they sold me etch prime made by one company and high build primer made by another company, they had assured me they would be compatible. Before I stripped the tank again today I took the tank to the Body Shop Supply place and had a polite but pointed discussion with them about the incompatibility issue between the original etch prime and the high build primer, they provided the new etch primer for free and also gave me a credit towards future purchases, and claimed the person I was previously dealing with was a trainee who has now been informed of his mistake........... bloody hell.

to strip the tank this time I used garnet blasting, the stuff is sharp and much more aggressive than glass bead, gives some "tooth" to the bare metal, and was quick, less than 10 minutes to strip the entire tank back to bare metal. Now I have to sand the tank with about 150/180 grit to be sure I have a good base for the new etch primer.

Paul LeClair
 
back to the bare metal (again!) tank today, sanded and then sprayed the first coat of the new acid etch primer. The stuff stinks to high heaven, more (justified) comments about the fumes invading the house from the attached garage......

about to get back to the fiberglass repairs on the Jota fairing, not looking forward to all the sanding that is going to be required.

Paul LeClair
 
well, lots of time hanging with the grand kids, not all that much progress on the paint prep. Garage has turned into such a mess with several different projects going on that I (temporarily) lost track of the Jota Series 2 fairing that I am doing the fiberglass repairs on before priming......... :o

anyway, will take a bit of time to do some clean up and organizing, then get the final prep finished hopefully this week.

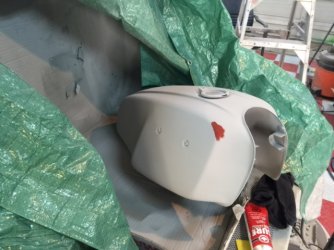
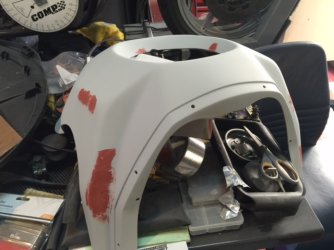
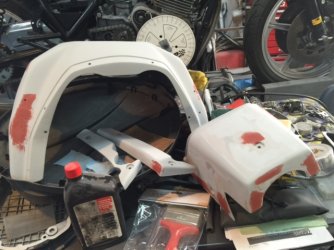
a couple of minor progress photos, shot before I located the Jota fairing under repair that I had so safely stashed away under a tarp I forgot where I put it.

Paul LeClair
 

Attachments

  • final prep 1.jpg
    final prep 1.jpg
    110.6 KB · Views: 8
  • final prep 2.jpg
    final prep 2.jpg
    92.5 KB · Views: 10
  • final prep 3.jpg
    final prep 3.jpg
    114.2 KB · Views: 10
Paul LeClair said:
they provided the new etch primer for free and also gave me a credit towards future purchases, and claimed the person I was previously dealing with was a trainee who has now been informed of his mistake........... bloody hell.

"Quick, shut the shop! Here comes that lawyer again!" ;)

H.
 
Paul LeClair said:
a couple of minor progress photos, shot before I located the Jota fairing under repair that I had so safely stashed away under a tarp I forgot where I put it.

Paul LeClair

Don't you just hate that. (scratch)
 
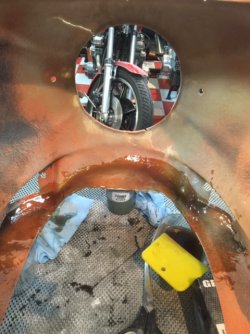
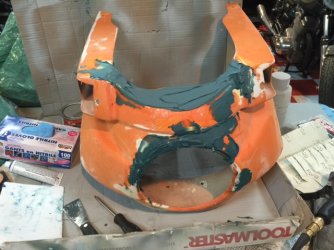
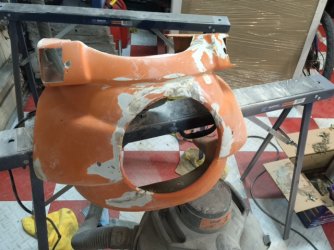
some fiberglass repair progress. Lots more work required. First I used a metal grinder to open up all the cracks, then I stuffed the cracks with cloth mesh, then resined everything from inside the fairing shell with metallic tape on the outside of the cracks to contain the resin. Once that all set for a couple of days, peeled off the metallic tape, again used the metal grinder to roughly shape things, then applied the fiberglass specific bondo, first coat, then sanded with 80 grit on a 6 inch disc dual action air sander. Applied some more bondo, waiting now for that to set up, have been shaping the headlight opening roughly with a file.......

Paul LeClair
 

Attachments

  • Fiberglass 4.jpg
    Fiberglass 4.jpg
    121.6 KB · Views: 21
  • Fiberglass 3.jpg
    Fiberglass 3.jpg
    111.9 KB · Views: 23
  • Fiberglass 2.jpg
    Fiberglass 2.jpg
    122.5 KB · Views: 19
  • Fiberglass 1.jpg
    Fiberglass 1.jpg
    129.2 KB · Views: 16
Paul, before painting just make sure the headlamp rim still fits inside the opening in the fairing. It's all too easy to add too much filler repair at this stage and there is not that much room at best for the rim.
 
Grant said:
Paul, before painting just make sure the headlamp rim still fits inside the opening in the fairing. It's all too easy to add too much filler repair at this stage and there is not that much room at best for the rim.

Hi Grant

I was thinking the same thing, I am going to test fit the fairing before paint. I am also going to test fit the turn signals before paint.

If I had known beforehand how much time this fiberglass repair was going to suck up I would have just bought another fairing shell from Wolfgang, but I am in too deep now to quit..... ;)

Paul
 
well, seeing Keith's photos several months ago of what he did to his hand with his hand grinder (which was not fitted with its guard) was not enough to convince me to put the guard back on my hand grinder.... using the grinder a few days ago to shape the fiberglass repairs on the crashed Jota fairing I am repairing for paint I modified my right forefinger - really didn't even feel it until after it had happened and the hunk of finger was just.....gone, vaporized...... :o :'( Now the proper guard is going back on the grinder, that bloody hurt, will take some time to heal, and will leave yet another scar.....

set my paint prep back a few days, now, appropriately bandaged and wearing a surgical glove, I am back at the paint prep. Spent an hour or so cleaning up my horrifically messy work area first.

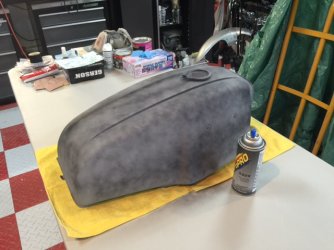
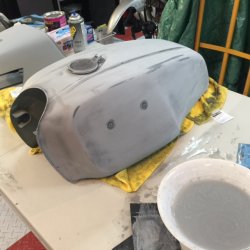
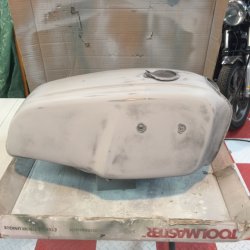
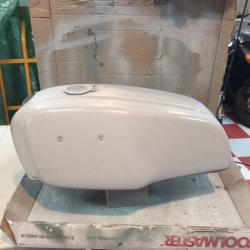
I have all the bodywork completed now and everything in two coats of high solids high build primer (except the bloody (literally) Jota fairing shell) so time to move on to the next step, spraying a sanding guide coat then wet sanding. I am starting with the 1200 TS tank. Sprayed black guide coat, and started wet sanding with 400 grit. Amazing how effective in showing the low spots the guide coat is. Went right through back to bare metal in a few places, unfortunately, but expected.

Four photos, in sequence, 1st with guide coat sprayed, next two showing wet sanding progress, final showing the sanded tank with a fresh and hopefully final coat of high solids primer which has to dry so I can do a light final sanding.

Paul LeClair
 

Attachments

  • Guide coat 1.jpg
    Guide coat 1.jpg
    106.4 KB · Views: 11
  • guide coat 2.jpg
    guide coat 2.jpg
    119.2 KB · Views: 9
  • Guide coat 3.jpg
    Guide coat 3.jpg
    115.8 KB · Views: 9
  • Guide coat 4.jpg
    Guide coat 4.jpg
    106 KB · Views: 298
Dellortoman said:
Are you going to paint blood spatters on the rest of the bodywork to match the fairing? You could turn the bike into a mobile teaching aid for crime scene investigators.

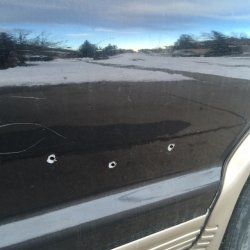
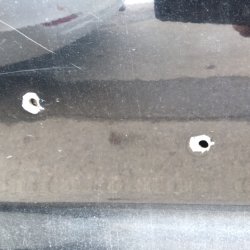
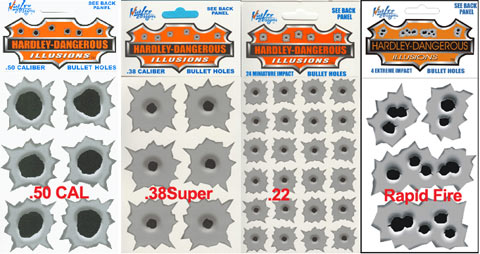
well., my spouse's 24 year old son, who is back living with us to go back to finish his schooling, is trying to sell his 2001 Kia Sportage at the moment. He is a keen gun enthusiast, loads his own ammo, buys, rebuilds, modifies, and sells on various guns. His room looks like a bloody arsenal. He drove the Kia Sportage regularly to the large outdoor high caliber rifle range west of Calgary. In fits of boredom utter stupidity, he SHOT the damn Kia Sportage several times with various large caliber weaponry. It still runs, but you can just imagine how ridiculously hard it now is to sell......... The Kia may go to the crime scene investigators yet, my next door neighbour has been eyeing it warily as it sits in my driveway, although he hasn't yet asked about the bullet holes. I suggested to the kid that he at least cover up the real bullet holes with those stupid bullet hole stickers, would look better than the real deal in plain sight. The black paint on the old KIA is in pretty decent shape, very shiny and highly reflective, show off the bullet holes quite well, unfortunately.... see photos

as for painting blood splatters on the 1200 TS bodywork, why paint them on when I could always anoint the bike at any time with the real thing.......... ;) ;) ;) ;)

Paul LeClair
 

Attachments

  • KIA 1.jpg
    KIA 1.jpg
    112 KB · Views: 14
  • KIA 2.jpg
    KIA 2.jpg
    144.8 KB · Views: 5
Sure they are not stickers.........

stickers_illusion_bullet_hole_stickers.jpg
 
Had to pull the guard off my 125mm angle grind once to get it into a tight spot,didn't like it at all.Just holding it had my fingers way to close.Having a wheel let go would be not pleasant either
 
Last time I used an angle grinder without a guard, I managed to cut my fingers in exactly the same spot as Keith, but my little 4" grinder didn't bite as hard. I only went into the bone on one finger and took a piece out of the next. I believe Keith went across 3 fingers, almost severing the first one.

I've not used it without a guard since, and never will. If it's an awkward job and the guard gets in the way, I'll find another way to do it.

The thing that scares me with angle grinders is those Arbortech Woodcarver gadgets. If you're not familiar with them, they're basically an angle grinder wheel with a chainsaw tooth profile for shaping wood (photo below). Wood is a less predictable material to work with than metal because of its grain, knots, etc. The grinder can kick back and jump out of your hands. At 10,000 rpm, those bloody things will rip large bits off you before you know what's happened.

I have one that I use on rare occasions, but only with the side handle on the grinder for better grip, and I wear motorcycle gloves with carbon/kevlar armour.

_vyr_147Arbortech-woodcarver.jpg


Back
Top