
breganzane
Hero member
- Location
- NSW Australia
I'm trying to work out if Cosi is staging an elaborate and superbly executed wind-up or not... 

Thank Christ someone is taking this seriously!Hey Tom
Any old foil will do if your in strife but I’ve found that the best brand of foil was Comalco, made in Australia and I tend to sway towards either Sika or fullers spray adhesive
The key is to make sure you put the shiniest side out, this is probably the most important part of the process, the rest is pretty easy, obviously make sure the surface is clean dry and free of any contaminants. Pre cut a piece of practice foils, for a trial run, don’t worry if you fuck this one up , you can save the damaged practice pieces for jacket spuds later on. Oh one thing I forgot to mention, it’s best to remove the bulb and the reflector from the headlight bucket, I know this seems obvious bleedingly obvious but some people try to take this short cut
So you have your test piece cut for a practice run, bulb is out reflector is on the bench, you need to make a reflector jig, I made mine out of some timber to suit the diameter of the reflector, this a important part as the next part of the process requires the reflector to sit flat, I liken it to a egg in a eggcup setup. Get your practice piece/ pieces of foil and lay it in the reflector. Now this is my trade secret of how to get the foil nice and flat and even in the bowl, it sounds unconventional but I found that the best thing to use is a tennis ball, not one that you’ve been throwing for the dog or one that’s been belted around the Avalon tennis courts, fresh new out of the tin, I prefer to use technifibre or babalot brands myself but a Wilson Spaulding or Dunlop will do the job. Take a fresh ball, heat it to about 45 degrees Celsius and you want to gently knead the foil from inside to outer with the tennis ball to gently shape the foil to sit in the concave shape of the reflector, get it as close to perfect as you can, don’t worry if there is some fine crinkles in the foil, these will roll out with the adhesive, the key here is to get it as close to the finished product as possible, once you have achieved this it’s time to break out the spray,
Spray liberally but evenly, take your pre shaped foil and place on reflector, repeat the kneading process with the tennis ball working from the inside to the our edge, allow to dry normally about 30 minutes in the sun and finally trim up any excess and you should have a as good if not better than new reflector.
I have used this process many times, most of the qld guys have been running lights with this process for the last 10 years or so, it’s proven and it works, im sure there will be testimonials to follow from many happy punters.
I have also been working on different coulours and shapes to enhance the light refraction and to add a little custom style bling to customise the output, this is still a work in progress, so stay tuned
If you need any more advice, drop me a line
C


Of course, by far the best Comalco product was made at Tiwai Point in New Zealand, so that will give the best results. Still AU bauxite though.Hey Tom
Any old foil will do if your in strife but I’ve found that the best brand of foil was Comalco, made in Australia and I tend to sway towards either Sika or fullers spray adhesive
The key is to make sure you put the shiniest side out, this is probably the most important part of the process, the rest is pretty easy, obviously make sure the surface is clean dry and free of any contaminants. Pre cut a piece of practice foils, for a trial run, don’t worry if you fuck this one up , you can save the damaged practice pieces for jacket spuds later on. Oh one thing I forgot to mention, it’s best to remove the bulb and the reflector from the headlight bucket, I know this seems obvious bleedingly obvious but some people try to take this short cut
So you have your test piece cut for a practice run, bulb is out reflector is on the bench, you need to make a reflector jig, I made mine out of some timber to suit the diameter of the reflector, this a important part as the next part of the process requires the reflector to sit flat, I liken it to a egg in a eggcup setup. Get your practice piece/ pieces of foil and lay it in the reflector. Now this is my trade secret of how to get the foil nice and flat and even in the bowl, it sounds unconventional but I found that the best thing to use is a tennis ball, not one that you’ve been throwing for the dog or one that’s been belted around the Avalon tennis courts, fresh new out of the tin, I prefer to use technifibre or babalot brands myself but a Wilson Spaulding or Dunlop will do the job. Take a fresh ball, heat it to about 45 degrees Celsius and you want to gently knead the foil from inside to outer with the tennis ball to gently shape the foil to sit in the concave shape of the reflector, get it as close to perfect as you can, don’t worry if there is some fine crinkles in the foil, these will roll out with the adhesive, the key here is to get it as close to the finished product as possible, once you have achieved this it’s time to break out the spray,
Spray liberally but evenly, take your pre shaped foil and place on reflector, repeat the kneading process with the tennis ball working from the inside to the our edge, allow to dry normally about 30 minutes in the sun and finally trim up any excess and you should have a as good if not better than new reflector.
I have used this process many times, most of the qld guys have been running lights with this process for the last 10 years or so, it’s proven and it works, im sure there will be testimonials to follow from many happy punters.
I have also been working on different coulours and shapes to enhance the light refraction and to add a little custom style bling to customise the output, this is still a work in progress, so stay tuned
If you need any more advice, drop me a line
C


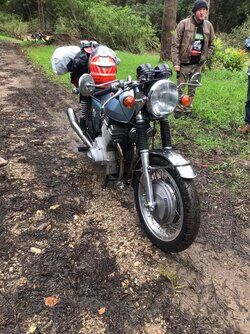 headlight reflector you will see the water still in it … funny thing that but as a testament to the pureness of the water in the Kalang river there is no tide mark in it one week later…….hmm same couldn’t be said for the prince of darkness indicator it still had some water in it but all good nice and dry there too now…but having said that they also still actually worked so that is amazing for Lucas huh … sorry was just reflecting on that if it at all makes sense
4W bulbs will eventually burn/melt the bulb holders and possibly the instrument dials, they just get too damn hot. Stock fitment was 3.4W, a small but deciding difference. Hard to find, so swap to LEDs, at least for theIt's definitely got a bulb so it's semi seal or a separate reflector and separate glass. My fuzzy memory is the first and I added that rubber gasket over the sealed glass and glued reflector and now from Piet that's something I shouldn't have done. When I can swim across my yard I will pull it down and maybe take some pics. I need to replace the tacho backlight rubber bulb holders and bulbs as well. Std so I remember is 3watts, I think I have all the bits including soldered and shrinkwrap connectors plus 4watt bulbs. Even with the speedo backlights working I couldn't read the speed heading home with no headlight, maybe using 4watt will fix that, or maybe bifocals.

I presume by "good quality alcohol" you mean a single malt Tasmanian whisky.From memory we used acetone .. but guess that a good qualitry alcohol might also be useful for this purpose ..


 you could sure buy a lot of foil or reflective wrap for that much dough