Oil flow around 750 head

chrissoz

Senior member
My 750SF1 has just gone back together, runs OK but I am checking oil flow to head. Ran without the cam end covers(?) and I could see good oil flow out of the ends of the exhaust cam but no flow out of the inlet cam.

With the covers on I can see plenty of oil splashing around the exhaust tappets but not much around the inlet tappets.

Is this normal? Is there a diagram anywhere of all the oil flows on a 750?

Thanks
 
My 750SF1 has just gone back together, runs OK but I am checking oil flow to head. Ran without the cam end covers(?) and I could see good oil flow out of the ends of the exhaust cam but no flow out of the inlet cam.

With the covers on I can see plenty of oil splashing around the exhaust tappets but not much around the inlet tappets.

Is this normal? Is there a diagram anywhere of all the oil flows on a 750?

Thanks
Oil flow to 750 heads is super-important and can be blocked super-easily by the studs (either centre front or centre back or all four). There are slots in the top centre gasket surface of the head that are oil channels. Oil comes up around the studs and enters the head via these slots. If the top cover holes are too close together front-to-back they can literally block some or all of the oil trying to get into the slots.

Simple solution is to fit L-shaped pieces of thin wire between stud and head at the four centre studs (one arm of the L down the stud hole, the other arm sitting in the slot). This allows sufficient gap for the oil to pass. Some top covers even require elongating the stud holes to create more distance (and allow for the thin wires to fit).

Ask Tippie how he discovered this design flaw, which also led to this little trick - I NEVER build SF motors without doing this these days - it's free insurance.
 
I'm getting pretty good at dropping the engine! Only pivoted it down so not to much fuss, just need to split the final drive chain, everything else stays on. Have a little trolly I made up and use a car jack to lower it. Getting nice flow to both cams now.
 
I'm getting pretty good at dropping the engine! Only pivoted it down so not to much fuss, just need to split the final drive chain, everything else stays on. Have a little trolly I made up and use a car jack to lower it. Getting nice flow to both cams now.
You don't need to split the final drive chain, just back off the adjusters completely and push the wheel forwards as far as it'll go.
Paul
 
I'm getting pretty good at dropping the engine! Only pivoted it down so not to much fuss, just need to split the final drive chain, everything else stays on. Have a little trolly I made up and use a car jack to lower it. Getting nice flow to both cams now.
Good stuff. Top marks!! Or should that be Top Marx! :)
 
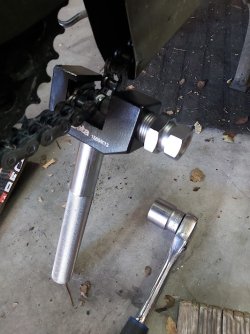
Tools to break the chain were beside me - tools to move the rear wheel were over the other side of the shed! Regretted it later cause it is fiddly and messy to put the chain back together. Lessons learned.
 
They're bloody hard to get these days, the last chain I bought didn't have one in the packet, only a riveted one. Top-of-the-range Kushtani or whatever they're called so I ordered just a split link, what turned up at my place was exactly the same chain kit, $250 worth of kit for the $15 I paid for the split link. Seems it's a liability thing. The next issue was that riveted link was insanely tight, it needed pressing on and needed a riveting tool to fit it. In the end, I used a ball pein hammer against a limp hammer. Talk about complicated.
 
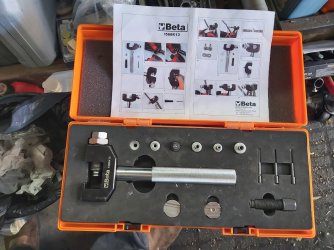
My two DID 520VXs only came with a split links. I have the DID fitting tool but it's actually easier removing it using an old style chain breaker to press the plate off. I use the DID tool to press it back on but can also use large vicegrips and a small spacer over the pin. I run the split link on the inside (it was touching the frame on the right) and access isn't brill.
 
They're bloody hard to get these days, the last chain I bought didn't have one in the packet, only a riveted one. Top-of-the-range Kushtani or whatever they're called so I ordered just a split link, what turned up at my place was exactly the same chain kit, $250 worth of kit for the $15 I paid for the split link. Seems it's a liability thing. The next issue was that riveted link was insanely tight, it needed pressing on and needed a riveting tool to fit it. In the end, I used a ball pein hammer against a limp hammer. Talk about complicated.
Part of the progress in chain tech Vince.

A connecting link with a loose sliding fit would instantly be the weakest in the entire chain.

15 bucks sounds extremely steep, DID clip links are around €5 retail here... I thought that excuse about the boat from Japan was a thing of the past.

piet
 
I just found the whole thing way more unnerving than the plenty of times I did it in the past with a spring clip. Maybe the problem was watching a Utube clip of how to rivet a link and it was made out to be like open heart surgery or working on live house wiring. a millionth of a gram more force would result in a frozen link and a broken chain on the next ride. I ended up not using the borrowed riveting tool, way too complicated. There were about 15 different anvils in the kit and I couldn't remember which one I was supposed to use. I just used a centre punch then a 3mm punch and then a ball pein hammer on the hollow pins. BTW I also broke my Renals chain breaker as well, it had been used for a good 20 years but failed on this job even with the chain link ground down with my 5-inch angle grinder.
 
When was the last time you had a chain actually break? Weak link? I seem to replace chains when they develop tight spots as the pins dry out under the o-rings. Have been tempted to buy good quality non o-ring from Jason now that I have Scottoilers. The most recent chains I have fitted lucky enough to have a spring clip joiner had the side plate so tight to fit that I don't reckon it even needed the spring clip, not that I would dare tempt Mr Murphy.
 
One of the blokes had a chain break on an RGS on a Snowy run, he was mid-passing a very big truck at the time. I don't think he was much of a bike maintainer though. I was dreading doing the replacement after having some issues on 180s fishing the chain around the front sprocket, it's 1000% easier on a 120.
 
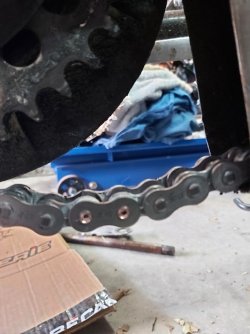
I changed the chain on my SF2 yesterday. a one half hour job, using a riveted link, and the correct tool.
Also a new BT46 and new wheel and sprocket carrier bearings. All ready for this summer's tour towards Eastern France.
Paul
1718178744335.jpeg
1718178775714.jpeg
1718178800813.jpeg
 
Good to see that lower chain guard. I reckon it is great extra protection for the chain from road filth and most people junk them. Unfortunately can't use one with my wide 17" tyre.
 
Good to see that lower chain guard. I reckon it is great extra protection for the chain from road filth and most people junk them. Unfortunately can't use one with my wide 17" tyre.
They're excellent protection. A day's riding in the rain doesn't affect the chain in the least.
Yes, a lot of them were junked. Not sporty looking enough.
Restorers are crying after them today.
Paul
 
When was the last time you had a chain actually break? Weak link? I seem to replace chains when they develop tight spots as the pins dry out under the o-rings. Have been tempted to buy good quality non o-ring from Jason now that I have Scottoilers. The most recent chains I have fitted lucky enough to have a spring clip joiner had the side plate so tight to fit that I don't reckon it even needed the spring clip, not that I would dare tempt Mr Murphy.
Personally, I've never had a chain fail on me. Know of several others though, especially one cheapskate that pieced a chain together from several left-overs. Found 3 spring clips in that one, nearly whipped him with it, I was that mad. He cost us half a day on a fairly tightly-scheduled trip.

One other memorable failure was after taking first place at Hockenheim with the H-D Sprortster in 1995. Unloaded the van Monday morning, started the bike to ride it up the ramp into the workshop, bloody chain snapped half-way up! Michael had won by about 30 seconds to second place, he could have coasted the last 500 metres! But we stopped using spring clips from there, I had about 5 chains of different lengths and a bag of rivet links for gearing changes.

IWIS chains used the outer plate to secure the clip itself. After assembly, with the outer pressed on, the plate was forced in the other direction to secure the clip, this worked extremely well. I also use this method on any other chains with tight-fitting outer plates.

piet
 
Back
Top