Redax Generator and Ignition upgrade to Laverda Jota 180 series 1

and the length of the stop doesn't really matter, cause you rotate the crank in one direction to the stop, rotate it in the other direction to the stop, and then split the rotation distance to find TDC ?  correct?
 
Dellortoman said:
Some of us don't have a doctor's income  ;)

Here's a couple I prepared earlier. Cost $0.00 each.

Forget the income, saved myself half a hangover  :LOL:
 
laverlesmains said:
and the length of the stop doesn't really matter, cause you rotate the crank in one direction to the stop, rotate it in the other direction to the stop, and then split the rotation distance to find TDC ?  correct?
It doesn't have to be exactly any length,my first attempt failed as to short it missed the piston but to long isn't fantastic either as the gaps is to big and the distances could make errors happen.That cane field bloke Marks pic has a size that looks good.Plus or minus a bit isn't the end of the world
 
Davo said:
Why the hell spend valuable time and effort converting a spark plug when for $30 you can have one made with a nylon rod delivered to your door.  http://www.ebay.com.au/itm/Nylon-Piston-Stop-Tool-Save-the-Metal-to-Metal-Damage-in-Your-Go-Kart-Engine-/370605253410?pt=AU_Go_Kart_Parts_Accessories&hash=item5649cb6322#ht_2108wt_848

Dellortoman said:
Some of us don't have a doctor's income  ;)

Here's a couple I prepared earlier. Cost $0.00 each.


I didn't need to spend valuable time converting a sparkplug, I got Cam to send me one of his valuable time sparkplug conversions :D :D

Has been used quite abit setting up the cam timing on my motor and works really well. Big thanks Cam :-*
 
Vince said:
It doesn't have to be exactly any length,my first attempt failed as to short it missed the piston but to long isn't fantastic either as the gaps is to big and the distances could make errors happen.That cane field bloke Marks pic has a size that looks good.Plus or minus a bit isn't the end of the world

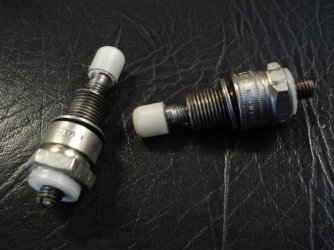
That's why I made mine (and Rob's) adjustable. I wasn't sure how long it needed to be.
 
Total Recoil.

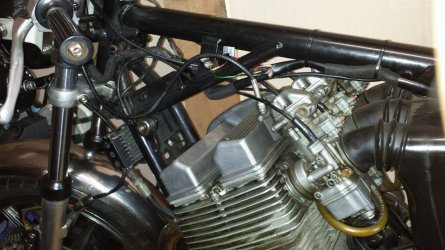
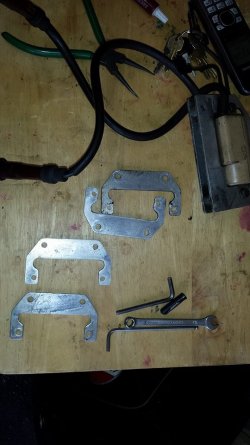
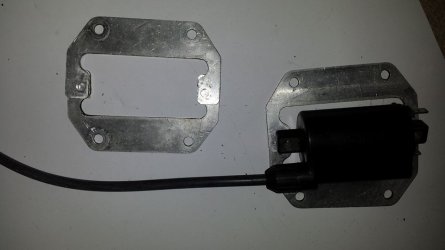
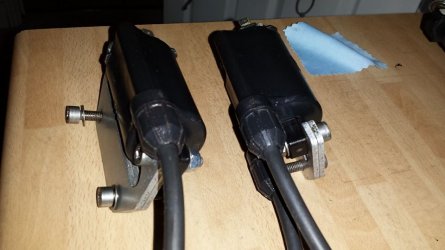
After a conversation with Keith, I removed the original coils. The original left side aluminium coil mounting plates come as a pair. They are needed for the installation of the new TEK coils. All very well thought out.

I'm having to fit the job in now during the week. Just can't rely on having weekends with decent weather and I do like a bit of daylight when I am working on electrics...or anything for that matter.

Any thoughts on me using a smear of Di-electric grease on the coil mounting bar/grounds ?

joe
 

Attachments

  • recoil 1.jpg
    recoil 1.jpg
    82.6 KB · Views: 70
  • recoil2.jpg
    recoil2.jpg
    78 KB · Views: 56
  • recoil 3.jpg
    recoil 3.jpg
    43.8 KB · Views: 56
Good on you for doing this Joe...I chickened out and shipped (vanned?)it up to Keith to fit the whole shebang.doing it yourself will help understand what goes on, I am sure, wish I had done it...
 
TEK Coils..

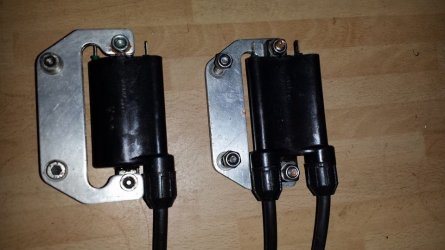
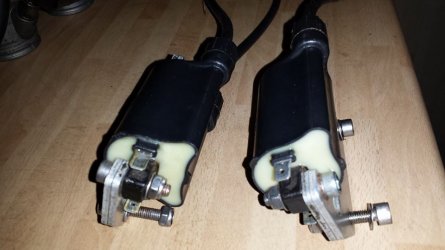
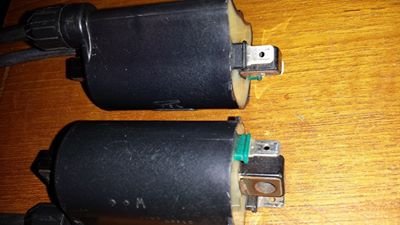
The primary terminals on the ignition coils are colour coded Green and Black.  Green is -ve and Black + ve .

This I understand determines the correct direction of flow of electrons at the spark plug electrodes  and therefore the "strength" of the spark so it may as well be done right even though it will run either way.

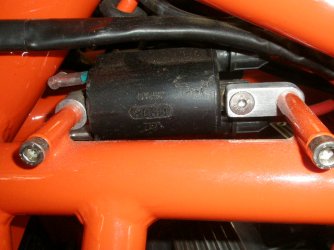
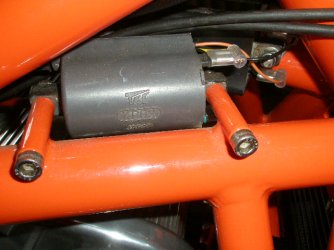
The coil mounting points need to be grounded nicely to the frame ie clean...

and the last 3 pics shows them mounted on the bracketry from the oe left coil..Now double plate each side..

ps I am a Carpenter ha ha so bear with me.

Joe
 

Attachments

  • tekoil4.jpg
    tekoil4.jpg
    88.9 KB · Views: 41
  • tekoil2.jpg
    tekoil2.jpg
    69.4 KB · Views: 35
  • tekoil 1.jpg
    tekoil 1.jpg
    62.4 KB · Views: 36
  • Tek Coils.jpg
    Tek Coils.jpg
    18.6 KB · Views: 38
Interesting, I just wired my TEK coils Green +in Black +out to ignition. Haven't started the motor yet. Wasn't aware that the coils needed a earth connection via the frame mounts. This is on a Motodd frame so not using the ally mounting plates.
IAG, would you mind emailing me a coil wiring diagram please, robberyman[at]hotmail.com

Cheers
Rob
 

Attachments

  • PA170588.JPG
    PA170588.JPG
    101.6 KB · Views: 21
  • PA170590.JPG
    PA170590.JPG
    102.6 KB · Views: 21
Should be fine Rob, just make sure there is no paint where it bolts up to the frame, either end of the mounting acts as an earth
 
Back
Top