RGS1000SFC Engine Case Split

breganzane said:
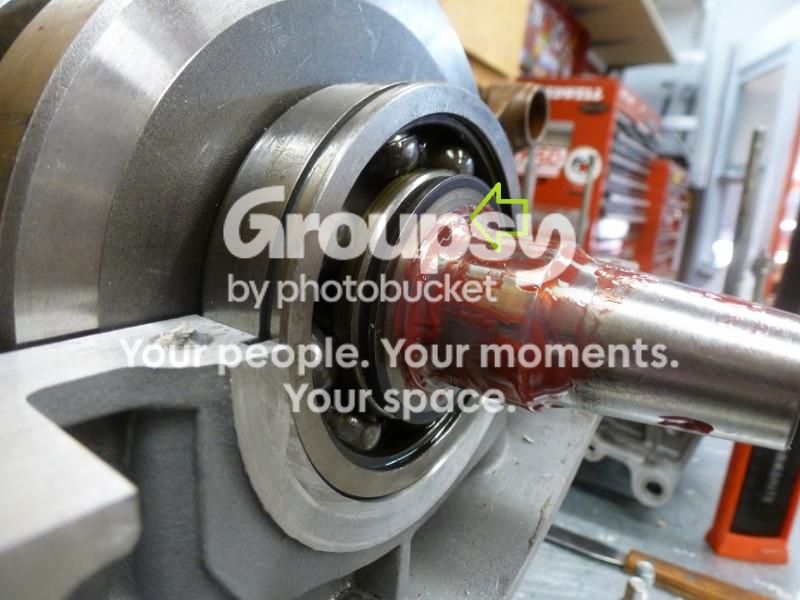
Missing circlip, betwixt bearing and washer.
:)
Don't think so.  Can you see it in this picture?

P1020120_zps262c9847.jpg


However, when the washer is pushed against the circlip there remains a 'shelf' on the crank that the alternator basket does not take up and the washer is free to flop around. 

Arrow points at the 'shelf'

CracnkshaftandWasher_zps213a10b1.jpg


Is it possible that when the alternator basket is cinched up tight with the right-handed bolt on the end of the crank, this gap will be taken up?

 
Thanks guys.  I tapped the alternator basket onto the shaft with a rubber mallet and the gap was taken up nicely.  Just a bit paranoid, I guess, since so many challenges have occurred during this build.

 
Rockitdoc said:
I have some 515 for use on the head gasket around the cam chain tunnel.  Just as good as 510 or 518?  These all seem to be anaerobic sealers.  What's the diff?

Answered my own question.  515 is for steel.  518 for alloys/AL.  510 is higher temp and chemical resistant.

518, it is then.

 
I know for you pros, this is no big deal, but for us wannabee Laverda wrenches, getting the cases Timeserted and back together as a unit again is call for a beer or two....

then again, waking up is call for a beer or two!

Anyway, the resassembly continues.....

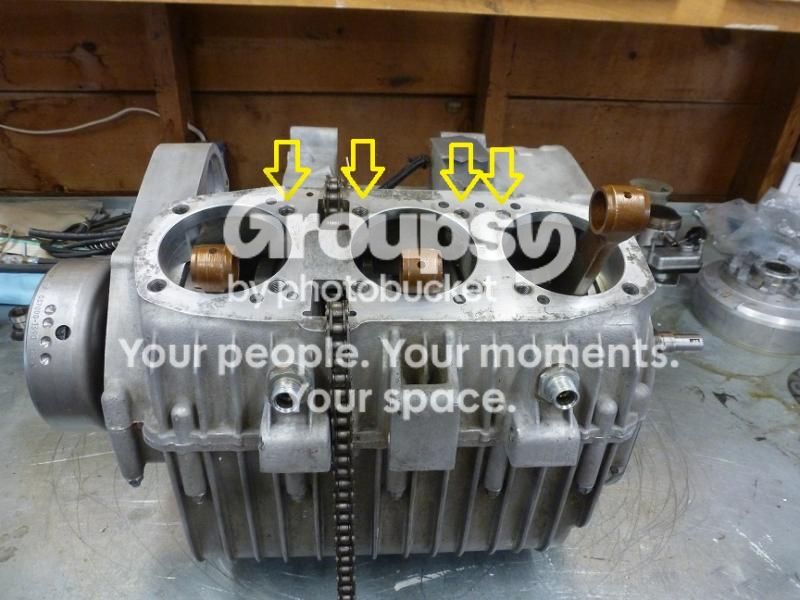
EngineCasesReassembled_zps74f5ab4f.jpg


the yellow arrows are pointing at the four M9 studs to be left out until the barrels are on, in accordance with Clem's suggestion back in post #22. 

 
leave them all out, and install two in the corners of the inlet side, they act as a "guide" when lower the cylinders
Take the chain out and do it the Clem/Red/other/not Grant way, much less hassle and you will be much surer that the chain is on the crank sprocket, not beside it.
CLEM
 
CLEMTOG said:
leave them all out, and install two in the corners of the inlet side, they act as a "guide" when lower the cylinders

Makes sense.  Those studs are a royal PITA when trying to get the pistons up into the cyls.

CLEMTOG said:
Take the chain out and do it the Clem/Red/other/not Grant way, much less hassle and you will be much surer that the chain is on the crank sprocket, not beside it.

On this motor, the chain cannot get off track with the guide in there.  I tried to make it go off track on purpose and could not.  The guide is close enough to the chain that the chain cannot move laterally far enough to be off track.  Am I missing something, as usual?
 
Yes.
Believe me it is possible for the camchain to be fed in offset to the crank sprocket.
You have to remove the chain guide when installing the chain.
 
Grant said:
Yes.
Believe me it is possible for the camchain to be fed in offset to the crank sprocket.
You have to remove the chain guide when installing the chain.

What if the chain guide and chain are already installed, as in my case?  It appears, from the top, that the chain is on the sprocket.  Should I turn the engine over, remove the guide, to verify the chain is on the sprocket?  Not a problem as I would not like to find out later the chain is too tight when finally bringing the ends together.
 
Yes,
turn it over,
remove the cam chain pedestal, and the chain, leave them out until the head is back on.
this makes turning the crank much easier to position it for valve timing, but don't do that with the cams in place, position crank, then install cams and finally torque the head bolts
 
In one of your various threads on this rebuild several people recommend you fit the chain after refitting the barrels and head.
My suggestion was that you fit the chain to the crank first and then build the barrels and head on, and feed the chain through as you go.
It seems you are thinking of doing it the way I suggest.

As I said before it is possible to fit the chain offset and still join it up, and even run the bike (for about 2 weeks until the chain snaps DAMHIK).

So you have asked and been given 2 ways of doing it.
Time to pee or get off the pot now.
 
Grant said:
As I said before it is possible to fit the chain offset and still join it up, and even run the bike (for about 2 weeks until the chain snaps DAMHIK).

So are you saying that you fucked it doing it your way or did you fuck it doing it the other way?
 
In 2004 I rebuilt my 1200 as it had the bad crank bearings (was a Spanish bike I bought that year and they had never been changed).
While so doing I dropped the camchain down the tunnel.
Fished it back up using straightened coat hangers and joined it up.
2 weeks later the camchain snapped on my way back from work.
The chain had been to one side of the crank sprocket after I fished it back up.

Since then I put the chain on the crank sprocket first and build the engine up around it.
No biggie, even single-handed.

I have tried it both ways and this way works for me.
YMMV
 
I have tried it both ways and also now put the chain in before fitting the barrel.  Maybe I was just unlucky but in the couple of engines I tried the casting was such that the lip to the side of the chain made it impossible for the chain to slip in from the side.  I had to engage the first link of the chain onto a tooth of the crank sprocket and wind it 'round, quite a PITA and needed a few iterations to get it so that the joining link was centred between the cam sprockets when at TDC.  I found the hassle of dealing with the chain during assembly easier than the hassle of getting the chain in afterward.

The simple thing is that you do it which ever way you are happy with, but ALWAYS visually confirm via the inspection cover underneath that you have the chain correctly on the sprocket after installation.  Easy innit?
 
Back
Top