Sealing ND instruments

Paul Marx

Hero member
Location
France
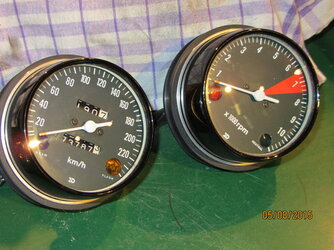
We're restoring my wifes 500. One of the instruments was dented and had already been opened since the crimped ring had been replaced by a screwed collar.
We obtained a new instrument body and a new ring from Marcel at CB750faces. Excellent fast service.
My question is the following.
The original instrument glass is sealed in with a sort of liquid rubber which has of course dried. Cutting it out of the old body isn't a problem.
However, how do I fix the glass in the new body, making it water tight of course?

Paul
 
I use Tiger Seal for things like that Paul.
Seals, sticks and is tough. It does not leach acetic acid in the curing process. I think there are many similar polyurethane sealants, but I like Tiger Seal.
 
Very hard question Paul, if considering you want to be under the budget 30€+delivery from cb750faces.
Here some advice, but I think you already did your evaluations about.

1) do seek out supplier for something like this: https://www.gteek.com/Seals/Еxtruded-rubber-profiles/rubber-l-profiles and use cyanoacrylate glue to joint the end.

2) You have a lathe (or a friend with..) and turn it from POM or PA rod.

3) You could make a mould from wood or other material in order to pour epoxy resin (you need a lathe too for this)

but lets take a look to the costs:

1) for this kind of items, presuming you find the supplier, I think you have to order a minimum quantity + delivery and + you need cyanocrylate glue (few ml of superglue are around 6€)

2) if you haven't the bar, you have to purchase the material, and, generally, minimum quantity is one meter and you are over the budget for sure.

3) if you haven't the epoxy at home... well you are almost close to the budget for the resin, not to mention you have to built the mould.

Mainly it depends from what you have at home (taking for granted your competence) but, remember, at the end you'll have just slap something together...
 
We'll see. I'll give it a try.
The problem is that if I start buying bits from CB 750 faces, I'll be buying plenty since I have my 3C instruments to come and they have seen better days.
So I'll try the home fix first. I'm not competent enough with a lathe to have fun with the other options.

Paul
 
If you are looking for a MacGyver-solution what blow in my mind could be:

1) do try to strip a electrical cable in order to have a "U" shaped rubber string and roll it up to the lens.

2) Using the lens placed into the case in the right position and some tape to protect parts and make borders, do fill the space around with hot glue (black glue is available) when it is warm you can shape it quite well. The hot glue is a good solution for static applications. If you fear the lens could be damaged by the hot glue, use a cartoon.

3) instead using the hot glue you could use the silicon (black silicon is available). You have to be a bit more carefully and patient than with hot glue but it is a option.

4) Self fusing silicon tape, but I dont know what could be the behavior once in the case. (https://www.bing.com/images/search?q=silicon+tape...) and the cost...

5) you could use PET bottle like as follow:


At least you'll have a chopping board and pens for friends...
I'd avoid any tape (like electrician tape or duct tape), you well know, the glue could melt with time.
 
You're giving me ideas.
For instance, make liquid rubber by diluting rubber in acetone.

There is in fact a recess for the seal in the case.

Will look into it.

Paul
 
I don't know the process rubber and acetone, if you have results please post'em I'm bit curious.
If you'd pursue the silicon road the following video will give you a track (use wd40 on the mold for unsticking parts instead water)


and if you cannot be satisfied of diy methods and you are going to invest on a 3d printer.... or just for infos on professional methods and materials take a look to this (but youtube is chock full of videos, so this is one of hundreds).


I haven't a 3d printer, but sometimes I'm quite close to... there are several reasons for having one and this could be one of them. You can print not just with PLA but also with quite similar rubber material. Here a video with millennian included.
And.. as always happen to me, instead spending just 30€, you will spend 400€ for buying a printer...

 
I don't understand why you're messing around with solutions that may or may not work, and will probably look like shit, when Marcel's seals are only about 16 Euro. You'll easily spend more than that on your home-brewed cock-ups.

BTW, I dunno whether rubber will dissolve in acetone. Even if it does, I doubt it'll re-constitute into flexible rubber again. You can buy liquid rubber for casting. But then you have to make a mould which will be difficult without a lathe.


PS: I just looked it up: "Acetone will not dissolve rubber, but prolonged exposure will degrade it"
 
Oh well, there you go then.
I did find an O ring for a house water filter which might do the job but will need to check since it's all going to be pretty thick. Previous owner went to the trouble of cutting a piece of glass which adds up the mm.
Otherwise, it'll be "Hallo Marcel, I need the two O rings, top and bottom, and the lens".

For the acetone solution, I confused rubber and plastics.

Paul
 
My water filter O ring is too thick as is the glass.
So it was hello Marcel: 2 seals, top and bottom and a glass. €60.
That and a body and crimping ring adds up to over €120.

Paul
 
I overhauled a set of Jota clocks a few years back. New parts cam from Marcel at CB750Faces.
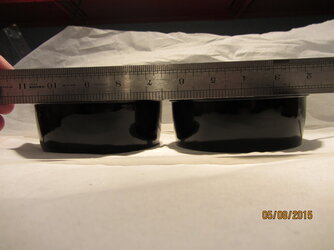
My seals were still OK, so I re-used them. I did discover that the housings supplied by Marcel were slightly shallower than the originals, making reassembly with both seals impossible. So I refurbished and reused the old housings.
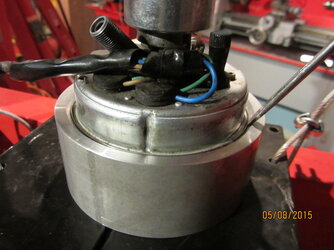
I made up a tool to hold the housings with glass and seal in place, then compressed the assembly lightly in the press and crimped it back together using new rings. See photos.
The clocks looked great, and IMG_1545.JPGIMG_1548.JPGIMG_1552.JPGIMG_1556.JPGwere absolutely watertight.
 
If you look at the aluminium clock holder tool in the press, you can see I left some space to be able to turn the bottom edge of the bezel over using a screwdriver. So I basically worked my way around the clock, turning the edge over. Then I went around with a flat punch, to ensure it was clamped nice and tight. Not as neat as I would have liked, but it worked fine, and isn't visible when the clocks are fitted. The visible side of the bezel is supported by the tool, and completely unmarked. IMG_1554.JPG
I think the bezel was originally rolled over, but that would require complex tooling...
 
I'm at same point. Next step is to crimp the ring again. The last time I used a screwdriver to fold the ring over the casing. Any professional advice to do this job more professional is very much appreciated.
 
I think clamping the parts firmly together is the most important.
This allows enough compression on the gaskets to achieve a good seal. If you don‘t have a press, a big vice should work. But be very gentle, you don‘t want to squash the clock flat! (My press is capable of 20 T)
Using the screwdriver to fold the bezel over is OK, but this alone will not achieve sufficient clamping force. You need the second operation with a flat punch to fold the bezel right over.
Sorry I don‘t have photos of this.

Steve
 
Back
Top