What did you do to or for or with your Laverda today?

Brett said:
Nearly finished getting the throttle cables and set up correct on the drummer project  :o think now have the optimum length and position for the splitter only time will tell but. At least I have become quite an expert on soldering the nipples on the ends of the cables  :D

Are they steel cables Brett? I'm planning on making up my own clutch cables from stainless, but am assuming solder will never bond to the stainless. Any tips will make life easier. Maybe there's a special stainless compound solder?? I think bicycle stainless cables are crimped.
 
I used to use silver solder, never had one fail either, but I just use bought ones now, Venhill.
Come on Chris, they just use alligator clips for torturing their victims, never needed to solder the electrodes on.
 
I use a solder pot, the key is like Marty said flare the end slightly, the solder I use is 96 percent tin 4 percent silver, its 5 times stronger than normal solder the key is in the flux you use and where you put it.
If I could buy the damn cables ready done would have done so.
 
I'm experimenting with compressionless bicycle brake housing, so the inner wire has to be smaller than std clutch - bicycle brake inner wire. Might break in a week, might last years, but it should provide a very positive clutch action, with little friction.

Thanks for the tips on soldering. Makes sense and sounds easy.
 
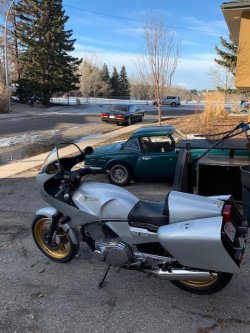
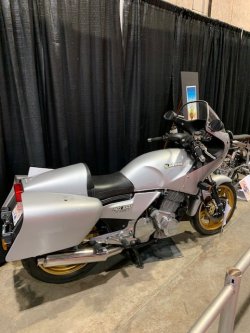
took the 84 RGS Executive to be displayed in the local large Motorcycle Show, in the Rocky Mountain subsection of the Canadian Vintage Motorcycle Club exhibit. This years exhibit theme was motorcycles of Europe. Seemed to be well received.

Paul LeClair
 

Attachments

  • Lav 1.jpg
    Lav 1.jpg
    111.1 KB · Views: 29
  • Lav 2.jpg
    Lav 2.jpg
    89.3 KB · Views: 32
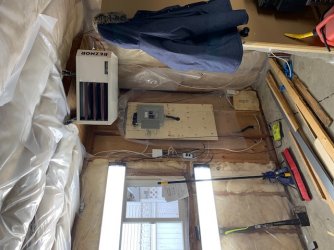
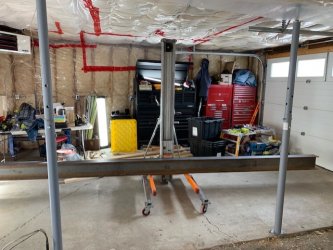
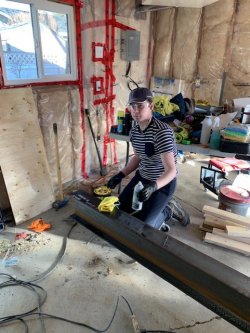
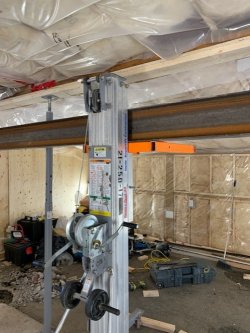
working on converting my old small single garage with attached open car port into a small double garage with power and heat. Ran power, sub panel, gas line, gas furnace, electrical outlets for tools, heavier cabling and outlets for welder and compressor, insulate and vapour barrier, install a steel supporting beam after the wall between removed, new windows and doors, now starting on the interior finishing with drywall (gyrock, sheet rock, gypsum board, whatever the stuff may be called where you are....), then will be on to installing cabinetry, work benches, tools, etc...?, then the Laverda's and other can finally come inside...

Youngest son has been helping, one of the photos shows him preparing the steel beam.

Paul LeClair
 

Attachments

  • garage 1.jpg
    garage 1.jpg
    99.4 KB · Views: 40
  • garage 2.jpg
    garage 2.jpg
    97.9 KB · Views: 43
  • garage 3.jpg
    garage 3.jpg
    104 KB · Views: 57
  • garage 4.jpg
    garage 4.jpg
    92.6 KB · Views: 49
Welcome back Paul, I was just mentioning to Red today that we haven?t heard from you for a long time. What is going to hold the beam up?

I had to do a similar thing in my kitchen, but with 2 x structural timber planks screwed together, and undoing the acro props was very nerve wracking. My laser measuring thingo showed 1mm of movement in the centre, I was happy with that.
 
You need to spread the load, a nice wide foot eg plank under and look under that as well. It gets interesting in 3 story brick buildings. There you use gadgets called Trishores, that's triple Acros. And you need to think about getting the beam in place before shoring, not happening after there-there. My favourite is needle shoring, that's real fun.
 
for the garage/car port, the span is 22 feet, and the steel beam is 16 feet. Single story building, only the weight of the roof and the snow load to worry about. The engineering drawings call for footings below the frost line (about 4 to 5 feet), and 4 foot long timber stub walls at each end of the steel beam enclosing the ends of the beam, with timber structural supports under the beam ends supported by the footings, and the stub walls tied into the outer walls.. The acro posts (known as "jack posts" here, are only temporary. Can't see it in the photos but I already broke through the concrete with a rented jackhammer to make holes about 30 inches around to allow the "screw pilings" to be installed  https://en.wikipedia.org/wiki/Screw_piles

my youngest son and I have done all the work so far, with appropriate City inspections, but I have just hired a professional to do the gyprock sheeting. taping and sanding, and priming. Same for the footings, some fancy hydraulic equipment required to turn the screw piles into the ground, and then printed torque readouts required to satisfy the City inspector that they are deep and tight enough.

between the garage/car port, being unreasonably busy at work with trials, and hanging out with the grand kids I have been a bit short of time. The heavy work schedule should be resolving by about mid February 2019 as I have a big gap in my trial schedule coming up, thankfully. By then hopefully the garage may be mostly useable and I can return to some motorcycle projects, including the totally disassembled Garelli 150 which hopefully I can remember how to put back together...?.

I do continue to scan the forum most days, you lot have been busy and having fun, good on you all!

Paul LeClair
 
Sir Sidney Ruffdiamond said:
Nice one Paul - bringing Laverdas to the masses is exactly the right move as it?s such a good bike - the handling is untouchable!

I was part of the rotating crew manning the display over the weekend. Reactions to the RGS ranged from the typical "what is a Laverda and who made it" to the rarer "I had a Jota when I was younger?.."

most had never seen a Laverda before. The bike was very well received.

Paul LeClair
 
"only the weight of the roof and the snow load to worry about." would be an understatement wouldn?t it, Paul? You can get very heavy snowfalls there I reckon.
 
Depends on the pitch, even we in Oz build steep pitchs in the Ski fields so it sheds. Seen some dangerous lumps fall on occasion.
 
Paul LeClair said:
but I have just hired a professional to do the gyprock sheeting. taping and sanding, and priming.

Paul LeClair

Chicken. Do your own and it can look as crap as mine  :LOL:
 
Back
Top