What did you do to or for or with your Laverda today?

Piranha Brother 2 said:
Nice! Thanks for the info. I've got the wheels and the compounds, just rsist the urge to get black soot all over my face when I have so many other structural jobs to get out of the way on the spesh.

Have made a not of the wheels and compounds for when i do get around to it. If it wasn't for potential lockdowns, I'd probably just pay someone to do it all!

I wear a Lone Ranger style mask to keep the soot off and work outside to make it more bearable.
Ill post details on the compounds and buffing wheels just to avoid confusion as not all brands are the same.
 
Drained the oil, fitted a new primary chain, new fork oil seals, removed the carb pump levers, filled with new oil. Started engine but can't go on road because of lockdown.
 
Nat Magee said:
Drained the oil, fitted a new primary chain, new fork oil seals, removed the carb pump levers, filled with new oil. Started engine but can't go on road because of lockdown.

Good work, Nat!! You won't miss a thing.
 
Got the head off the project 3CL, after a quick decoke I was happy to see nothing broken or cracked..  It has 38 mm intake and 35 mm exhaust valves.  They were pretty much on spec clearance wise  .Have yet to take it apart.
Pistons and bores looked unscathed but no measurements yet, but the pistons seem very stable in the bores ..as in they go up and down alright but no movement within the bore sideways or front to back. I have them soaking in diesel overnight ..seemed like a good idea.
 
I was trying to get my head around The Lone Ranger Mask comment about protecting yourself from the dust from polishing and I couldn't see how something that covers a tiny bit around your eye sockets would do anything. I think its more a Cowboy Bank robber mask that would work, eg a hanky across the nose and lower face. Might help with the virus as well. I couldn't let it go, I need help with this OCD
 
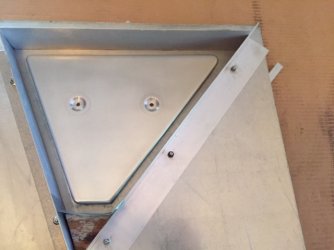
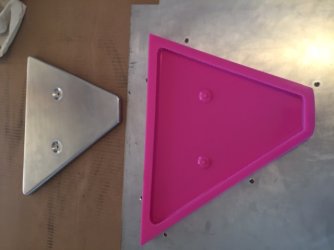
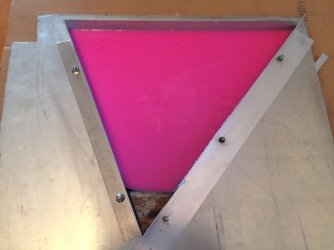
After months of intermittent work, I finally extracted my first Si mould from my SFQ sidecover plug. Now I flip it over and do it all again for the other side. Couldn't be happier with the result! Yay! Next step, fibreglass or carbone product!


Attachments

  • ready to pour.JPG
    ready to pour.JPG
    77.1 KB · Views: 341
  • mould and plug!.JPG
    mould and plug!.JPG
    60.7 KB · Views: 346
"After months of intermittent work, I finally extracted my first Si mould from my SFQ sidecover plug. Now I flip it over and do it all again for the other side. Couldn't be happier with the result! Yay! Next step, fibreglass or carbone product!"
And you can make a pair for me while you are at it.
 
Sounds good, fratello mio. With the time and work involved (and silicone ain't bloody cheap) I'll hopefully be able to sell some - might make you a pair for your birthday prezzie  :D

Only those willing to customise their brackets and ideally, chop a few bits off their SF frames, will be able to use them. They won't fit a 'genuine' SFC replica, but an SFC 'semi replica' with the original rear triangle in place would be a candidate, cos they'll have modified their frame already.

Might even be poss to add brackets to std frame so that the new bolt holes have something to screw into ... and avoid the chop factor. They'd certainly look better than the std sidecovers when people have chucked the airbox ... like the fabulous Bangalore SF2 review, cos apparently ... the std airbox and filter let water in!!! Another piece of total tossery in that article.
 
PB
Did you get the Rose coloured resin from the same shop that Ron gets his glasses?
You will have a shock when you find out its a lot smaller than you remembered it to be  :LOL: :LOL:

Jules
 
  Following the head removal I got the cylinders off yesterday, bit of a wrestle but not too testing,  pleasantly surprised to see no signs of damage to bores or pistons . Some marks on the bores from long time standing I guess but no scores or pits ,  currently measuring OOR and taper but pretty sure will end up with a hone minimum or a rebore , I will have to get my work checked by the machine shop to be certain..New pistons seem mandatory.
  On the down side  it looks like the big ends are shot. Oh and by way of a bonus the oil drain plug looks like it was just barely holding being totally wrapped in plumbing tape.  BUT..  I still have a Laverda triple in the shed!!
 
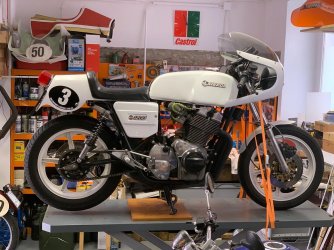
... serviced my white 1200SC today - fresh oil, new spark plugs, new brake fluid, tire pressure ok! I hardly can wait the first ride ...
Ciao, Gert
 

Attachments

  • IMG_3281xs.jpg
    IMG_3281xs.jpg
    149.3 KB · Views: 209
julian said:
PB
Did you get the Rose coloured resin from the same shop that Ron gets his glasses?
You will have a shock when you find out its a lot smaller than you remembered it to be  :LOL: :LOL:

Jules

Ha haa! It's actually silicone Julian, not resin - called Pinkysil. I guess the colour makes it easier to contrast with gelcoat or epoxy first layers. And also with mixing - 50/50 eq parts crimson and white. Easy to se when you've got a good mix.You only get 6 minutes total once you've mixed throughly. Really easy to work with. As usual, the success all comes down to prep. Will try and buy resin today and start making the actual FG sidecovers. Maybe look into carbon as well.
 
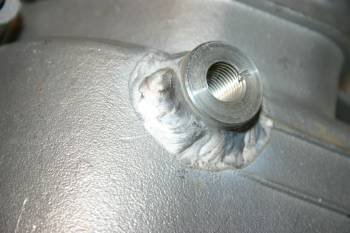
hello Paul in Cayman, don't faff around with thread repairs on your crankcases.
step 1) you can buy a 14mm sump plug from Ford that has a much longer thread than the stock Laverda one, this uses the upper portion of the thread which is not used with the standard plug, that may well sort your problem and for a very long time (not my invention but one of Keith P from UK)

step 2) do this in every time, if you have empty  crankcases. turn a top hat bush with the correct length spigot to match the case thickness and enough of a boss to hang below and weld it in place, see picture

CLEM
 

Attachments

  • sump plug.jpg
    sump plug.jpg
    21.6 KB · Views: 161
motoddrob said:
Go carbon with epoxy Q. It's lighter, stronger and wont have the fractures you sometimes get in the gel coat. 3 layers will do it and it'll be about 1.5mm thick.

Been tossing that up, Rob. There's a mob in WA (I think) who do carbon kits; I can choose the mat weight and anything else I need to do a basic job. So I need: epoxy resin, hardener, mat (any particular weave?), a rolling tool, brushes. Anything else? A proper filter mask??!!

Then, three layers, eh. What type of mould release (although with silicone moulds, it should almost not need any)? Do I brush on epoxy first, like gel coat? Is it as easy as fibreglassing? If the weave isn't too ugly after my handywork I might leave some bare around the paint as black highlights.

Or I can source carbon weave, epoxy and stuff, more locally, if I know what to order.
 
Back
Top