
You are using an out of date browser. It may not display this or other websites correctly.
You should upgrade or use an alternative browser.
You should upgrade or use an alternative browser.
Bare Naked SFC1000
- Thread starter Rockitdoc
- Start date

laverdakeith
Hero member
No lambasting here Doc just trying to save you from yourself, take the advice or leave it, it was only intended to be helpful. So far I've been canny enough to leave my GE turbofan in one piece, thought about it but the wise words of Clint rang in my ears "mans got to know his limitations" 
Keith.
Keith.

mcnicol
Hero member
- Location
- Safety Harbor, Florida, USA
Quote from: drikko on Today at 19:26
https://dl.dropboxusercontent.com/u/58865462/rgs manuals/RGS Manual Complete.pdf
Gee, that disappeared quick - error 404. Does the link expire after 30 minutes?
Simon, no, copy and paste the entire url, don't just click on it. Only the blue bit is hotlinked. Bloody Microsoft forum software :
Ken
https://dl.dropboxusercontent.com/u/58865462/rgs manuals/RGS Manual Complete.pdf
Gee, that disappeared quick - error 404. Does the link expire after 30 minutes?
Simon, no, copy and paste the entire url, don't just click on it. Only the blue bit is hotlinked. Bloody Microsoft forum software :
Ken

Simonr501
Hero member
- Location
- Lympne, Kent. UK
Thanks Ken, realised that and deleted my post.
May well be useful for the Jota 120 I hope.
May well be useful for the Jota 120 I hope.

Rockitdoc
Hero member
- Location
- Fort Collins, Colorado
drikko said:https://dl.dropboxusercontent.com/u/58865462/rgs manuals/RGS Manual Complete.pdf
Thanks Drikko!
Rockitdoc
Hero member
- Location
- Fort Collins, Colorado
laverdakeith said:No lambasting here Doc just trying to save you from yourself, take the advice or leave it, it was only intended to be helpful. So far I've been canny enough to leave my GE turbofan in one piece, thought about it but the wise words of Clint rang in my ears "mans got to know his limitations"
Keith.
No worries. Fiddling with these machines is why I have them, limited or not.

Dellortoman
Hero member
- Location
- Tasmania, Australia
Rickitdoc, it doesn't pay to be too sensitive on here.
At least Keith said "respectfully suggest ... "
Take it slowly, read the manual, continue to ask questions and keep posting pictures.
I'm playing around with the same frame and engine, stripped to the bare frame too. Tell us about your cock-ups so it'll help me avoid them!
Cam
At least Keith said "respectfully suggest ... "
Take it slowly, read the manual, continue to ask questions and keep posting pictures.
I'm playing around with the same frame and engine, stripped to the bare frame too. Tell us about your cock-ups so it'll help me avoid them!
Cam
Rockitdoc
Hero member
- Location
- Fort Collins, Colorado
Dellortoman said:Rickitdoc, it doesn't pay to be too sensitive on here.
At least Keith said "respectfully suggest ... "
Take it slowly, read the manual, continue to ask questions and keep posting pictures.
I'm playing around with the same frame and engine, stripped to the bare frame too. Tell us about your cock-ups so it'll help me avoid them!
Cam
My thin skin showing through again, hey? I get it.
It was a bad day here. Just wanted to get the case off so I could get to a serious issue. Wasn't taking my time. I know better. Especially without a manual I understand.
Anyway, I'll be goofing a lot up, so stay tuned! I'll record it all in living color
After a while you get to know who the fully qualified Mechanics are here.Thats a bit of an IN joke.BTW 100% of the advice here is well meant,excluding any from The Queenslanders.Funny arnt I.There a pretty logical bike to work on,BUT being close to hand made there are LOTS of Laverda centric details to learn.I would hate to add up the total Laverda work time experience here,it would be a very scary number

Laverdalothar
Hero member
- Location
- Germany
Hi Scott,
the bandwidth of knowledge on this forum reaches from completely unexperienced people that have never taken an engine apart or even a wheel out nor being able to service their bikes properly to experts that even have worked together with Laverda guys side by side in the late 70's and 80's, such as Piet or Phil or others, to fix issues created by bad production runs or developments. Keith with his workshop and experience belongs from my perspective to the upper range and though some of his comments sound a bit direct, they are a result of long term experience with having to fix things customers have crashed by trying to do the work on their own.
However, the engine is no rocket science and with proper reading of the green book, you should be able to disassemble the sucker completely. That said, bringing it back together is a different story that I try to avoid to having to do personally. it's also not rocket science but needs a gentle experienced advice here and there. If you get stuck, you have Scott Potter around you to help out. Personally, I would use that source and spend a day or two with him to get the sucker back together, but that is up to you to decide. It would just bear the benefit that Scott has many parts on the shelve and could help out if something is worn or damaged (such as the shifting springs f.e.). The "anty rattle" spring form the clutch needs special tools to be properly mounted, which I think Scott has. Nothing critical, just something which the engine benefits from (lower noise when clutch is pulled) and which you definitely need special tools for. Not talking about adjusting the shifting mechanism...
All the best and keep the motivation high, you are close to the peak where it goes back together, so ...
the bandwidth of knowledge on this forum reaches from completely unexperienced people that have never taken an engine apart or even a wheel out nor being able to service their bikes properly to experts that even have worked together with Laverda guys side by side in the late 70's and 80's, such as Piet or Phil or others, to fix issues created by bad production runs or developments. Keith with his workshop and experience belongs from my perspective to the upper range and though some of his comments sound a bit direct, they are a result of long term experience with having to fix things customers have crashed by trying to do the work on their own.
However, the engine is no rocket science and with proper reading of the green book, you should be able to disassemble the sucker completely. That said, bringing it back together is a different story that I try to avoid to having to do personally. it's also not rocket science but needs a gentle experienced advice here and there. If you get stuck, you have Scott Potter around you to help out. Personally, I would use that source and spend a day or two with him to get the sucker back together, but that is up to you to decide. It would just bear the benefit that Scott has many parts on the shelve and could help out if something is worn or damaged (such as the shifting springs f.e.). The "anty rattle" spring form the clutch needs special tools to be properly mounted, which I think Scott has. Nothing critical, just something which the engine benefits from (lower noise when clutch is pulled) and which you definitely need special tools for. Not talking about adjusting the shifting mechanism...
All the best and keep the motivation high, you are close to the peak where it goes back together, so ...
Rockitdoc
Hero member
- Location
- Fort Collins, Colorado
Thanks Lothar. Actually, been using Scott quite a bit. He currently has the head for looking at and touching up, if need be. Forks (after repairing busted cast AL bit) went to Show Low, AZ for rebuild, and the frame and yokes are at my consulting welder for gusset plates and redrilling botched up helicoil bit. So, as you can see, I am staying away from stuff I know requires rocket science, and getting close to reassembly. I appreciate the breadth of knowledge here and count myself at the very bottom of the steep curve. If it weren't for this group, my grandchildren would still be working on getting this thing back together. More coming.
Laverdalothar
Hero member
- Location
- Germany
Naaa - have seen the pics of your previous restoration, I trust you will manage it perfectly with a great result at the end!
And trust me - the moment you first role this baby out will be priceless. More so, after re-torquing the head and having the ability to make use of all its power and fun...
And trust me - the moment you first role this baby out will be priceless. More so, after re-torquing the head and having the ability to make use of all its power and fun...
Rockitdoc
Hero member
- Location
- Fort Collins, Colorado
Just got the gussets welded onto the RGS. Came out very nice.
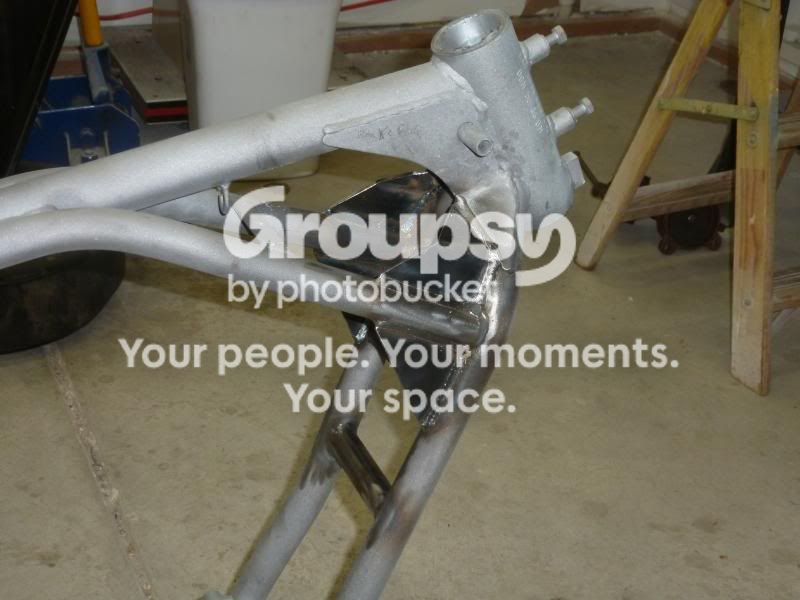
Prime tomorrow and paint.
Reassembly follows.
Prime tomorrow and paint.
Reassembly follows.

Dellortoman
Hero member
- Location
- Tasmania, Australia
How did you weld them - TIG?
Rockitdoc
Hero member
- Location
- Fort Collins, Colorado
Heli-Coiled top yoke repaired and re-tapped. Good to go!
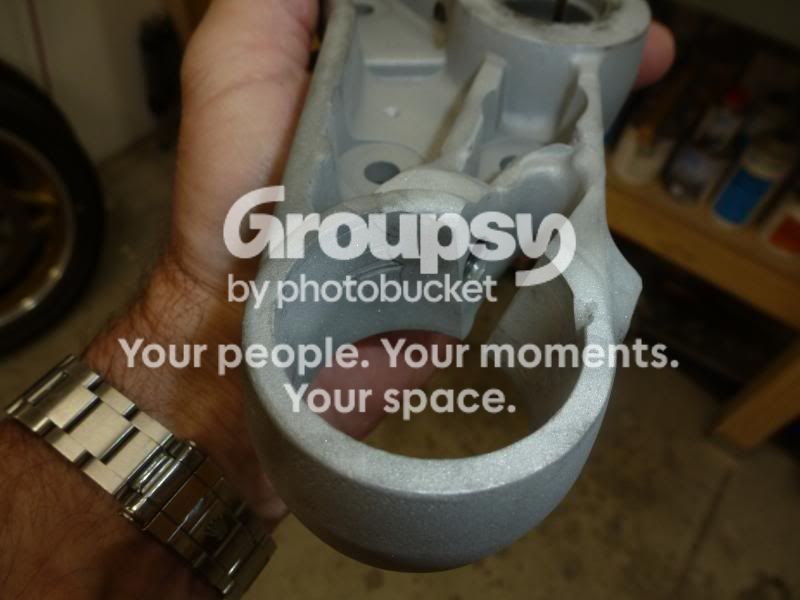
This is what it looked like before repair:
[/quote]
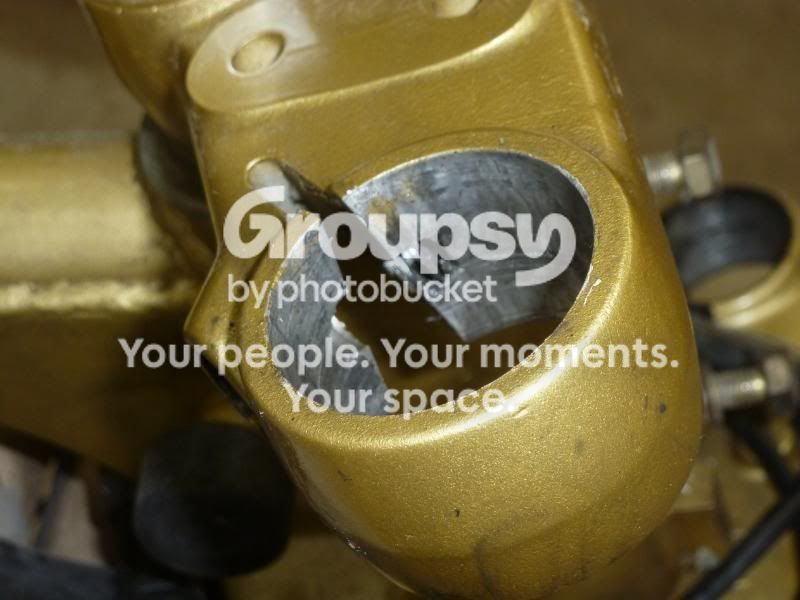
And now,
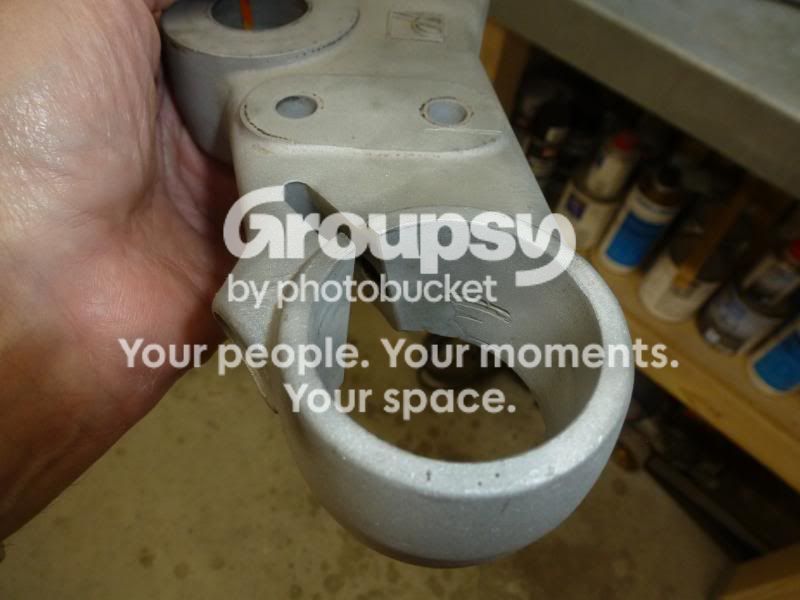
Nice! I think this is going to turn out to be a great bike again. Paint tomorrow.
This is what it looked like before repair:
[/quote]
And now,
Nice!
I think this is going to turn out to be a great bike again. Paint tomorrow.
Rockitdoc
Hero member
- Location
- Fort Collins, Colorado
Yes. TIGDellortoman said:How did you weld them - TIG?
Laverdalothar
Hero member
- Location
- Germany
looking great, Scott!
Rockitdoc
Hero member
- Location
- Fort Collins, Colorado
Got my paints out today and colored the frame, top yoke, side stand and center stand.
Here's the repaired top yoke showing (not very well) the new bolt threaded into the yoke. No waisting required. It just fits.

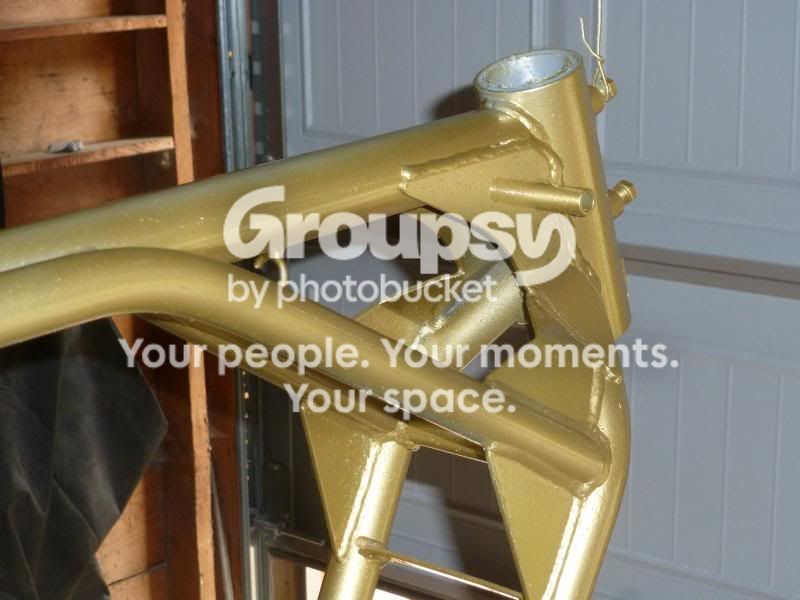
Here's a better? pic of the frame where the gussets were welded. It really turned out nice. It looks like some epoxy primer is showing through on the top rail, but it must be the light of the photo. I had a hard time getting my gun to the proper angle to get paint into the area between the top rail and the bottom, but once assembled I think this is pretty much obscured.
Now the fun begins! Trying to remember how/where everything goes back together!
Here's the repaired top yoke showing (not very well) the new bolt threaded into the yoke. No waisting required. It just fits.
Here's a better? pic of the frame where the gussets were welded. It really turned out nice. It looks like some epoxy primer is showing through on the top rail, but it must be the light of the photo. I had a hard time getting my gun to the proper angle to get paint into the area between the top rail and the bottom, but once assembled I think this is pretty much obscured.
Now the fun begins! Trying to remember how/where everything goes back together!
Laverdalothar
Hero member
- Location
- Germany
that'll be a superb bike once finished!