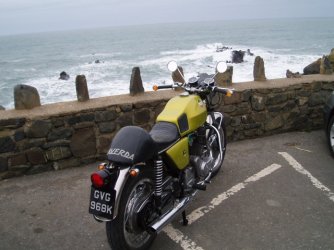
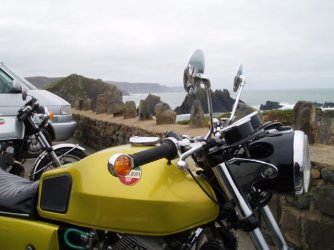
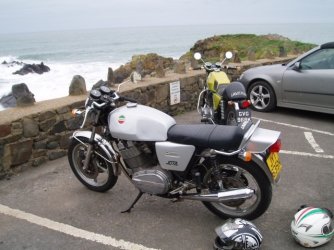
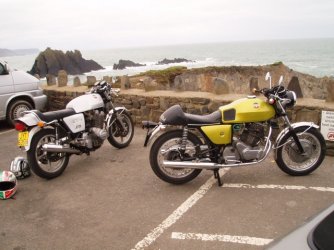
What did you do to or for or with your Laverda today?

Key piece of info in Red's opening comment -
Generally not a job that the average home mechanic can carry out, but here follows the method
that we use.

Alternative approach that minimises loss of shim size through recutting seats is to get a set of oversize valves (stem) and ream existing guides
 
What did I do for my Laverda's today? I started painting the garage walls orange, (I had a tin left over from the house) whilst explaining to my Breganze Triple how it is in its honour and letting the Zane POS know that it would never be painted Orange, because it can never deserve to be treated like its elder cousin.  :D
 
 
North Devon Coast today , very nice.
 

Attachments

  • P1010264.jpg
    P1010264.jpg
    104.3 KB · Views: 53
  • P1010271.jpg
    P1010271.jpg
    115.9 KB · Views: 48
  • P1010266.jpg
    P1010266.jpg
    82.3 KB · Views: 46
couple more-
 

Attachments

  • P1010270.jpg
    P1010270.jpg
    75.6 KB · Views: 45
  • P1010265.jpg
    P1010265.jpg
    107.9 KB · Views: 59
  • P1010263.jpg
    P1010263.jpg
    108.7 KB · Views: 61
Rob said:
Key piece of info in Red's opening comment -
Generally not a job that the average home mechanic can carry out, but here follows the method
that we use.
:) We have changed valve guides plus some seats if needed around last 50 years to amount of around 1000 engines at least. But not to every kind of engines before. I thought we are going to succeed also this time ;)

Rob said:
Alternative approach that minimises loss of shim size through recutting seats is to get a set of oversize valves (stem) and ream existing guides
I thought oversized stems are better available to engines without separate guides. Harder to get those to BMW K100, at least most of the dealers supply only the standard stem sizes, of course it is possible to manufacture a valve. But the seat must be still machined for a new valve.

This K100 head to be overhauled has quite good valves and seats but worn out guides. The valve stems itself are in good condition. Our method is to change and ream new guides, then a machining shop will machine the old valves and seats, they also grind a littlebit away from the end of the valve if necessary to achieve good shim thicknesses. I also checked that the old valves are straight on a lathe. After these I also inspect the valve seating surfaces using inspection dye, grinding compound is not used. And a lot of other smaller work stages and inspections here between.

 
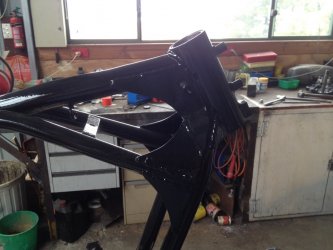
Wielded gussets in Steering head to fix crack and added swing arm doubler plates same as Laverda race bike. Top gusset gos through the frame as one piece

IMG20171014133629_Small.jpg

IMG20171014133425_Small.jpg


Frame was checked aligned by triangulation from points on pin through swing arm pivot and steering head.

IMG20171014100817_Small.jpg


Clean up still to be carried out

Will
 
Jugs_S said:
Wielded gussets in Steering head to fix crack and added swing arm doubler plates same as Laverda race bike. Top gusset gos through the frame as one piece

IMG20171014133629_Small.jpg

IMG20171014133425_Small.jpg


I was just about to write that one of our Sydney guys was going to make up a one piece top gusset ...... then looked at Jugs' profile  :o same Sydney guy, hi Will! Nice work, all those cardboard cutouts worked then eh?

Frame was checked aligned by triangulation from points on pin through swing arm pivot and steering head.

IMG20171014100817_Small.jpg


Clean up still to be carried out

Will
 
Jugs_S said:
Wielded gussets in Steering head to fix crack

Not trying to be a nitpicker, but the gussets to the horizontal tube are badly placed and create a large stress concentration at the end, and will (ironically) promote cracking.  They taper out, which is good as it gradually increases stiffness, but the end of the gusset is at the most highly stressed part of the tube (in the axis of the gusset) so you will get a concentration there.  Given there are ones top and bottom it is even worse, they are a bit offset at least, but there is a good chance of a crack forming between the ends of top and bottom gusset, right through the horizontal tubes.
The same gussets placed on the outside of the tube and welded along the neutral axis is a significantly better gusset because there is minimal stress in the tube in that axis at that point.  It's a seemingly small detail but is known to make a big difference to future cracking.  This is outlined in frame building books by the likes of Tony Foale, Carroll Smith and John Bradley.  I would cut them off and redo them on the outside.

Info provided with best intentions!  (Lavflag)
 
breganzane said:
Not trying to be a nitpicker ...

I was going to say something similar, but I didn't want to nit-pick  :D

But now that Steve has opened the can of worms, I agree with his assessment.

Furthermore, if welded against the outside of the tube, the new gusset above the horizontal tube would align with, and attach to the original steering head gusset, forming a contiguous gusset from upper spine tube, through steering head to lower tube. That's how I did mine anyway. Apologies for the crap photo. Lighting is all wrong, but you can get the general idea. Not saying mine is perfect either, but it's closer to what Steve described.

There's little to be gained by slotting the frame tube and poking the gusset plate through to the other side, because welding separate gussets to the neutral axis both sides of the tube achieves the same structural outcome with a lot less work. The way you've done yours, there's no structural integrity between the upper (original) gusset and the new one. But maybe that's not so important as avoiding stress concentrations.

On the positive side, your welds are neater than mine.  :D

Cheers,
Cam


Attachments

  • brace2.jpg
    brace2.jpg
    127.6 KB · Views: 105
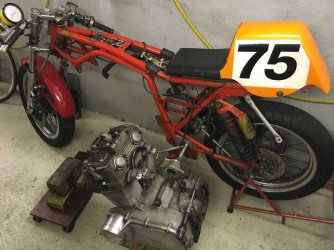
All the amazement expressed by my classic racing gang last season that my bike has 14 racing seasons under it?s wheels made me decide not to push my luck.
New Carrillo rods are on the way from Wolfgang for the genuine SFC crankshaft in my SF2. Apparently racing SFCs were known rod breakers, at the little end, but I heard this for the first time just now. Hopefully I don?t find any bad news when I press it apart. The crank was fitted in 1983 and had I guess around 80000km on the road before becoming a race bike when we moved here to the arctic in 2001. I had converted it to 90 degree in 1998 or thereabouts.
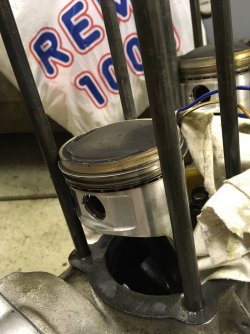
The pistons and bores look fine and there is just the normal scrap of play around the big ends. No carbon and no contact on the squish area so the 1mm clearance is on the money too. Forged pistons were fitted in 2010 after they had been used in the road bike for a few years to check them out.
A bit for me to do this winter.
 

Attachments

  • rsz_new_rod_time.jpg
    rsz_new_rod_time.jpg
    89.2 KB · Views: 56
  • rsz_pistoni_2017.jpg
    rsz_pistoni_2017.jpg
    115 KB · Views: 54
Tony bought my SF back in mid August and he still hasn't picked it up - Driving me crazy!!!!!!!

All he needs is a 1/2 ton Trekking about a couple 1000 miles before the snow flies and a couple of days off.
 
Back
Top