Anybody Printing 3d Parts?

My first ASA print was not good...it appears to have started fine but warped and came off the bed. I've made a bunch of changes and we'll see how #2 goes. I'm heading out to help a friend with a Laverda build so before I leave I'm printing a short part to see if the changes help. The part finished and it is much improved but still have some tweaking - gap between infill and perimeter...
When you do the slicer settings make sure you print it on a raft. I also spray the print bed with extra strong hairspray to help it stick.
 
I did create a brim...when I pulled it off the bed it was very lightly attached...I ran out of hairspray...just before I lost my hair 8-) but I will pick some up and study what material works best for the bed. I'm currently using the Ender glass bed that came with the machine
 
I did create a brim...when I pulled it off the bed it was very lightly attached...I ran out of hairspray...just before I lost my hair :cool: but I will pick some up and study what material works best for the bed. I'm currently using the Ender glass bed that came with the machine
Ok, so look on Amazon and grab a 3 pack of build tack, they come in various sizes. That will help, the warping is because as a likes to warp around the edges, so if you do a raft and a brim that should sort you out.
 
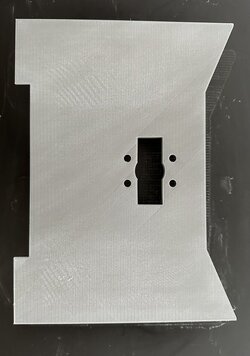
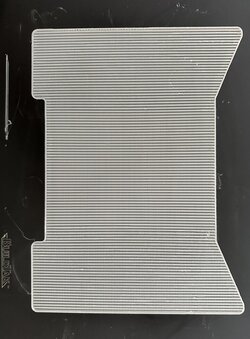
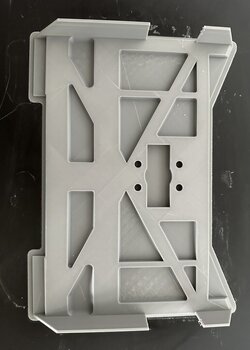
Here you go. ASA. Printed for what was the battery tray floor. Photo one is top side which my kill switch goes I. Photo 2 is the raft that it was printed on, about 5 mm wider and taller than the tray foot print, this stops warping

Photo 3 the underside with pocketing in to keep it light but strong.

Not much post processing needed at all
 

Attachments

  • EA422193-6AA7-43D2-BD53-895350BB93EC.jpeg
    EA422193-6AA7-43D2-BD53-895350BB93EC.jpeg
    160.2 KB · Views: 14
  • 6DFCF4A0-87C8-41F2-8E4C-33A2BB95CE75.jpeg
    6DFCF4A0-87C8-41F2-8E4C-33A2BB95CE75.jpeg
    214.3 KB · Views: 14
  • 52C772F1-BB58-4993-B9BA-E93B5E87286B.jpeg
    52C772F1-BB58-4993-B9BA-E93B5E87286B.jpeg
    85.6 KB · Views: 14
Interesting and enjoyable topic.
As an older retired chap, I find it great to see LAV people willing to use new technology to keep our Lovely LAVs going.

As for 'you can buy one from ...', no challenge there except to your credit card.
 
Very interesting posts,
I tried casting a couple of bits using resin and “blue stuff mold “, hard work and a bit hit and miss, especially anything complex shaped, so led me to start looking into Prusa and Ender,
Still looking btw, haven’t committed cash.
try yeggi.com for model searches, includes thingiverse
 
I ended up getting an Ender 3 V2 2 pack. - 2 refurb units for 269US, that I shared with a friend. The Ender is nice because it represents an easy entry with lots of online support. There are lots of 'upgrades" to be able to use a variety od materials but it should print ABS out of the box - enclosure is highly recommended. I have a lot of modelling experience so this was a good fit for me.
For Laverda content; Wolfgang came down last weekend to bring some parts for an RGS project that I'm helping with. The bike runs but needs some machine work to get Suzuki wheels fitted. That will get the other machines running...
 
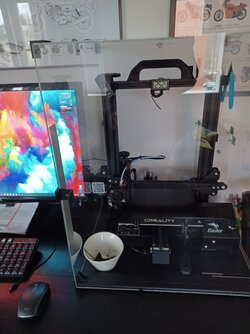
Here's my setup for printing small bits and pieces. Ender 3 Pro, bought second hand, already included some upgrades. I just built the enclosure. Just ordered some tpu-filament to play with.
 

Attachments

  • 1052022112226.jpg
    1052022112226.jpg
    110.7 KB · Views: 25
Hi:
My 3D project
 

Attachments

  • 0FA1CDF8-6552-4345-9582-C338DA03DCDD.jpeg
    0FA1CDF8-6552-4345-9582-C338DA03DCDD.jpeg
    104.6 KB · Views: 21
  • F6624292-F20D-4234-92B7-AB5DF7E724AD.jpeg
    F6624292-F20D-4234-92B7-AB5DF7E724AD.jpeg
    118.9 KB · Views: 20
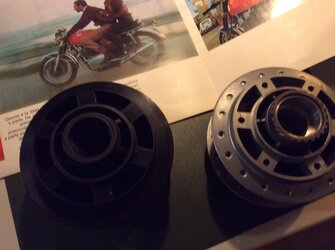
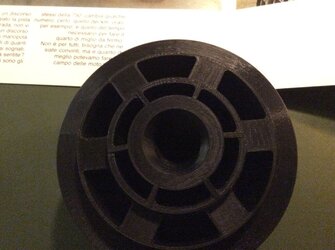
My first ASA print that didn't come out as a stringy blob...the difference was a raft. It's not perfect but a good start and could be used. There is support material in the countersunk hole...easily removed with a countersink. I may try to reorient the part for printing...
 

Attachments

  • IMG_3144.jpg
    IMG_3144.jpg
    114.6 KB · Views: 15
So, my first attempt of 3d-printing with tpu-filament. My earlier prints were with pla, so firstly I needed to change the printer settings; higher extruder temperature, lower printing speed etc. I had high expectations, since tpu prints are supposed to be flexible but still strong. They should also have good resistance to environment, UV rays, temperature, chemicals and so on…

Fingers crossed, file to the printer and let it run. So it did, for 6h30min. The model was 3.5x7.5x9cm with 4mm walls. Everything looked to be going well enough. Excellent adhesion, no warping and the print showed no signs of error. Well, minor stringing, but strings should be easily removed after the print had finished. Also the support structure (opening 5x7cm) was fine.

When I removed the print it looked excellent, just what I was looking for. But removing the supports and unwanted strings turned out to be a struggle. It took some time and effort to get the part cleaned. Also, some of the wall structures weren’t successful, layers came apart.

A start is a start, eh? I’ll need to be printing more to get things right.
 
That’s what I’m finding with ASA small prints worked fine yesterday. I tried to print my firebox cover file and it was rough. Bed adhesion , layer adhesion and and and need work.
 
Last edited:
That’s what I’m finding with ASA small prints worked fine yesterday. I tried to print my firebox cover file and it was rough. Bed adhesion , layer adhesion and and and need work.
You need to keep the filament dry. If it’s out of a low-humidity box it will suck up all the water in the air. Have a look at the filament manufacturers' website, and look at their instructions, most recommend drying the filament out in an oven at 65 degrees c for between 2-6 hours. You need to look after your filaments and store them in dry boxes. Humid filament is responsible for a huge percentage of failed prints. I use these for my filaments to keep humidity down, I manage to get 3 normal-size spools in each box, I have 16 of these boxes. they are available in the US as well
when printing, I have the filament spools in these for both print heads, its a bloody good investment.


depending on the humidity level in the polybox, I will dry my filament before printing, in my oven in the workshop if need be .

stay low and zigzag and keep your filament dry
 
Last edited:
You need to keep the filament dry. If it’s out of a low-humidity box it will suck up all the water in the air. Have a look at the filament manufacturers' website, and look at their instructions, most recommend drying the filament out in an oven at 65 degrees c for between 2-6 hours. You need to look after your filaments and store them in dry boxes. Humid filament is responsible for a huge percentage of failed prints. I use these for my filaments to keep humidity down, I manage to get 3 normal-size spools in each box, I have 16 of these boxes. they are available in the US as well
when printing, I have the filament spools in these for both print heads, its a bloody good investment.


depending on the humidity level in the polybox, I will dry my filament before printing, in my oven in the workshop if need be .

stay low and zigzag and keep your filament dry
Dry box ordered. I was trying to keep the filament in a vacuum bag with desiccant but my good intentions...well you know how that goes.. I have a question about the zigzag comment. I'm assuming it's a Slic3r setting...I'm using Prusaslicer. I did turn the light on in the enclosure as a start to keep filament dry.
 
Last edited:
In regards to my previous comments about trouble printing ASA I found another problem - apparently there was some kinda nut loose behind my keyboard...All the stringy stuff spewn about was because I tried to print a boss 6mm above the plate...no support. Today I have adjusted nozzle temp and it started great until the boss printing part...
 
Last edited:
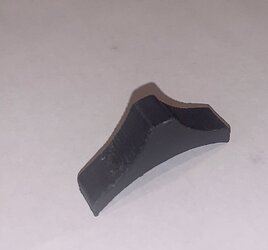
I found printer settings from tpu-filament manufacturer’s website and the result was better. Not perfect, but the part is now usable. No stringing, still minor wall layer detachment. Print speed was really slow, so it took 8h30min to finish.

I wonder if it would make any difference if the walls were printed horizontally instead of vertical. That’s not always possible, but worth a try.
 
I found printer settings from tpu-filament manufacturer’s website and the result was better. Not perfect, but the part is now usable. No stringing, still minor wall layer detachment. Print speed was really slow, so it took 8h30min to finish.

I wonder if it would make any difference if the walls were printed horizontally instead of vertical. That’s not always possible, but worth a try.
when you do prints you need to work out what orientation you want the strength in. Prints take a long time in TPU, each filament has its own timing. When you slice the object you want to print, look and see what infill you use, for TPSU if you want a firm finish you can reduce infil to say 50%, try it on a small print. When I reduce infill in slice settings, I change the shape of the infill as well, mostly I use a honeycomb infill, as that is where I get good strength from, in regards to compression, but there are other infill types you can choose from, like grids or lines etc, these all have an effect on the print time. Have a look in the forum associated with your printer, a lot of people share print profiles for different materials for your specific printer, you can get a lot of knowledge from reading about other people's projects. Once you get your settings right for the object you are printing, make sure you save it. That said, print settings that work for a spark plug sized object, often don't work for a golf ball sized object. Thats when you really need an enclosure for your printer. Sounds silly but even a fan or air conditioning blowing on the or near the print will have an effect on the print, so its best to have the printer enclosed.
 
Back
Top