Building my Jota

Piranha Brother 2 said:
BTW, DAM racing sell alloy inserts to raise the tank to clear flat slide Miks on triples. Might raise it too far maybe.,

Not required if you use Red's angled carby manifolds. Gets the carbs more level too, where the float bowls seem to be work better.
 
Sorry CK but IMHO the top looks all wrong. A compromise between the two would look better. If you want to get it totally right you have to scratch build one for your bike.
Looking at my SFC they got it right but the 74 model tank curves up towards the front. Can't really see the shape of the bottom line of the earlier tank on your photo so don't know if it has the same line as the 74 tank. You have to love your own baby doesn't matter how ugly it is :D
I get conflicting opinions on the fairing I fitted to the Motodd but as I created it it looks good to my eye.
 
Actually I tell a lie, I didn't create the Motodd fairing as it came from a OZ compliant 916 Ducati with the squ headlight fitted. I did give it a nose job and fitted the 2x 50mm HID projector lens lights.

Bike looking fantastic Sideshow.
 
motoddrob said:
Actually I tell a lie, I didn't create the Motodd fairing as it came from a OZ compliant 916 Ducati with the squ headlight fitted. I did give it a nose job and fitted the 2x 50mm HID projector lens lights.

Bike looking fantastic Sideshow.

thanks man, Im glad so many people with experience see things that I dont see, it save s a lot of work
 
When I rebuilt my Motodd starting from scratch, bare frame and motor the only bits reused from it's previous life was the suspension, rear sets and l/h switch. I scratch built all the body work out of carbon apart from the Boba front guard and said Duc carbon fairing. In hindsight I'd have done many things differently but it was a learning curve. Never played with carbon before and Boba was helpful with advise. I live in bum fuck nowhere so didn't have my motorcycling mates around that often to criticize the various ideas roaming around in my mind. I'm sort of 95% happy with the end result but it is what it is and I love it. Red did the crank and supplied the pistons as well as the GSXR rims. Red also supplied the Sache ign, ZZR250 alt and Mikunis a few years before the rebuild. This is it's 3rd and final reincarnation since I first built the bike in 1986 using my 1200TS mirage as the donor. There is something very satisfying about building your own bike. You can get carried away with the attention to details. Since I finished the Motodd I've spent the last 6 years building my house with the same level of details I built the Motodd with. It's not finished yet but I'm living in it :)

Only got myself to blame as there's nobody I can pass the blame too.

Hey CK, just drop the nose a little.
 
sideshow said:
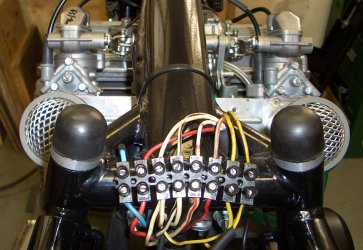
Just checked, its not on the verticals, it is on the tank rubbers at the rear, but only just above the tubes for the seat unit, I think when the tank is full and head down that will hit. I will have to make something that lifts the tank up at the rear... good spotting and pointer  thanks a bunch

Hi Todd, I have made 5 mm spacers to clear the tank from the velocity stacks.
Ciao, Gert
 

Attachments

  • CIMG4432.JPG
    CIMG4432.JPG
    101 KB · Views: 226
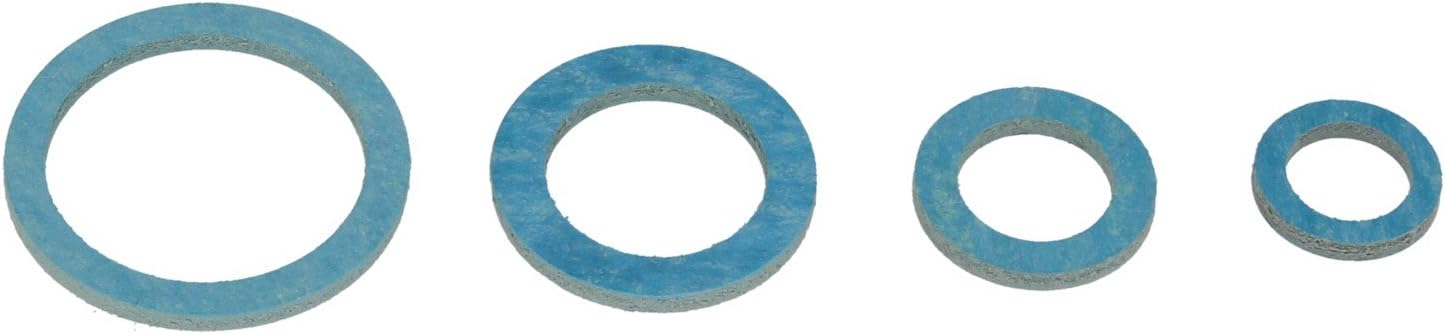
If you have no access to a lathe, you can also use sanitary gaskets. I would need to measure which one, but I have (I think) 3 under each of the rubbers since almost 30 years for the same reason as Gert :D one of these:

615QzSuSRKL._AC_SL1500_.jpg
 
motoddrob said:
There is something very satisfying about building your own bike. You can get carried away with the attention to details. Since I finished the Motodd I've spent the last 6 years building my house with the same level of details I built the Motodd with. It's not finished yet but I'm living in it :)

The SFQ has become one of those, Rob. I made half-arsed mods over the years and even though I still liked riding it I knew it wasn't what i'd hoped it would be. So this one is the final iteration. Unfortunately, unlike your house and being able to live in it while you build it, I can only have little daydreams about hitting the starter one day in the hopefully near future!!

Having said that, like your house, I will be able to continue with refinements once it's a goer. Exhaust system is close - most things in place and ready for a stack of welding. Then ... just a few little things to do ...  :-\
 
Saw a great tip for welding exhausts on Some Assembly Needed section in Adventure Rider the other day. The bloke made a notched wide hose clamp, it held the 2 sections of pipe together and flush inline while he tacked them in the notch. Brilinty simple.
 
Grant said:
Wow, a carbon fibre house!  :D

Given the size and weight of the main beam a carbon beam would have been way easier to install. Would've looked way cool too.
Not sure what the building inspector would say, not that any has turned up to check................................Yet
 
Vince said:
Saw a great tip for welding exhausts on Some Assembly Needed section in Adventure Rider the other day. The bloke made a notched wide hose clamp, it held the 2 sections of pipe together and flush inline while he tacked them in the notch. Brilinty simple.

I used two half-sections (split lengthways) of the next size up to align my headers like that for tacking, Vince, but I used radiator hose clamps and had 13mm holes drilled in the half-sections to expose the joins so the welder could tack them - worked a treat. It meant I could get the exact angle and rotation on the sections.
 
You couldn't - unless you had a VERY steady hand. I'd have preferred a single pipe with the mandrel bends, but no way I could produce a shaping template. I needed the sections to fit to the motor and bike. Once I have the three piece headers welded I may be able to have them copied by a pro mandrel bending pipe guru.
 
Back
Top