Building my Jota

Vince said:
Saw a great tip for welding exhausts on Some Assembly Needed section in Adventure Rider the other day. The bloke made a notched wide hose clamp, it held the 2 sections of pipe together and flush inline while he tacked them in the notch. Brilinty simple.

Vince, can you post the link to that posting? Would like to see the clamp used.

Thanks!
 
Laverdalothar said:
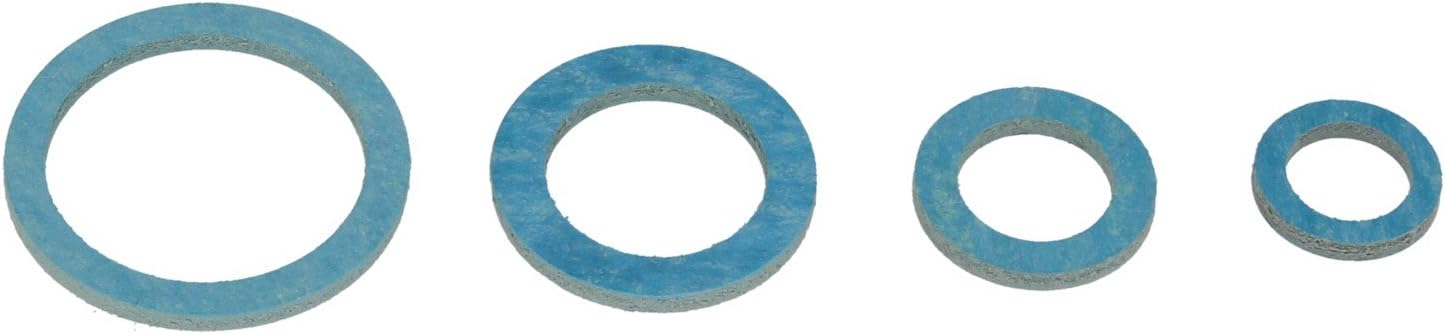
If you have no access to a lathe, you can also use sanitary gaskets. I would need to measure which one, but I have (I think) 3 under each of the rubbers since almost 30 years for the same reason as Gert :D one of these:

615QzSuSRKL._AC_SL1500_.jpg

You can't find sanitary gaskets any more because of Covid.
People have been hoarding them.

Paul
 
That took some looking for, I know its a Harly but the builder is quite a talent.
https://advrider.com/f/threads/103-shovelution.1429600/page-8
 
so I had a quick hour in the shed last night, while the family was off to visit friends...
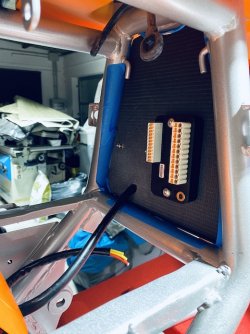
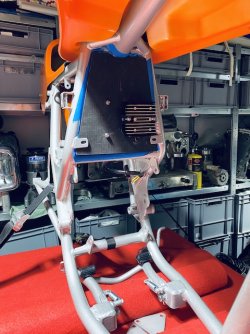
so I started doing the first carbon mock up of the electrical bulkhead as I call it. This is just 4 mm thick c-plate, I wanted to get the regulator on so I could see where everything else would go. As I didn't de tab the bike the reg went on what I think was the old starter solenoid bracket... thats were its stayng as the mounting hole centres were spot on the same on the bracket as they were on the reg. Those fasteners that hold the regulator on, are also two of the fasteners that hold the bulkhead in, so for me thats just win win. Everything will be rubber mounted, but for now its just being put in place. Having the reg on the outside gets it some air , and leaves space on the inside for the motogadget  M unit , and everything else. There will be a cover plate that covers everything on the backside area once I see how much depth will be taken up from the rest of the electrics. Once the revival starter solenoid arrives, I will work out where that goes... most likely on the outside face of the bulkhead, next to the reg. When everything has found its home in this area, I will lay this c-plate on the one that will be the real one and transfer all the holes over, the final one will be painted silver as close as we can match it to the frame.
I have swaged up battery and starter motor cables, I have both 16mm2 and 25mm2, I found flexible 25mm2 wire so if I can I will use that ( clearly both positive and earth will be the same gauge). A mate has the hydraulic swaging tool, so I knocked them up on that, all in for both sets of cables it cost me 12 euros to make them in material cost. Things are getting further along now. I discovered I have to make a new axle/ front spindle for the CRS forks, so thats next on the plan, so I can get the front wheel mounted and the brakes sorted. the photos are the front and backside of the bulkhead with reg and M unit in place, the M  Unit may move, but for now thats where it is.
 

Attachments

  • IMG_4031.jpeg
    IMG_4031.jpeg
    141.8 KB · Views: 371
  • IMG_4033 2.jpeg
    IMG_4033 2.jpeg
    158.5 KB · Views: 371
It may amount to nothing, but it's preferable to have the regulator cooling fins oriented vertically for best heat dissipation.

cheers,

bazzee
 
Vince said:
That took some looking for, I know its a Harly but the builder is quite a talent.
https://advrider.com/f/threads/103-shovelution.1429600/page-8

thats a pretty cool article..
 
Vince said:
That took some looking for, I know its a Harly but the builder is quite a talent.
https://advrider.com/f/threads/103-shovelution.1429600/page-8

Thanks for that. I'd never would've looked at a Hardley build thread...
 
It was kind of ok and then the tank mods really improved the look. That section of Adventure Rider has some Insanely talented builders. One lived in Alaska and does brilent stuff. Another from Vic has build a KTM single for the same Bears racing that the Redax blokes do. Some interesting comments made.
https://advrider.com/f/threads/ktm-690-supermono-and-other-ghetto-race-bike-builds.1422469/
 
bazzee said:
It may amount to nothing, but it's preferable to have the regulator cooling fins oriented vertically for best heat dissipation.

cheers,

bazzee


I checked with the tech guys at Rick's , and its all good mounted this way
 
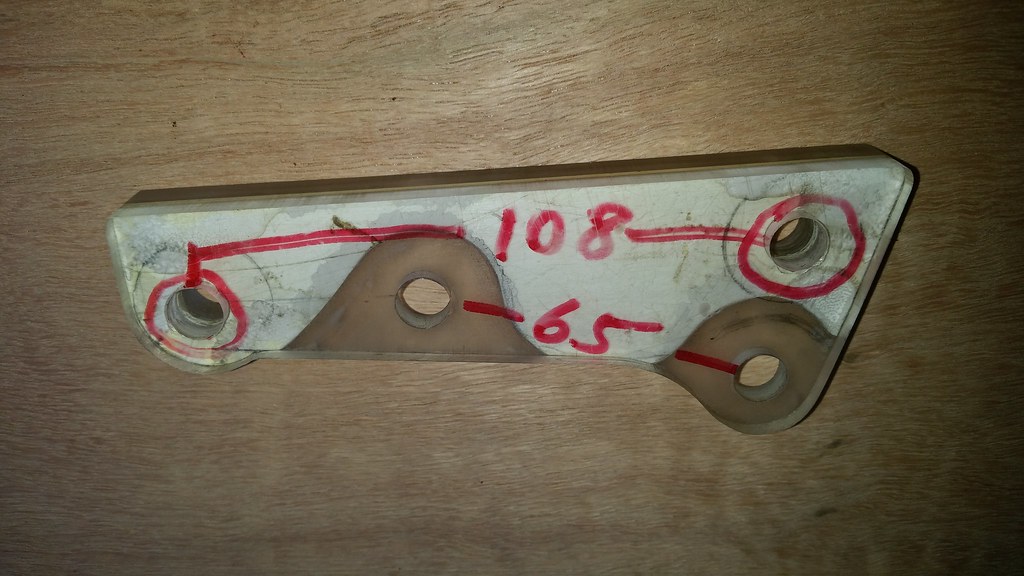
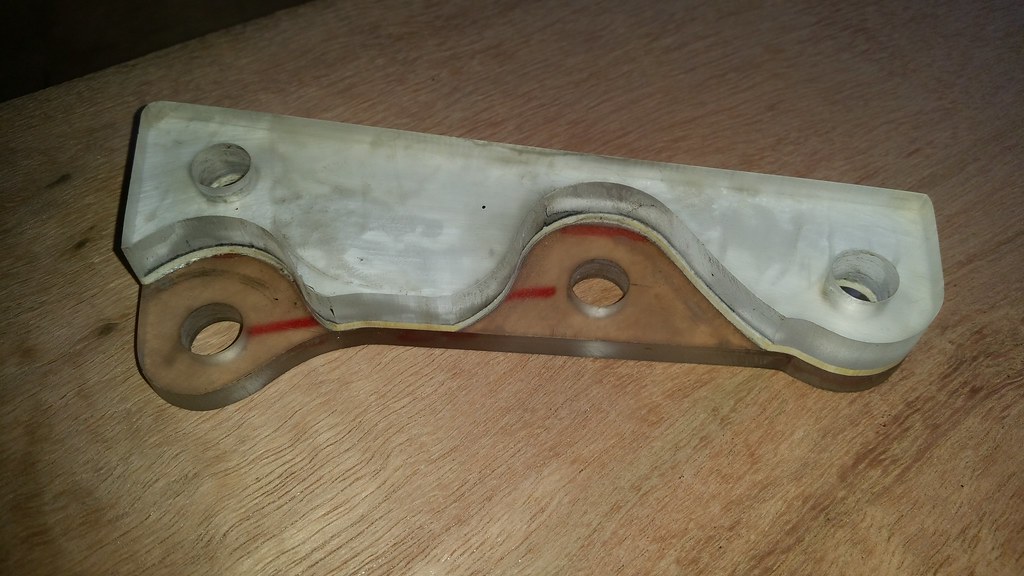
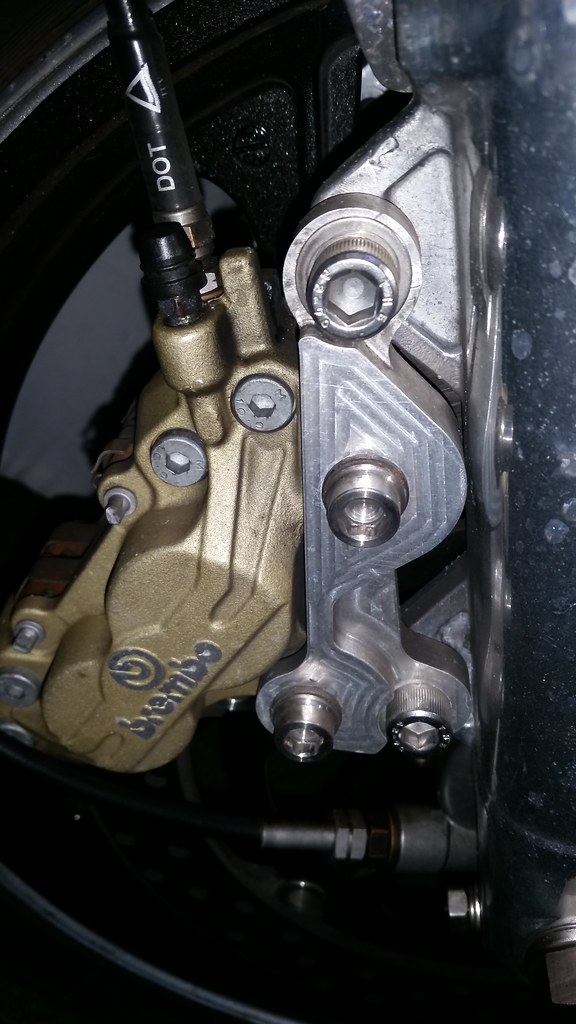
So i was going to design a calliper adaptor for the brake caliper to my CRS forks, and randomly looking through other bike builds online, I saw that my friends at Revival Cycles in Texas, had used the same forks, same brake caliber and 280mm discs on one of their builds. Their adaptor  was roughly similar to what I had started to draw up. I had a quick chat with them, and to save re-inventing the wheel, they  kindly gave me the 3d .step file of their adaptor. Unless you have designed these things, as simple as they look, they actually take a lot of work to do, so it was great that they helped me out, and with no charge, which in itself is very unusual in this day and age. I did offer to pay for the drawing, or to have them mill a set, but they refused and shared some knowledge .

So the next step, I wanted to mock up the brakes in place , and a mate of mine has a 3d printer onboard the yacht he runs. Due to covid, they are cruising the islands around here, a quick WhatsApp with the file attached in a message saw them put my sample calliper adaptors in their build line. They use their printer for all sorts of things, its cheap, cheerful, and really handy. We did some changes to set ups on their race set up last year, and they printed sheaves to replicate the new set up, which allowed boat builders to come in and make carbon sheave boxes etc , while the real sheaves  were being machined up with my guys in Milan. 3 d printing can save a lot of time!

Each adaptor takes just over 4 hours to print, uses a few  grams of recycled plastic, and not much electricity. As this is a budget printer, the finish is a bit rough, but its accurate where its important with hole centres etc. Im not going to spend any time cleaning the printed items up, if they are found to fit, they arrive tomorrow when the yacht is back in port where my office is. So hopefully by monday I will have sent the file onto my machinists mates in Milan, and have them mill up a set.


<iframe src="https://player.vimeo.com/video/449608609" width="640" height="360" frameborder="0" allow="autoplay; fullscreen" allowfullscreen></iframe>
<p><a href="https://vimeo.com/449608609">3d print</a> from <a href="https://vimeo.com/user16136896">Todd C</a> on <a href="https://vimeo.com">Vimeo</a>.</p>
 
Very cool indeed. Beats my cardboard templates thass fo' sure. And you're right about it being tricky - some odd angles that you have to get right. I've handmade them for Brembo 08s on VFR forks and 4-spot Tokicos on early gixxer forks. A lot easier when it's just flat plate (the former - the latter were a lot harder!).
 
I tried to make templates for 4 spots out of customwood its a lot harder than it looks i ended up getting pete smith from epicycles to make them on his cnc only took 6 months
 
I have 100 parts being 3D printed by my daughters boyfriend, cheaper and faster than getting the originals, which are injection moulded, from my Italian supplier.

Someone here mentioned about flex of 3D printed plastic, these are made from PLA and are like a spring clip, and work a treat!

I also have him making me some plastic interior clips for my car, which I broke trying to stop a rattle in the dashboard.
Hope he finishes soon, if my daughter dumps him, I'll be in the shit. :D
 
A brilliant read thank you, I just love your attention to detail.

I was interested in your choice of colour as you mentioned that you were not really a fan of orange and you have gone with your heart on every other detail. Personally I think it's a smart choice and will really link the more avant garde detail back to the iconic Jota theme, but did you have another colour lurking at the back of your mind? Will it come back to bug you?

 
Back
Top