wanted - moto giro bike

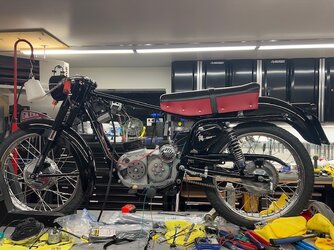
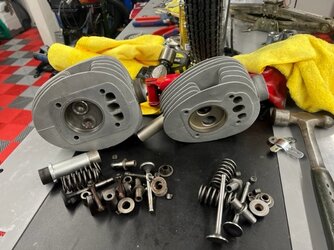
long saga with the Gilera head, obtained new guides, valves collets and caps, springs, then turned out the new valves were too long and the head was f***ed, sourced another head from Italy, plus a bunch more bits and bobs, mixed and matched everything, and the machinist returned to me today one completely reconditioned and useable head.

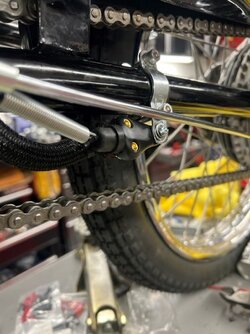
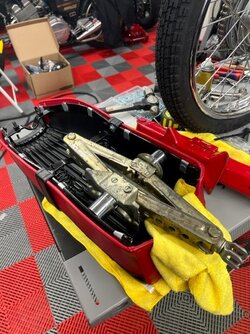
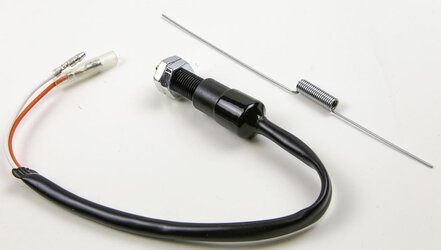
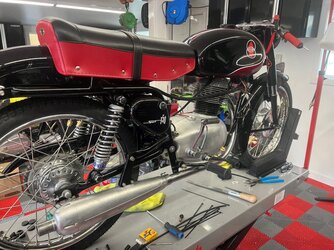
have had quite a bit of Court time recently so not had much time for the project, but free now for a few days, hoping to finish the wiring, install the head/exhaust/carb, and try and fire the bike hopefully within the next week or so. Lots of little details still to sort. Lots of little modifications required to make things fit nicely, brute force modification to the seat frame, rigging up a rear brake light trigger switch and mounting, etc., etc..

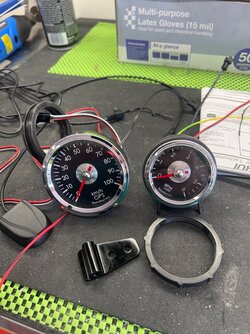
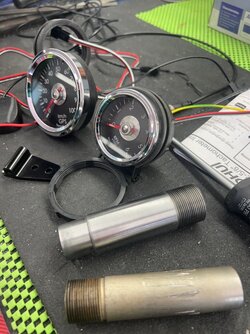
a couple of weeks ago I custom ordered a GPS speedo and matching electronic tach from SpeedHut, going to have to modify the headlight bucket a bit to fit the GPS speedo (hoping there is still enough room as I already have the big LED headlight assembly fitted), and figure out where and how to mount the electronic tach once they arrive, they are still a few weeks away, but don't need them to try and get the bike running.

Dellortoman (Cam) has been a huge help re the electrical wiring from scratch, integrating the VAPE 12 volt charging system, digital ignition, regulator rectifier, modern coil, etc with a wiring diagram for a scratch built harness for the rest of the bike. I agonize over each and every bloody wire, I hate electrickery....... Thankfully a very basic wiring harness, no turn signals, I am using really high quality components, connectors, shrink wrap on each connector, and so on.

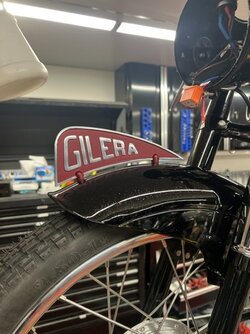
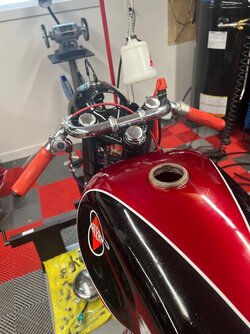
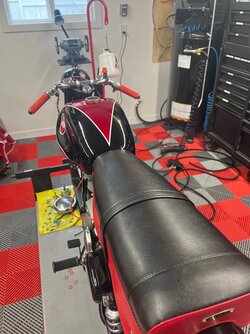
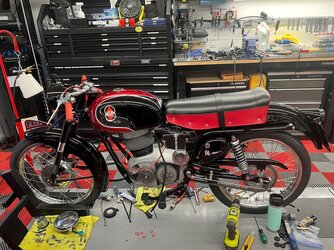
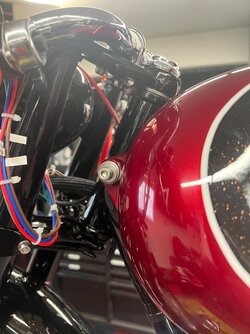
a couple of photos taken this evening
 

Attachments

  • Gilera progress 1.jpg
    Gilera progress 1.jpg
    91.8 KB · Views: 39
  • Gilera progress 2.jpg
    Gilera progress 2.jpg
    81.3 KB · Views: 35
  • Gilera progress 3.jpg
    Gilera progress 3.jpg
    113.9 KB · Views: 36
  • Gilera progress 4.jpg
    Gilera progress 4.jpg
    84.8 KB · Views: 39
  • Gilera progress 5.jpg
    Gilera progress 5.jpg
    116 KB · Views: 40
I recently wired up a kit car for a bloke, for which he provided all of the components. He had bought exactly the same (Wipac) brake light switch as the one in Paul's 2nd photo above. His intention was to fit it to the gear lever as a reverse light switch (the car uses a motorcycle engine so has a separate reversing gearbox). He said it was the same type of switch as on his old BSA A10 half a lifetime ago. He actually dug around and found the old BSA switch and he was right, it was identical.

The problem was that the switch was nowhere near sensitive enough for the application. It has quite a strong internal spring on the switch plunger so it requires a lot of stretch in the external spring to overcome the internal spring and make it switch on. Then it needs a long stroke back in the other direction to make switch off again (must be a lot of friction in the switch plunger). There was about 25mm of "dead band" between on and off. And to make matters worse, it wouldn't always switch at the same lever position every time. I declared it to be a useless piece of crap and ended up replacing it with a completely different arrangement using a microswitch.

That Wipac switch was apparently OK for a BSA that has a very long travel in the brake rod. But anything with travel of less than about 30mm might have a problem.

Paul, if you have difficulty getting it to switch on and off reliably, I'd suggest you replace it with the more sensitive type of switch typically found on Japanese bikes. The ones that come without pre-bent hooks on the spring are good because you can tailor the spring length to suit the installation. You'd need to fabricate a different style of mounting bracket.

bls.JPG
 
Hi Cam, and all

For the rear brake switch I played with spring tension and kept checking with an ohm meter until I got it to switch on/off reliably with the bike on the work table. I mainly need the rear brake switch to get the bike through government inspection to get it road registered. Longer term if it plays up as Cam notes there are other options. No issues making a new mounting bracket if required.

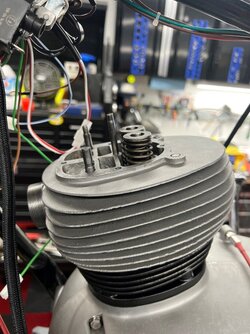
I am on to another challenge. The replacement head casting sourced from Italy (sold to me a a Gilera 150 head) and now fully reconditioned, turns out to be 10 mm thicker than my original, meaning the push rods are 10 mm too short, the cylinder/head studs are 10 mm too short..... Also the intake manifold tube is too large, 25 mm od instead of 22 mm od, etc. I can solve the intake tube issue fairly easily, either on a lathe or with a larger carb. I can solve the head stud issues fairly easily by making longer head studs. When the head I have had turned out not to be salvageable, replacement 1950's Gilera single heads are not exactly common, so I took what I could find on eBay Italy and had it shipped, I will have to figure out how to make it work. You can see in the photo the rear cylinder/head studs are flush with the top of the head rather than proud by 10 mm as required. One of the front studs is hollow and carries oil to the valve train from the oil pump, that may be a bit more of a challenge:eek::eek:

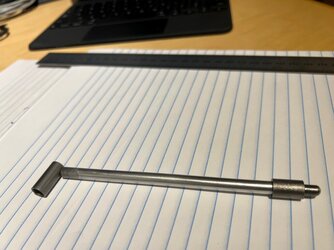
not sure what to do about push rods material. The existing push rods are assembled from little cast end pieces for each end, with a tube in between, nothing to lose so I am going to see if a longer tube can be made and inserted...... I have already managed to get one of the cast ends off without damage, looks like a light push fit only.... bloody hell, nothing is simple. I wonder what material to use for longer push rod tubes? Any knowledgeable suggestions?
 

Attachments

  • Gilera push rods 1.jpg
    Gilera push rods 1.jpg
    159.4 KB · Views: 21
  • Gilera push rods 2.jpg
    Gilera push rods 2.jpg
    97.2 KB · Views: 21
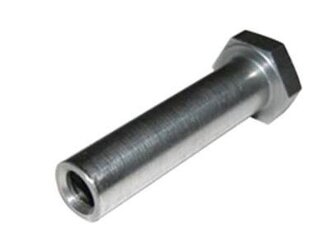
Can you counterbore the stud holes in the top of the head so the nuts will be recessed? If there's not enough metal to do a full counterbore big enough for the nut, washer and a socket wrench, you could do a narrow counterbore to take a female bolt and still have a washer under the hex head.

Female bolt.JPG


It's a while since I've had anything to do with pushrods. Nearly every engine I own is OHC.

It's not obvious from your photo what they're made of. I'd guess aluminium or chrome moly steel. Aluminium alloy is pretty common for pushrods, so is steel. Some are solid (I think Harleys use solid aluminium), but I'd guess that most are hollow to reduce reciprocating mass. You should be able to identify what they're made of pretty easily.

You can buy pushrod stock from sources like Kibblewhite. But it might be simpler to buy some tube from a supplier of engineering metal stock. If they're aluminium, you'll want a hard alloy. Ask for "aircraft grade", which would be a 7000 series alloy, although a 6000 series alloy would probably be OK. You could also source some pushrods from another engine if they're long enough to cut down and fit your ends. Might pay to check out some bike or car breaker yards.

If you really want to add some internal bling, get some titanium pushrods made up!
 
I am stalled now waiting on longer push rods, longer engines studs, machining of an inlet stub, and productions and supply of SpeedHut gauges.

likely 4 - 6 week delay now, I am guessing.

will give me more than enough time to do final assembly fettling, wrapping of scratch built wiring harness, and adjustments. Current state of the project, see photos
 

Attachments

  • Gilera April 2022 5.jpg
    Gilera April 2022 5.jpg
    144.4 KB · Views: 34
  • Gilera April 2022 4.jpg
    Gilera April 2022 4.jpg
    163.1 KB · Views: 36
  • Gilera April 2022 3.jpg
    Gilera April 2022 3.jpg
    239.8 KB · Views: 36
  • Gilera April 2022 2.jpg
    Gilera April 2022 2.jpg
    126.2 KB · Views: 36
  • Gilera April 2022 1.jpg
    Gilera April 2022 1.jpg
    200.3 KB · Views: 35
I agree with Cam, counterboring and using a sleeve nut may be easier than finding/making longer studs

Pushrods. I use 6061 alloy tube with as you found, the ends push fit. A drop of loctite or similar high temp adhesive eases the mind somewhat.

What you've got there as in the pic, looks a lot like small BSA pushrods. In which case you may find they are solid rather than tube
6061 round bar - either bigger with the ends machined down - or you may be able to source the correct OD.
 
Push rods are solid round bar. One of the studs is hollow and serves as oil delivery to the valve train. White cable ties in the photos are temporary, will be cut off once the home made harness is properly sleeved and wrapped.

I went back on eBay Italy. Same seller who supplied the thicker head, and purchased the pushrods and engine studs from the same engine the head came from. Path of least resistance, just a lengthy shipping delay from Italy to Canada even with “express” international shipping selected.

Closed up the wiring harness, stuck in a fuse, and hooked up battery. Have lights, low and high beam, tail light and brake light, and horn. Original high/low beam switch is a little dodgy. Going to take that apart again and see what the issue is.

Need a third hand (or leg) to kick the bike over while I ground the plug and check if I have spark…,.. I will either be very happy or very sad….. EDIT - very happy, hot snappy spark at the spark plug even with the brand new old stock Magnet Marelli pink vintage spark plug, now need to find a modern equivalent plug. I static timed the new digital ignition to my own TDC mark, hopefully when the time comes the ignition timing will be close enough to get the bike running.....
 
I reckon the short pushrod issue is an opportunity rather than a problem. I'd be inclined to ditch the solid bar pushrods and go with hollow tube for a lighter valve train. Makes life easier on the cams, followers, valve springs, etc. Might even give you a few extra revs when you're dicing with another rider on the twisty mountain roads during the moto giro. :)

Well done getting all the electrical stuff working. There's no stopping you now. Next thing you know, it'll have indicators, a starter motor, hazard lights, side stand switch, heated grips, USB charging port ...
 
just an unusual measurement that I had to figure out...... Italian language manual says the Gilera 150 engine olio is 1.35 kg. Set me off on a conversion journey, needed to know specific gravity of engine oil to convert liquid kg to liters..... 1.35 kg turns out to be just over 1.53 liters. I found it interestingo_Oo_O;) Now setting out to figure out what each of the four dip switches on the VAPE ignition box does......
 
just an unusual measurement that I had to figure out...... Italian language manual says the Gilera 150 engine olio is 1.35 kg. Set me off on a conversion journey, needed to know specific gravity of engine oil to convert liquid kg to liters..... 1.35 kg turns out to be just over 1.53 liters. I found it interestingo_Oo_O;) Now setting out to figure out what each of the four dip switches on the VAPE ignition box does......
Laverda service manuals are also known to express oil requirements in kg.

Paul
 
When a VAG dealership were checking whether another dealer had double filled the sump on my Skoda they did a 'drain and weigh' twice with about 3 or 4 weeks between each. Obviously weight is more accurate than volume, as it takes into account how much is oil and how much is contaminants that may have a different specific grav.

(that dealership - whose 'technicians always double check each others work' - HAD double filled it too)
 
found suitable push rod titanium tube stock from an online vendor. Went to order (for $60 USD), got to checkout, cheapest shipping option was another $60 USD, didn't order....... now going to look locally.....

as for measuring amount of oil in kgs, that was completely new to me, but I did manage it to figure it out.....
 
Speedhut gauges custom built to order, electronic tach, GPS speedo, just arrived. Speedo will be relatively easy to install. Bike has never had a tach, so going to have to figure out where to put the tach and make some sort of mounting arrangement. When I wired the bike I have already run a tach signal wire to the speedo bucket, so wiring itself should be relatively straighforward.

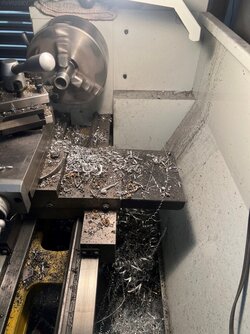
Friend with a lathe helped me out with my carb intake size issue, "we" (me watching, him doing the work) adapted an intake to suit.

Same friend suggested he wlil help out making new longer push rods once I source some approriate tube, he is suggesting something he called mandrel drawn tubing and pointed me to a local Calgary source.

I have done some adapting to the seat mounting, raised the seat significantly to hopefully provide a little more leg room.

I filled the engine with oil last week, I have a very small engine case leak, need to investigate and figure out how to solve that.

headed out to the garage to start on the gauge wiring and mounting process.....
 

Attachments

  • Gilera details.jpg
    Gilera details.jpg
    173 KB · Views: 24
  • Gilera Speedhut gauges.jpg
    Gilera Speedhut gauges.jpg
    193 KB · Views: 24
  • Gilera intake.jpg
    Gilera intake.jpg
    186.3 KB · Views: 24
Get yourself some flush cut side cutters for those cable tie ends 😏
Bike looks lovely 🙂
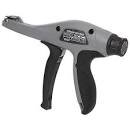
Get yourself a used Panduit cable tie gun. You adjust it to the tie-wrap size and it tensions and snips flush when you squeeze the trigger. They are about $200US new on Amazon and less than 1/2 that used on CL. There is a stamped model and a rounded ergonomic model, either way no more meat hooks!
1651358683564.jpeg
 
Last edited:
Looking great Paul. I have the same tool you used for adjusting your seat, Toyota corolla if I'm not mistaken, comes in very handy! Looking down the barrel of a week of valuable shed time, after 3 days of covid heavy fever. This virus is nasty!
 
Hi Marty

I had the first two CoVid shots, then the third (booster), and still caught CoVid in January 2022. Laid me out flat for two weeks, very unpleasant. Left me tired for quite awhile longer. Hope you feel better soon.
 
Get yourself a used Panduit cable tie gun. You adjust it to the tie-wrap size and it tensions and snips flush when you squeeze the trigger. They are about $200US new on Amazon and less than 1/2 that used on CL. There is a stamped model and a rounded ergonomic model, either way no more meat hooks!
View attachment 63389
I had no idea such a tool exists. I just checked Amazon Canada, they have various Panduit models, and a large selection of Chinese knocks offs for a fraction of the price of the real thing. The tool looks quite handy. Thanks.
 
Back
Top