wanted - moto giro bike

1 earth wire
1 wire for ignition
1 wire for lights
1 switch
Put a fuse if you're anxious
Finished

Paul
At least 4 wires just for the head light... easy, but not THAT easy.

piranha-bro2, when you say it is dead easy that means you already know what you are doing. Not for me, I'm making this up as I go along....... Electricity is not my friend
A complete wiring loom made from scratch for such a tiddler shouldn't take much longer than a Saturday arvo, beers included. ;)

Make a list and sketch yourself a diagramm so you don't forget anything, adding the (forgotten) rear light wire to a finished loom is a pita...

piet
 
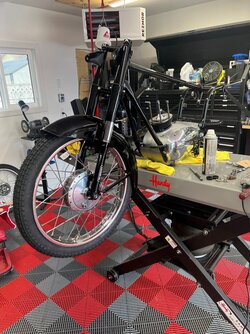
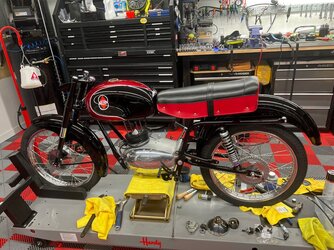
assembly progress. It is on its wheels.....

still needs a bunch of stuff,including piston rings and the head once new valve guides etc are installed, wiring harness, etc., but moving along. Seat needs some fettling, in the last photo it is sitting on top of its rear mounts, need to spread the seat frame and do a bit of tweeking to get it to fit properly, I just set the tank on for the photo, then took it right back off.

with all new fasteners, fresh chrome, and fresh paint with a ton of clear, assembly is slow, lots of filing, tapping threads, a bit of grinding here and there, but visible progress(y)(y)(y):D
 

Attachments

  • assemble 9.jpg
    assemble 9.jpg
    171 KB · Views: 49
  • assemble 10.jpg
    assemble 10.jpg
    233.1 KB · Views: 43
  • assemble 11.jpg
    assemble 11.jpg
    231.4 KB · Views: 49
  • assemble 12.jpg
    assemble 12.jpg
    227.1 KB · Views: 49
assembly progress. It is on its wheels.....

still needs a bunch of stuff,including piston rings and the head once new valve guides etc are installed, wiring harness, etc., but moving along. Seat needs some fettling, in the last photo it is sitting on top of its rear mounts, need to spread the seat frame and do a bit of tweeking to get it to fit properly, I just set the tank on for the photo, then took it right back off.

with all new fasteners, fresh chrome, and fresh paint with a ton of clear, assembly is slow, lots of filing, tapping threads, a bit of grinding here and there, but visible progress(y)(y)(y):D
Really impressive progress in a short time frame. Isn't it nice working on such a lightweight bike for a change?
 
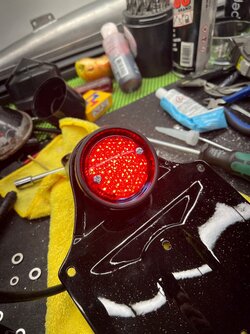
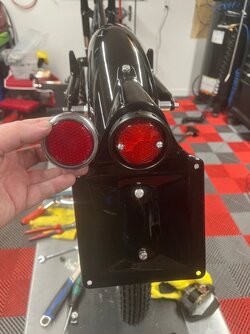
LED tailight conversion, running light, brake light, and licence plate light. The original 6 volt bulb type tail light unit has a chrome trim ring, otherwise I think the new LED unit looks pretty similar and quite unobtrusive, until it is activated. Yes, I know I cracked the LED tail light lens cover in the drilling and adaptation and fitting process, I have already ordered a new one, has to be perfect.....:rolleyes::oops:

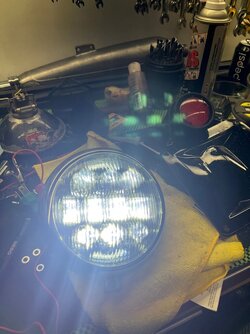
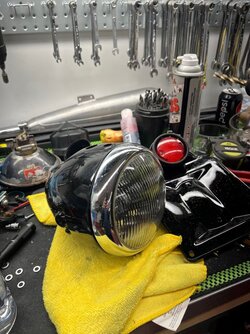
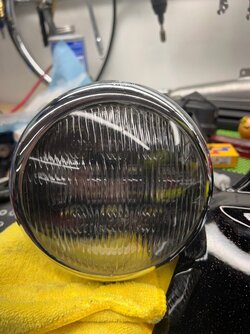
LED headlight conversion, daytime running lights, low beam, high beam, H4 type headlight plug in. I adapted the entire LED unit into the stock headlight bucket, in the stock chrome trim ring, behind the stock ribbed glass. Not to everyones tastes on an old bike, I know. I don't care. I want as much reliable lighting as I can get. Can't really see that the headlight is anything other than stock until it is turned on.

while I had the 12 volt battery on the bench to test headlight and tail light, I also just figured out that the stock horn that came with the bike does not work. I filled it full of penetrating oil tonight, and may drill out the rivets and see if is is salvageable, but if I can find something new that looks the part I will just buy a new one. Everythign has to work as the bike has to pass a mechanical inspection to be able to be road registered and licenced, which it has to be to run the Moto Giro.
 

Attachments

  • LED lighting 6.jpg
    LED lighting 6.jpg
    122.1 KB · Views: 32
  • LED lighting 5.jpg
    LED lighting 5.jpg
    180.3 KB · Views: 30
  • LEd lighting 4.jpg
    LEd lighting 4.jpg
    159 KB · Views: 26
  • LED lighting 3.jpg
    LED lighting 3.jpg
    147.9 KB · Views: 27
  • LED lighting 2.jpg
    LED lighting 2.jpg
    167.5 KB · Views: 28
  • LED lighting 1.jpg
    LED lighting 1.jpg
    118.2 KB · Views: 32
You could probably shout louder than the horn anyway. When you go for the roadworthy inspection, press the horn button and yell "BEEP" at the same time. Maybe the tester won't notice that it's not the horn that's making the noise.
 
A boat I worked on once had it's annual inspection before the engineer had fixed the fire alarm test system. The engineer hid under the dash in the wheelhouse and when the inspector pressed the test button the engineer connected the power to the alarms, "all good here". Fark.
 
The first fire test on a $100,000,000 high rise I worked on had fire sprinklers being glued onto ceilings with no pipes connected.
 
Dodgy installation stories eh?

My first engineering job was in a paper mill. I was out in the plant on some job when I leaned against a safety rail on a mezzanine landing above the paper machines to look down at the machinery below, and the rail was loose. If I'd leaned much harder I could have fallen to my doom and ended up as a nasty stain in a sheet of newspaper.

The railing was fabricated from 2" galvanised steel pipe. Each stanchion had a flange welded to the bottom that was dyna-bolted into the concrete floor with 4 bolts. It looked solid enough to stop a truck, but closer inspection revealed that each stanchion only had one bolt installed. The other 3 had sawn off bolt heads glued into the flange holes. I could slide a 6" steel rule along the floor and under the flange where the fake bolt heads were.

I have no idea who did the installation or how long it had been like that. But it would have almost have been easier to drill all the holes and do it properly than to drill/bolt one hole then saw the heads off 3 bolts for every stanchion and glue them all on. There were probably 10 or 12 stanchions in that part of the mezzanine, and countless others elsewhere in the plant.

I told the chief maintenance engineer and he didn't believe me until he checked for himself. Later that day there were a couple of guys with masonry drills installing the missing bolts. Guys working in the plant were approaching safety railings with suspicion for months, and checking the bolts.

Apologies for drifting off topic Paul. I'm enjoying the bike build.
 
I have done that on occasion where I couldn't drill through a reo bar and it is needed for cosmetic reasons but there is zero chance I would leave out enough to compromise safety, just the thought of Coroners Court would stop that. BTW that sprinkler thing was fixed, this was the initial inspection of a temporary section of the Building I was an apprentice on, if you're from Sydney it's the Nervi curved Mushroom-shaped building adjacent to Martin Place Rail Station and part of the MLC development for the Commercial Travels Association. One crazy shaped building.
 
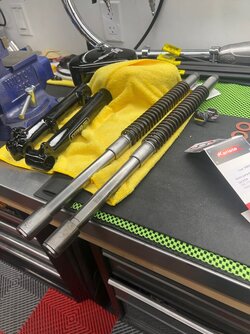
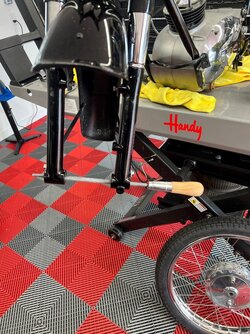
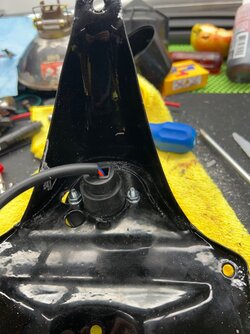
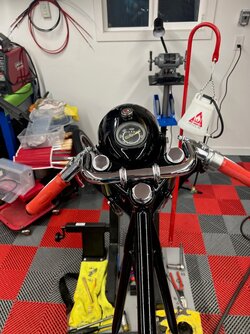
had to take the entire front end back off after I noticed an installation error, have the upper fork legs properly reinstalled now, installed the handlebars finally (had to drill the top triple tree for the mounting clamps to clear away the thick fresh paint and clear), fettled the stock headlight bucket to accept the new aftermarket "heavy duty" ignition switch together with the old speedo and the LED headlight conversion, took me quite a while to make it all co-operate together. A photo.

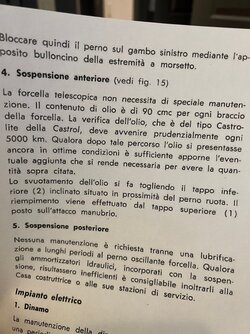
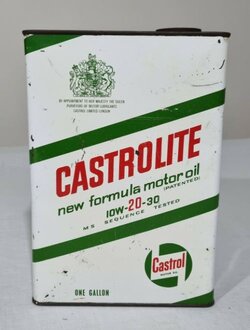
while the lower fork legs are still off I thought I might as well fill with fork oil, then realized I have no idea as to fork oil weight or volume. Going through the four Italian language manuals and parts I think I have found the information, atatched as a photo. However if 90 cmc is cubic centimeters that is only 0.09 liter per fork leg? Also can't decipher fork oil other that it is Castrol Castrolite? See photo, if anyone has any Italian skills?
 

Attachments

  • Gilera fork oil.jpg
    Gilera fork oil.jpg
    162.1 KB · Views: 18
  • Gilera bars.jpg
    Gilera bars.jpg
    176.7 KB · Views: 18
Translation:

The telescopic fork does not require special maintenance. The oil content is 90 cm3 for each fork leg. Checking the oil, which is Castrolite type, must be done prudently every 5000km. If after checking, the oil is still in excellent condition, it is sufficient to add an amount to achieve the above-mentioned quantities.
The oil is drained by removing the lower inclined cap (2) located near the axle. Filling is carried out via the top cap (1) located on the handlebar bracket.


I'm not sure how you check oil prudently, but they wouldn't have mentioned it if it wasn't important so you'd better have your prudent hat on when you do it.

I presume you've already figured out how to drain and fill the forks.

"Castrolite" is a blast from the past. It was a light viscosity engine oil. The tin says 10W-20-30. I guess that means a nominal viscosity of 20.
Maybe 20 fork oil would be a good place to start, and see how it feels.

The volume in "cmc" is indeed cc (centimetres cubico).
 

Attachments

  • castrolite.JPG
    castrolite.JPG
    45.9 KB · Views: 3
minimal electrical progress to day on the Gilera. Spent most of the day watching "Moto GP Unlimited" on Amazon Prime. Watched the entire 2021 season. Those riders are unbelievable on the track, and in fast recoveries from major injuries, even if a few of them are immature stupid pouty whiny prima dona's. An amazing behind the scenes look at the season, highly recomended. Huge respect for Marc Marquez, and for Valentino Rossi retitiring from an amazing career.

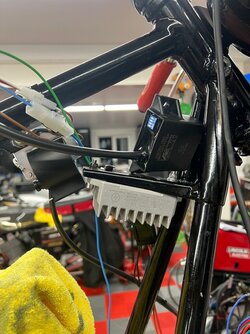
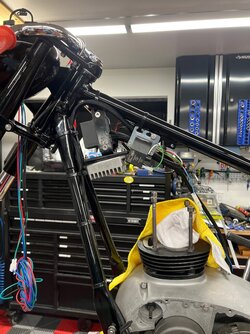
on the Gilera, testing out options for mounting regulator/rectifier, new coil, and waiting for paint to dry on the brackets I made up ( not shown ) for mounting the ignition control box.
 

Attachments

  • Gilera mounting electrical.jpg
    Gilera mounting electrical.jpg
    158 KB · Views: 22
Back
Top