when you are your own dreaded previous owner

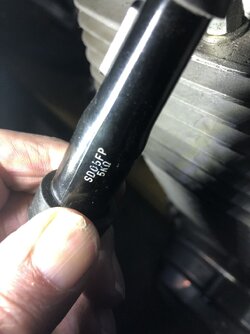
Throwing in a choice, that may be the best, given supply issues for NGK covers. Magnecor HT lead and fittings, though am unable to see the various terminations that once were available. The Spike termination on ND coils is a problem for Magnecor, spike termination not used in recent ancient history for ignition coils. . That was the only issue i had, the actual SS fittings and insulation caps were straight forward and robust. Used 7m/m Black Lead, and 8m/m Blue, had Red also ( drag motor grade or competition ).

Easy things first of course, perhaps BR8ES/Straight 7m/m copper HT lead, should the plug may be mostly available, not sure why, specialised plug really. Know this has been dealt with previous posts over many years. There are options, see Magnecor offers custom HT lead kits, even for later MG, 10m/m HT lead kits for Harley... everything has to be big on Harly's not least the obnoxious straight through pipes... sic. j
 
Got my NGK resistor plug caps from Gowanloch in Sydney - good price too. Bought NGK B9ES plugs rom Repco (stores everywhere) in Oz. Both well known Australian companies.
 
I'm about to horrify @iis_iis ....
In a bind I used generic automotive carbon core supressed silicon leads (with the integral caps). I was waiting for the smoke fairy to play merry hell with me but they worked fine on the IIS ignition and TEC coils for years and years. <ducks for cover>
 
I'm about to horrify @iis_iis ....
In a bind I used generic automotive carbon core supressed silicon leads (with the integral caps). I was waiting for the smoke fairy to play merry hell with me but they worked fine on the IIS ignition and TEC coils for years and years. <ducks for cover>
I ran them as well on both my road and race SFs with ND ignition (Suzuki), and Ignitech without any problems, with non suppressed plug caps from a lawnmower.
 
General missive, "do not use Graphite cored HT lead cable" remains valid, despite all the naughty boys here confessing to do just that, rebels are all about... the headmaster will see you after assembly.

The premise, as the core cracks and arcs, the center conductor erodes into an increasing gap, ie no noticeable degradation in HT performance, though can appear as hard starting, if not normal road riding, gives the electronic type ignitions a hard time with high voltage standing waves.

Would imagine any number of high grade and low grade HT lead comes into this application of part parameters and on engine performance. HTH j.
 
Might as well tape a series of pencils together and use their graphite cores. I found those graphite core cables on a car I bought once. It had difficulty starting and I couldn't get it to idle evenly. I checked a bunch of things before getting around to the HT leads. Most of them measured open circuit but they still worked because the HV pulse was jumping the gaps within the cables. But they were struggling to fire the spark plugs consistently. Replaced them with solid core copper core HT leads and got much stronger sparks. The car ran like a beauty after that. I don't recall whether I used resistor caps or plugs. It was a long time ago.

I've not used the Magnecor HT leads, but they look like a good product. They come in resistor (not graphite) and non-resistor types, so make sure you know what you're getting.
 
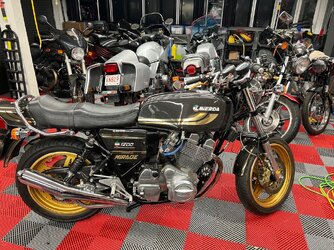
sick of wiring repairs on the 79 1200, took a break from wiring, to fit the side stand conversion.

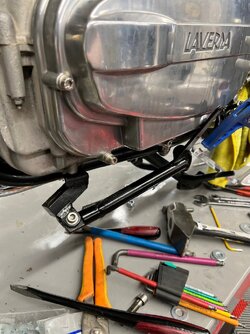
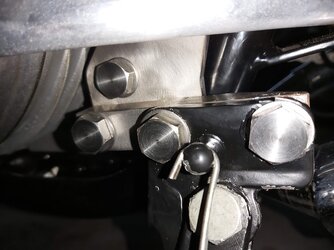
first photo is bashing the old side stand off from the bottom front engine mount, it had come loose so many times I had tack welded it in place years ago.....:sneaky::sneaky:

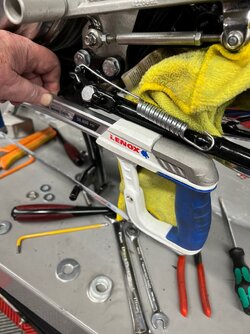
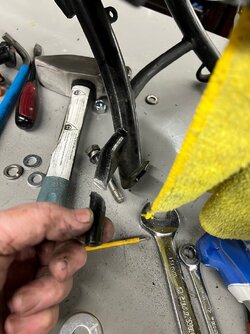
fitting the side stand conversion requires sawing off the extended tab on the center stand. Hacksawed it off and kept the cut off piece to weld back on if ever necessary. I am hoping to mainly use the new side stand most of the time now anyway.

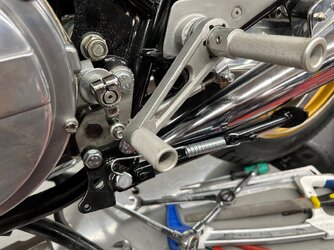
fitting the side stand conversion together into place with the left side shift conversion plus rear sets is a little fiddly, had to do some "fettling" to make things fit with enough clearances for the shifter to work properly, haven't test ridden yet

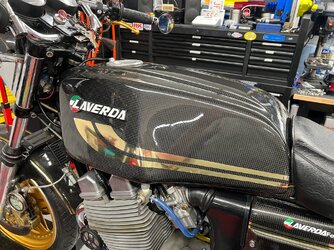
I am guessing maybe another two or three hours finishing off the re wiring, hoping to do that tomorrow then take a test ride. There are still little white spots all over the bike presumably from the fire suppressant foam. In hte last photo, look at the frame gusset plate just above the side stand adaptor plate, looks like little white specks. They are sticky and are everywhere. Likely going to trailer the bike to a commercial pressure wash bay, spray and soak the bike in solvent and surfactants, let it all soak for a bit, then give it a good deep pressure cleaning. Then the bike will hopefully be ready for this riding season if I have completed the rewiring correctly.
 

Attachments

  • 1200 side stand 1.jpg
    1200 side stand 1.jpg
    147.5 KB · Views: 47
  • 1200 side stand 2.jpg
    1200 side stand 2.jpg
    146.9 KB · Views: 42
  • 1200 side stand 3.jpg
    1200 side stand 3.jpg
    153.5 KB · Views: 48
  • 1200 side stand 4.jpg
    1200 side stand 4.jpg
    168.4 KB · Views: 48
sick of wiring repairs on the 79 1200, took a break from wiring, to fit the side stand conversion.

first photo is bashing the old side stand off from the bottom front engine mount, it had come loose so many times I had tack welded it in place years ago.....:sneaky::sneaky:

fitting the side stand conversion requires sawing off the extended tab on the center stand. Hacksawed it off and kept the cut off piece to weld back on if ever necessary. I am hoping to mainly use the new side stand most of the time now anyway.

fitting the side stand conversion together into place with the left side shift conversion plus rear sets is a little fiddly, had to do some "fettling" to make things fit with enough clearances for the shifter to work properly, haven't test ridden yet

I am guessing maybe another two or three hours finishing off the re wiring, hoping to do that tomorrow then take a test ride. There are still little white spots all over the bike presumably from the fire suppressant foam. In hte last photo, look at the frame gusset plate just above the side stand adaptor plate, looks like little white specks. They are sticky and are everywhere. Likely going to trailer the bike to a commercial pressure wash bay, spray and soak the bike in solvent and surfactants, let it all soak for a bit, then give it a good deep pressure cleaning. Then the bike will hopefully be ready for this riding season if I have completed the rewiring correctly.
Fitting the side stand does not involve cutting the centre stand tang. You can either shim the stand out a tad or use an extra bracket and move it back a bit which is what I did.

Paul
side 3.jpg
 
Fitting the side stand does not involve cutting the centre stand tang. You can either shim the stand out a tad or use an extra bracket and move it back a bit which is what I did.

Paul
View attachment 82079
Hi Paul great idea which avoids cutting eh center stand, but not a hope of that with the left side shift conversion using rear sets, not enough room or clearances. I had to do a fair bit of "fettling: and grinding and bending to get it to work in my application.
 
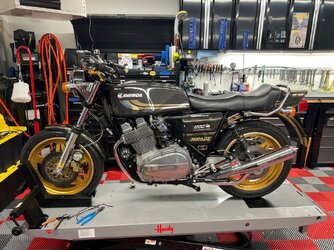
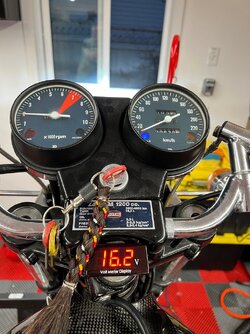
so I thought I had finished fixing all the electrical and other issues. I fitted a digital volt meter just for peace of mind. Fired the bike up, idling at 2,000 rpm on the choke the charging system is at 16 volts, a quick rev and it spikes to almost 18 volts, bloody hell...... :eek: :rolleyes:

now going to order a Shindegen Mosfet regulator/rectifier, hoping then the bike will be ready. Will only take a few minutes to fit a new r/r once obtained.

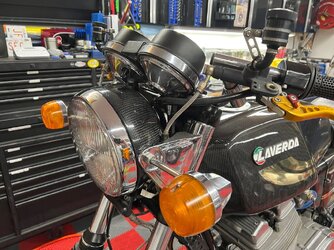
couple of photos
 

Attachments

  • 1200 1.jpg
    1200 1.jpg
    308.3 KB · Views: 31
  • 1200 2.jpg
    1200 2.jpg
    263.2 KB · Views: 22
  • 1200 3.jpg
    1200 3.jpg
    208.7 KB · Views: 21
  • 1200 4.jpg
    1200 4.jpg
    221.7 KB · Views: 30
  • 1200 5.jpg
    1200 5.jpg
    175.4 KB · Views: 30
They're such a good idea to have one of these gadgets on your dash, saving you at least a boiled battery or worse.
 
or the sense wire is in the path of higher resistance, to the actual 12V system. As per recent posts for Rob and low volts, hope that helps Paul.
Tie the RR sense wire as close to the +12V terminal on the battery proper. Bruce lead the way on FET RR's, did one her as well long time ago. j
 
I recently purchased three of those inexpensive volt meters from an Amazon seller. I mounted the first one to the steering head nut of the 1200 with double sided tape a couple of days ago. I took switched power off the back of the ignition switch, and grounded to the same ground wire grounding the front turn signal.

What I have not done is tested with a separate voltmeter right off the battery, will do that tonight when I get home from work to determine if the r/r is not working properly or if it is the voltmeter itself.

Thanks for the helpful replies!!! It would be easy enough to just wire the voltmeter direct to the battery if that turns out to be the issue. I was just trying to be thorough in having an ongoing voltage check to keep an eye on all my recent wiring replacement and repair.

On a more positive side, bike fires right up, idles nicely, sounds remarkable with the complete new exhaust system from Malcolm Cox, and all electrical functions seem to work. I did blue the right pipe getting the bike to run on all three cylinders and then while adjusting idle mixture I went a bit too lean on that cylinder, but hopefully the color will even out between all three header pipes once ridden.
 
Back
Top