Building my Jota

Glad to see you took all the backing off the Dymo labels, others haven’t in the past, and went back to the bike the next day, to find the bike surrounded by confetti .... it was one of the funniest forum posts ever. Hey Yogi? 💨
 
Last edited:
Glad to see you took all the backing off the Dymo labels, others haven’t in the past, and went back to the bike the next day, to find the bike surrounded by confetti .... it was one of the funniest forum posts ever. Hey Yogi? 💨
Hahaha. I have a more shameful story than that. About 12 years ago, fired up on red wine, I decided now was the time to pull apart an espresso machine to refurbish and re build. As it was the spur of the moment, and I didn’t have a shed or even labeling materials , I thought that serviettes cut into strips and stuck on to things with electrical tape and written on in black marker pen was the way to go..... I’m not sure what was in the wine to make me think that this was an awesome idea. As the story goes I went sailing for 3 months shortly after my grand disassembly, and came back to some far more than dodgy workmanship and labelling hilariously the permanent marker on the serviette blotted out so you could not even read what I had written in my tipsy madness .... since that day I have been somewhat more organised.
 
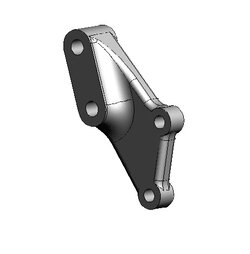
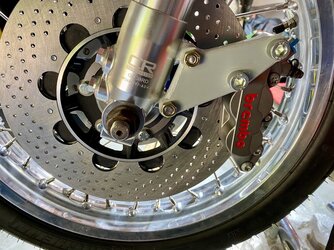
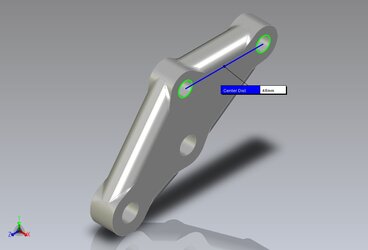
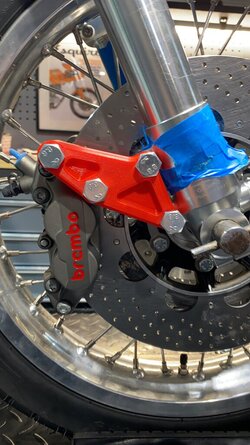
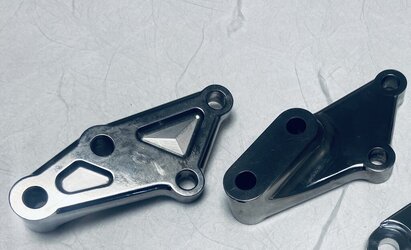
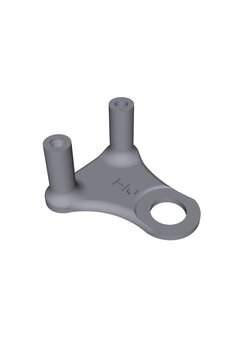
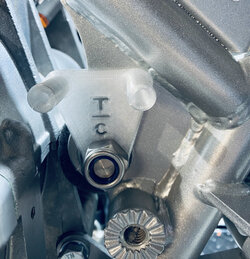
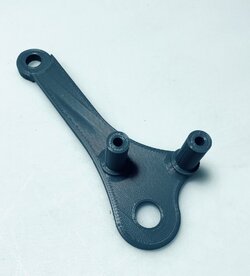
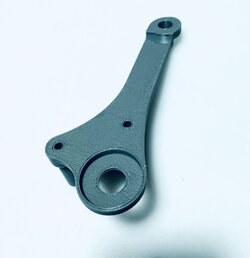
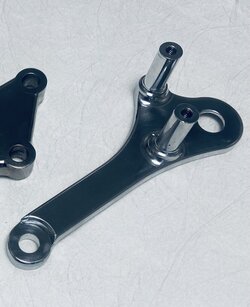
The evolution a part .... photo 3 is the first design, shared by Revival cycles, photo 1 is my changes , photo 2 the first print that fitted after hole Center’s were corrected , photo 4 , the adaptor bracket design evolved with pocketing, and 1 mm extra thickness where the calipers bolt on. Last photo , the finished items in Grade 5 Ti.. stunning.
 

Attachments

  • 95FA10AB-94C5-4F5F-A72C-D1CCCBA8C5C0.jpeg
    95FA10AB-94C5-4F5F-A72C-D1CCCBA8C5C0.jpeg
    21.7 KB · Views: 63
  • FD332BF9-7648-45EB-A0CB-0C30FD72799E.jpeg
    FD332BF9-7648-45EB-A0CB-0C30FD72799E.jpeg
    200.3 KB · Views: 49
  • 03ECCD8F-8704-4350-BCEE-88F4F3F1406A.jpeg
    03ECCD8F-8704-4350-BCEE-88F4F3F1406A.jpeg
    51 KB · Views: 49
  • 833588D4-049E-4BCF-AE1D-B01F812EA5E8.jpeg
    833588D4-049E-4BCF-AE1D-B01F812EA5E8.jpeg
    119.7 KB · Views: 60
  • EA844DF0-BDE6-478E-850F-34536A99F302.jpeg
    EA844DF0-BDE6-478E-850F-34536A99F302.jpeg
    106.6 KB · Views: 61
The rear brake master cylinder bracket went through a revolution as well. Photo 1 the original design, which didn’t look right when I fitted it , as you can see in photo 2. Photo 3 was the design I did that I liked the most , it’s got a bit going on in it with internal threads and steps on the front and back faces. The last photo shows it in 7000 series aluminium. These I will all blast to a Matt finish. All these bits should be here next week, with the ti torque rod for the rear brake. The Jota will look good in all the bling !
 

Attachments

  • 6A06CDE6-4117-4357-9594-3A95542076FF.jpeg
    6A06CDE6-4117-4357-9594-3A95542076FF.jpeg
    15.6 KB · Views: 52
  • 0FA9BFDD-80F9-4E63-B6AA-E4E8C25F4C80.jpeg
    0FA9BFDD-80F9-4E63-B6AA-E4E8C25F4C80.jpeg
    267.4 KB · Views: 44
  • 22535F44-A917-416F-90DD-B76EAB5AEF44.jpeg
    22535F44-A917-416F-90DD-B76EAB5AEF44.jpeg
    101.3 KB · Views: 39
  • 378D3875-FE82-4693-AD97-AC7972CB6555.jpeg
    378D3875-FE82-4693-AD97-AC7972CB6555.jpeg
    83.3 KB · Views: 44
  • E02693A1-A5DB-4412-9C90-E516DB8DEAE3.jpeg
    E02693A1-A5DB-4412-9C90-E516DB8DEAE3.jpeg
    122.5 KB · Views: 49
Fantastic looking bits. 3D printing is the revolution alright. Where does the log arm bolt to above the master cyl attachments points? To an engine mount?
 
Last edited:
mmhh - why didn't you use the footrest-holder-hole and made the distance-piece more on the rear of the bracket to get it alligned with the engine mounting screw? would be way less obvious and as you don't need the footrest holder anyway, that would be my prefered method... Sure the longer arm of your design takes more forces, but even the two screws relatively close to each other would be absolutely sufficient to take the load when tapping on the brake pedal from my point of view.

Just an idea... ;)
for me I thought it was just not a nice option. I like the curve up to the engine mount, it follows the curve of the engine , and is less intrusive. I think the way I did it ties in nicely and keeps the main bracket against the frame web.In any case it was it was me designing what I thought fit best... there are many ways to skin a cat, and my bracket is a bit extravagant, and so am I so it fits, your idea is very cool too
 
It is great what you came up with, I just think it might jump a bit to much in the eye looking at the side of the bike. But maybe that is just me...

Let's see how it looks once it is is done in alloy. Do you plan to paint it the way the frame is painted or shall it be just polished?
 
It is great what you came up with, I just think it might jump a bit to much in the eye looking at the side of the bike. But maybe that is just me...

Let's see how it looks once it is is done in alloy. Do you plan to paint it the way the frame is painted or shall it be just polished?
Oh it cant jump, there is a recess in the bracket thats not easy to see , that sits over the bushing in the swing arm pivot web , so when the swing arm nut is tightened down, part acts as a washer to the flanges locking swing arm nut, and the other part compresses against the web.then on to the engine mount there is a step down so it is flush with the mount and that acts as the washer for the nut there. There is no way this will jump, and the arch in the arm that goes up to the engine mount is designed arched so its stronger, should there be any moment in the bracket when the brake is applied or if for some reason the swing arm pivot bolt turns.
Everything I have made will be glass blasted , so its a satin finish. I really dont like shiny polishing, spoked wheels are one thing for me, but i personally dislike polished things . In any case it has already been machined as per the picture above, I over engineered it, there is no going back now.... but Im sure it will be great, as the plastic printed one was excellent
 
Shout out to Miguel........This week Miguel (michipons) did a solid for me. As my blasting cabinet is at his house, and we aren't allowed to visit other peoples houses , due to covid restrictions here, I managed to get him some parts via the delivery guy when my F4 was delivered to me. ( another valentines gift from my dear wife) The same delivery guy was dropping off Miguels 1200 to him.
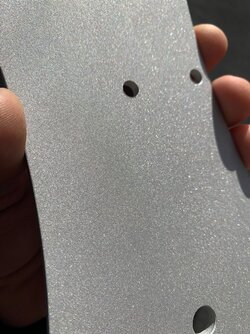
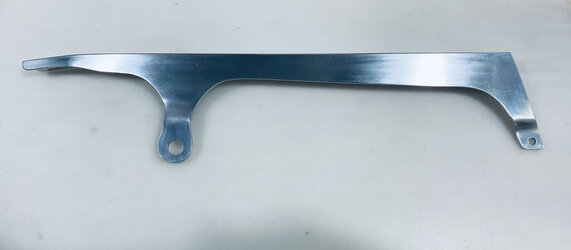
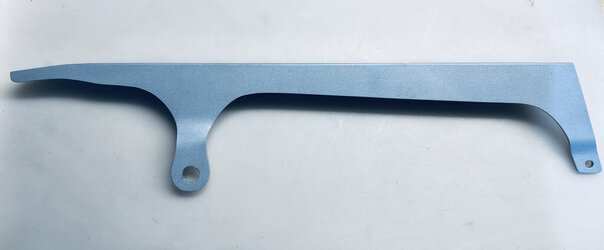
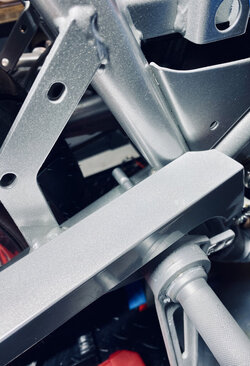
I wanted the head light bracket and the chain guard blasted, so the bike has the same overall appearance of Matt/Satin. Miguel was super kind enough to blast them and then went a step further and epoxy coated them. The finish was remarkable, in photo one, you can see the really nice sparkle the aluminium gets when its glass blasted , clearly that will attract grease and dirt if it is left like that, and as Miguel pointed out it could be coated, so he did. You can see the awesome chain guard House of D'art in Oz made me, its really aesthetically pleasing , so photo 2 is how I asked it to come, photo 3 is the blasted and coated finish, and check it out against the frame in the last photo.... its pretty damn close.

So thanks Miguel..... shout out to you mate.
 

Attachments

  • headlight plate.jpeg
    headlight plate.jpeg
    244.6 KB · Views: 49
  • IMG_6583.jpeg
    IMG_6583.jpeg
    36.7 KB · Views: 46
  • IMG_6976 2.jpg
    IMG_6976 2.jpg
    41.9 KB · Views: 46
  • IMG_6967.jpeg
    IMG_6967.jpeg
    153.1 KB · Views: 51
Back
Top